ACCESS POINT
Part of a Terrain that connects different elevation levels. Models moving through an ACCESS POINT can change their elevation.
THE NATURE OF THE GAME

asymmetry between Terran, Zerg, and Protoss, and the tension of holding a line or breaking through one. Whether you're playing a casual game with friends or competing at a tournament, everything here serves that goal. Each player is the general of an army. Before the game begins, you build that army by spending resources to recruit Units of Archon Studio miniatures, then wage war against your opponent. These rules are designed to capture the feel of StarCraft – the reaction-based gameplay, the distinct
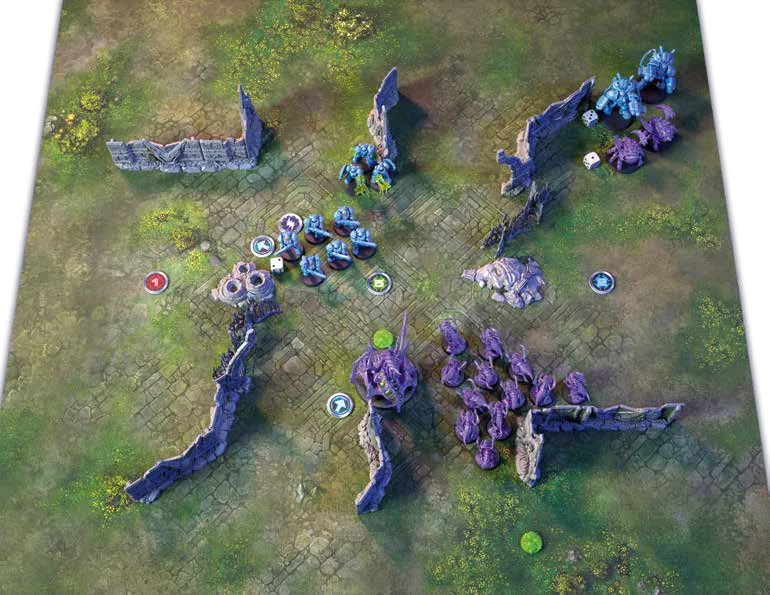
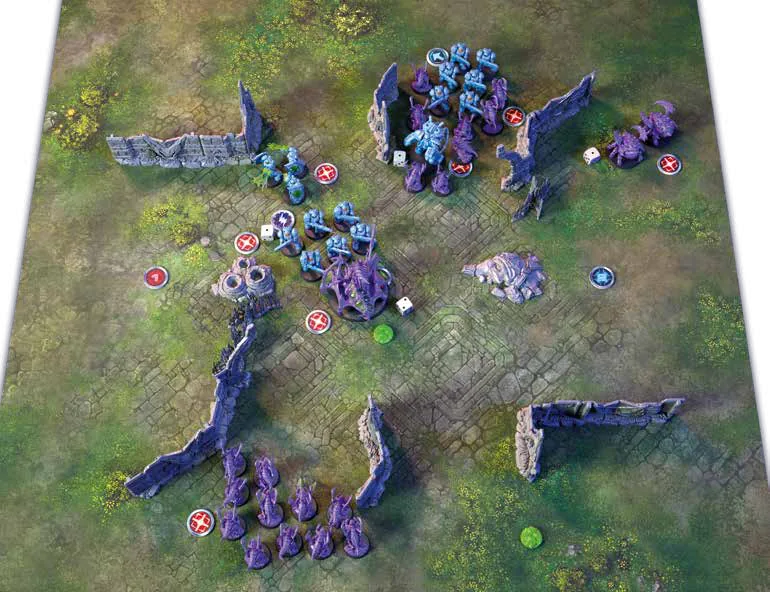
The battles in StarCraft: Tabletop Miniature Game are fast-paced, similar to those played on-screen for many years. To help each player understand the game's flow, we've prepared a battle report that will serve as a great introduction for new players. Below are the first two rounds of the game between the TERRANS, played by Katherine, and the ZERGS, played by James. TERRAN Units:
Tactical Card:
Faction Card:
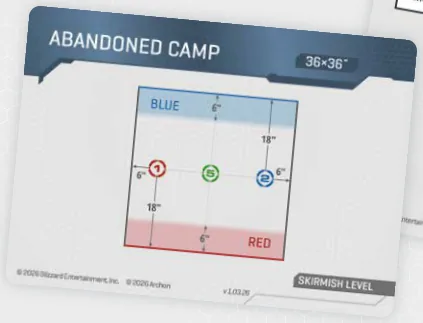
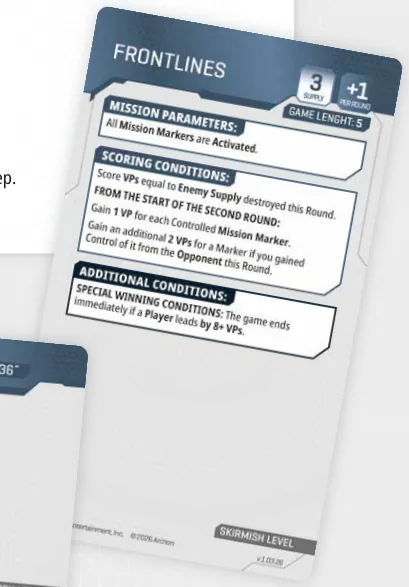
They both agree to choose a Mission and Deployment Card together to create a classic clash on no man's land. The objective of the Frontlines mission is to take control of up to 3 Mission Markers to gain Victory Points (VPs), gaining even more if any of them succeed in retaking objectives controlled by the Enemy. Abandoned Camp is a relatively standard deployment – each player claims one whole border of the playmat to be their respective Entry Edge. After that, they prepare the battlefield together, placing terrain in a way that allows them to learn the game and make the most of their actions, special abilities, and tactic cards. Once the battlefield is set up, the dice are prepared, and both players are ready to play, they roll for initiative in the first Round! ZERG Units:
Tactical Cards:
Faction Card:
Special Card:
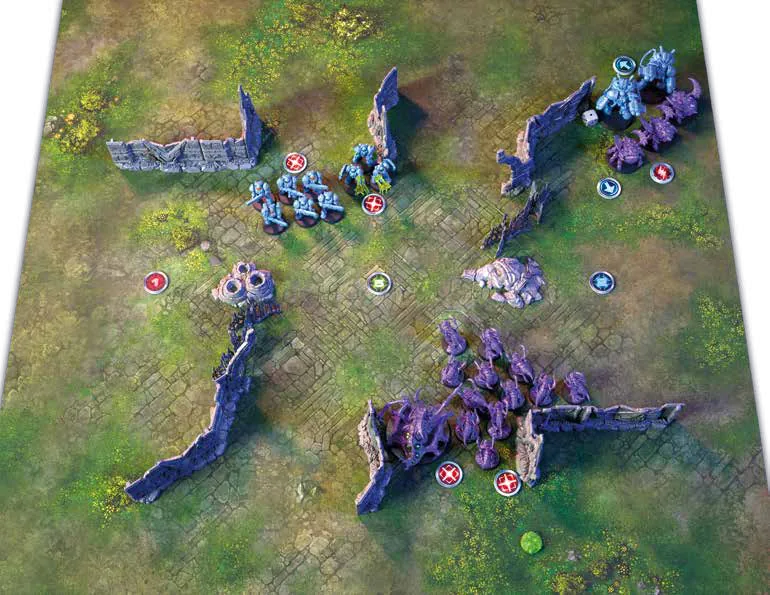
They both roll 2d6: James rolls 7, and Katherine rolls 5. James wins and decides that the Terrans under Katherine's command will start the first round. As their first action, Katherine brings a Unit of Marines from Reserves, equipped with special weapons. She moves this unit towards the middle to cover the area with all of her weapons. James responds with his basic Unit of Zerglings that have a passive Special Ability which allows him to put the models in this unit In Coherency 4", and he tries to hide from the Marines. He hopes that as many models as possible survive before he's in range for close combat.
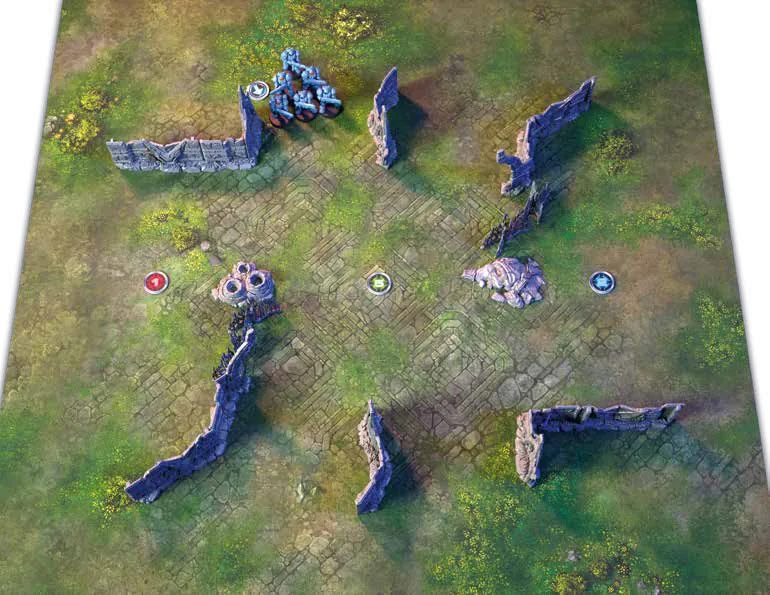
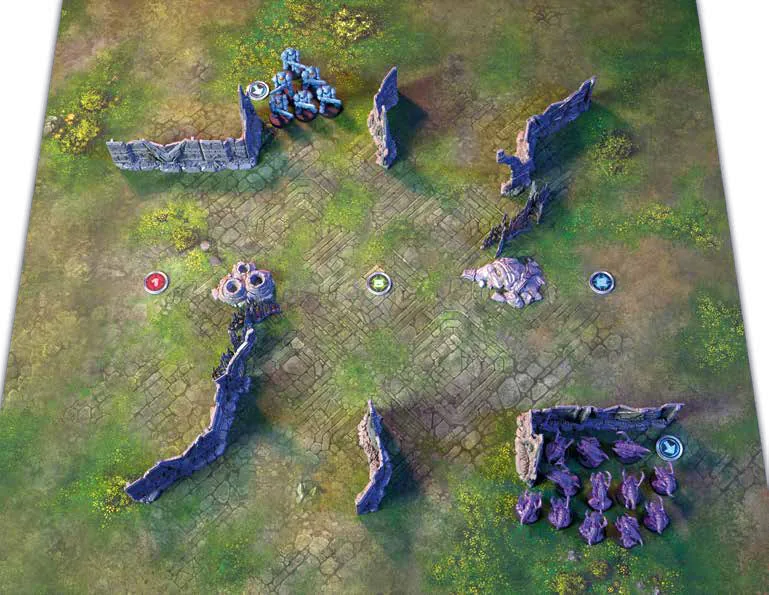
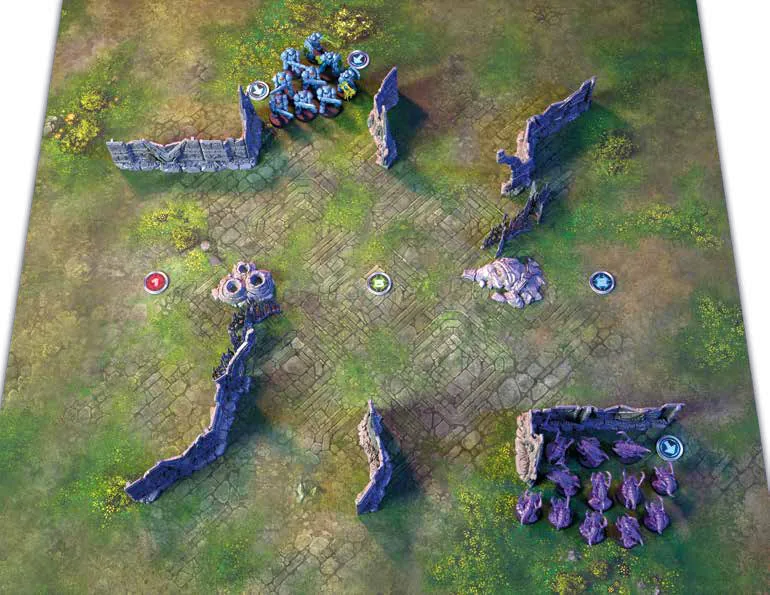
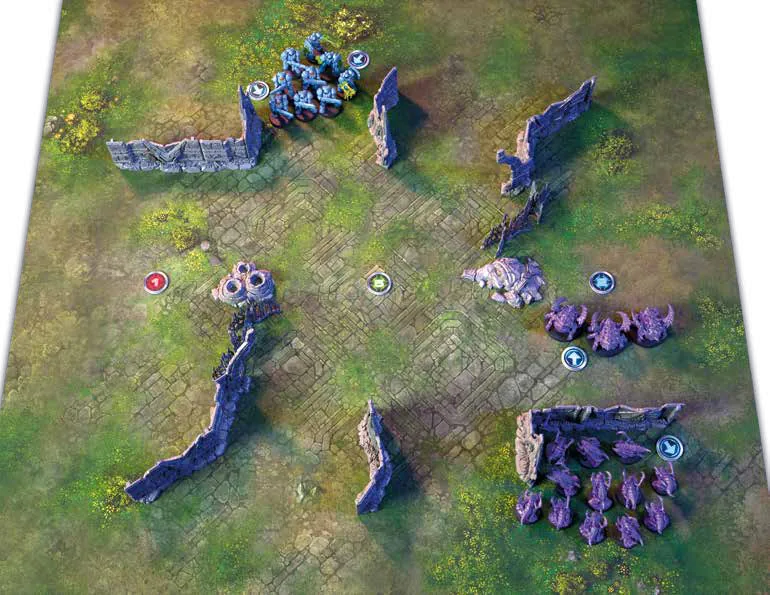
Katherine deploys a Unit of Medics that can provide healing. This Unit is very vulnerable, so she puts all models behind the Marines. James uses the Burrow Ambush special ability, which allows the Unit to be set up within 18" of his Entry Edge, and puts the Roaches 2" from the Mission Marker.
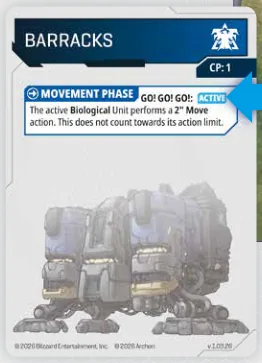
To counter these Roaches, Katherine deploys her heavy guns onto the field – Marauders. This unit has an anti-armour ranged weapon that can do considerable damage to Roaches. After deploying this Unit, she uses the "Go! Go! Go!" special ability from the Barracks tactical card.
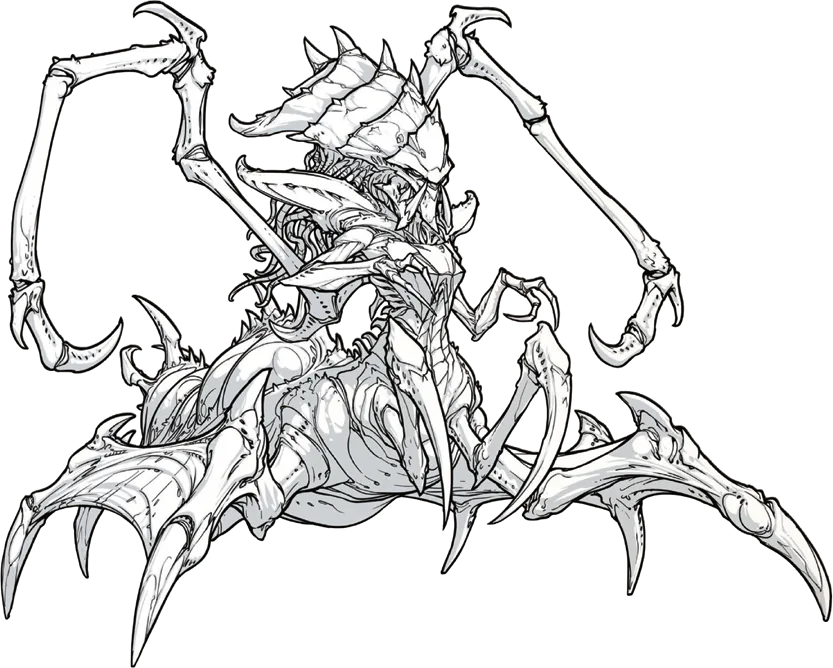
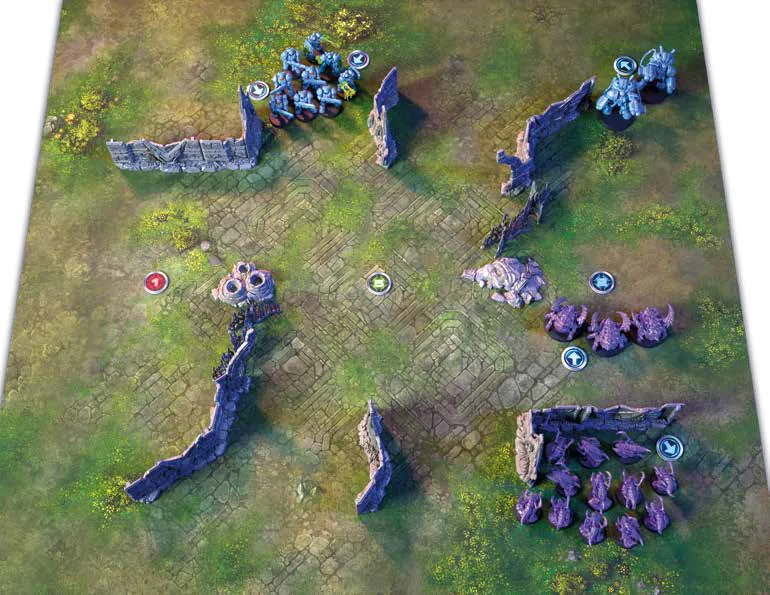
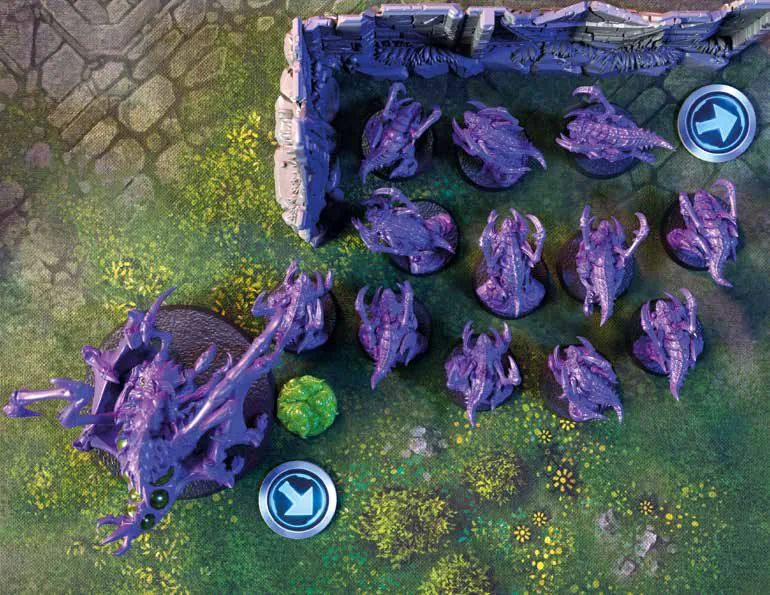
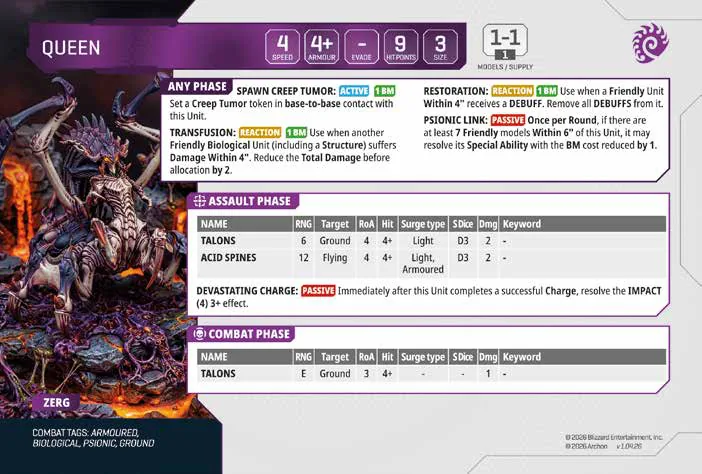
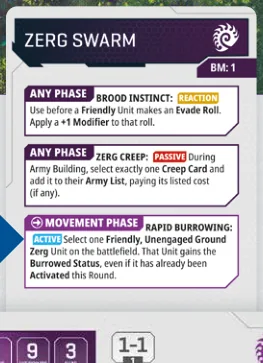
James wants to add some survivability to his Army, so he deploys a Queen. After moving onto Battlefield, James uses Queen's Active Ability "Spawn Creep Tumor" and puts a Creep Tumor token in base contact. He needs to pay 1 Biomass for this ability, but he can reduce that cost by 1 with Passive "Psionic Link" Ability, because there are 7 Friendly models Within 6" of the Queen. Additionally, to save the life of James' favourite Roaches, he uses the "Rapid Burrowing" special ability from the Zerg Swarm Faction Card. Now, the Roaches are BURROWED HIDDEN. and Katherine can't target them with her Marauders. Katherine has deployed all units up to the limit of 3 Supply this Round, so she must Pass and claim the First Player Marker for the next Phase. James also reached that limit and must Pass as well.
Katherine decides that the Zerg will activate first. She could go first, but the only juicy target – the Roaches – is HIDDEN and BURROWED. She wants to wait and force the Zergs to move. James activates Queen and moves 5" towards the middle of the battlefield.
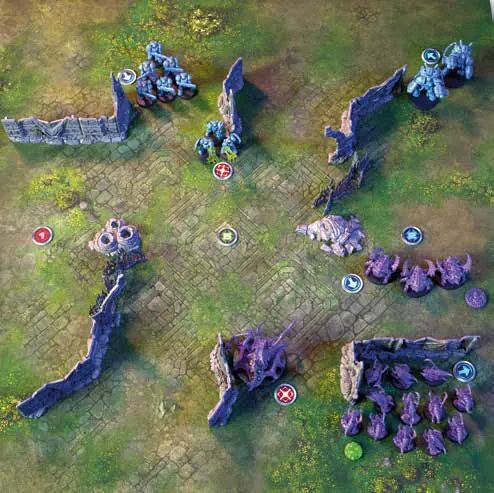
Katherine responds by moving Medics towards the middle. In a future activation, they will be able to heal the Marine unit.
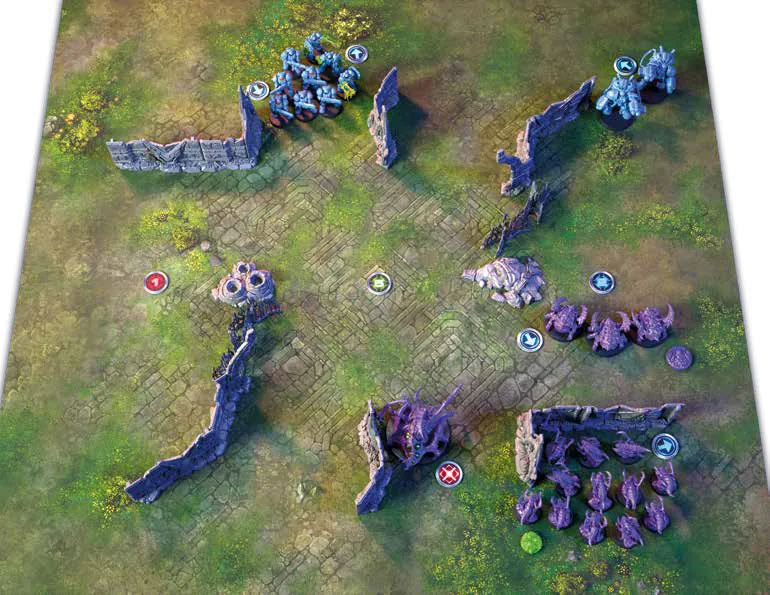
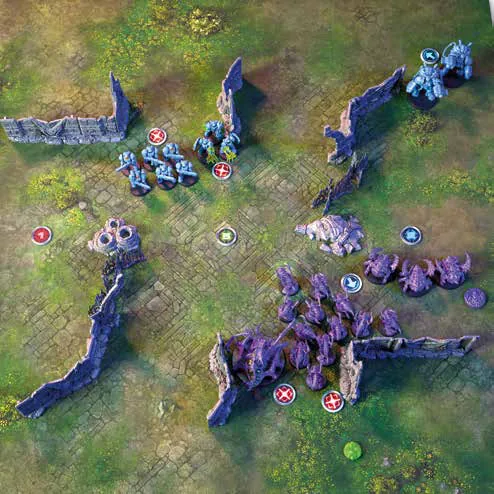
James activates Zerglings, which move towards the middle, and Katherine responds with Marines, which also move towards the middle. In future turns, it will be very important who goes first.
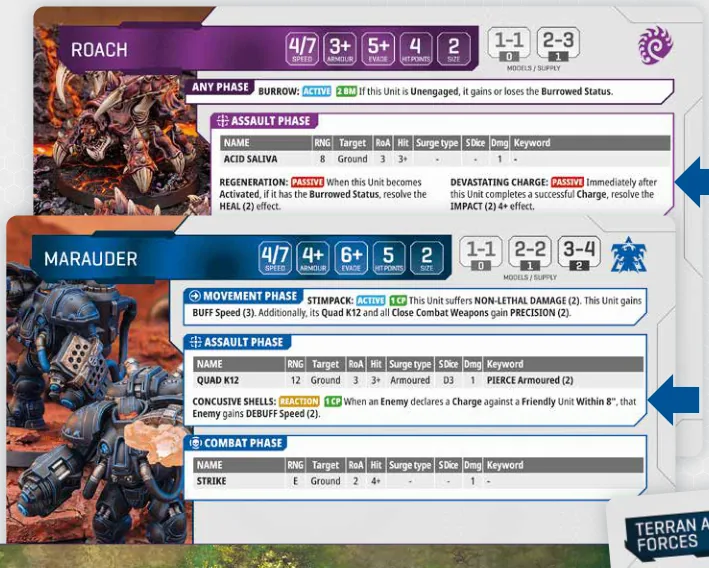
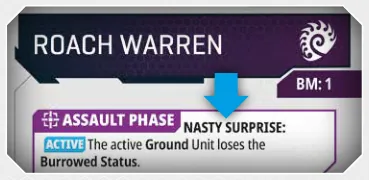
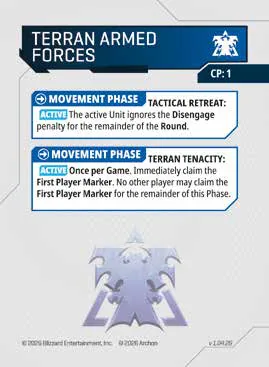
James activates Roaches, uses the "Nasty Surprise" special ability from the Roach Warren Tactical Card to remove the BURROWED Status, and declares a Charge action against the Marauders. After checking the range, Roaches need to move at least 7" to reach their target. As a reaction to the charge, Katherine uses the "Concussive Shells" Special Ability of the Marauders to reduce the charge distance of the Roaches by 2". She uses the Terran Armed Forces Tactical Card to pay the cost. Unfortunately, James rolls a 6 for charge distance, so it is enough to engage the Marauders in close combat. After finishing the charge, James uses the IMPACT Special Ability of the Roaches. He rolls 6 dice and hits 3 of them. Marauders have an Armour characteristic of 4+ and need to roll 3 dice. Luckily, they succeeded in blocking two hits, receiving only 1 Damage.
In response, the Marauders declare a Ranged Attack. These anti-armour weapons hit hard, but when a Unit is Engaged, Enemies are more likely to avoid taking Damage. The Roaches will be eligible for an Evade Roll in addition to an Armour Roll. Even if Katherine wanted to, she could not shoot at other enemy units, because an Engaged Unit can only target units which it is Engaged with. Dice are rolled, many shots are fired – the Marauders hit 5 times, and the Surge Dice apply 2 surges. First, James needs to resolve an Armour Roll. He puts 2 dice directly Damage Pool into the because of Surge, and then he rolls 3 dice. He succeeds twice, so only 1 die goes to the Damage Pool. In the Damage Pool, we now have 3 dice, and after this, James rolls for Evade – he succeeds in evading one of them.
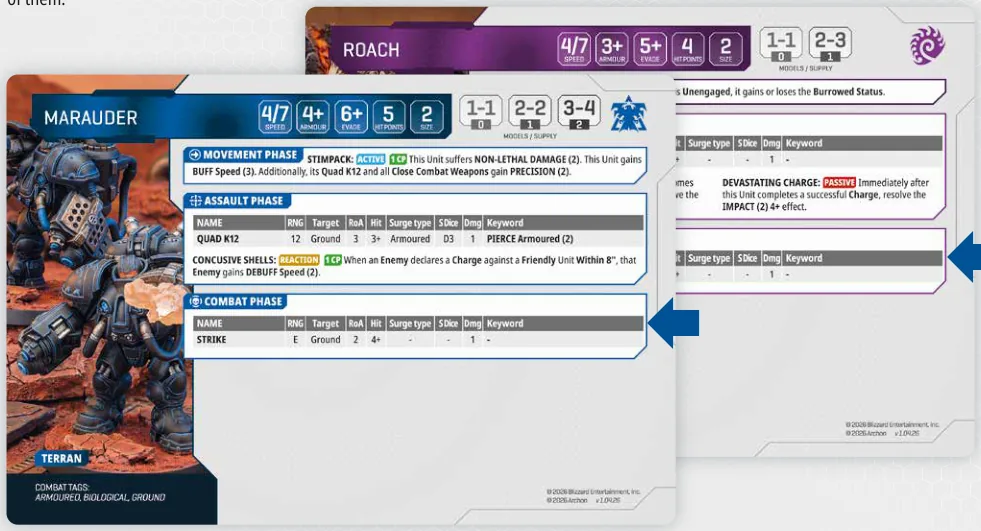
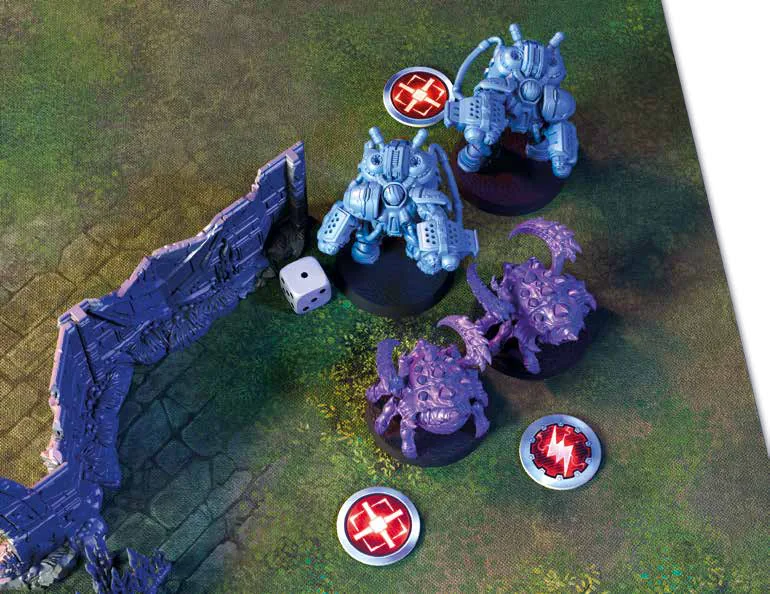
The first player to pass is James. He receives the First Player Marker and his Zergs will attack first in the Combat Phase! Because 2 hits go through, it's now time to apply Damage. The damage of the Marauder's Quad K12 weapon is 1, but as the weapon has PIERCE Armoured (2), each die deals 2 Damage to the Roaches. Roaches have a Hit Points (HP) characteristic of 4. One Roach is dead and removed from the battlefield.
In the Combat Phase, both players can activate only Engaged Units; they must activate those units. Everyone is fighting to survive! James, with Zerg, has the First Player Marker. He activates Roaches. Each Roach has a Rate of Attacks of 2, and hits on a 3+. Roaches successfully hit the Marauders with all 4 attacks, and the Marauders' armour value of 4+ blocks two hits. Katherine adds 2 more Damage to Marauders for a total of 3. It's still not enough to destroy one of them. At the end of that strike,
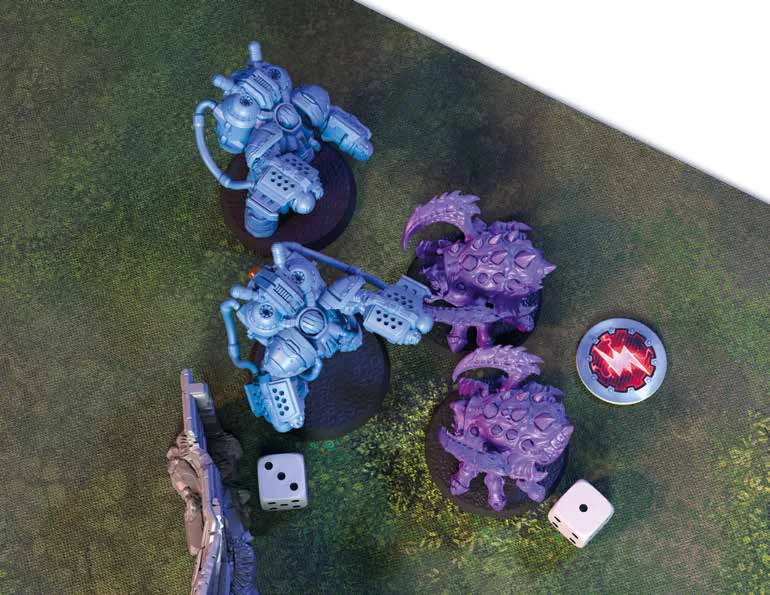
James removes the Activation Marker to mark that this Roach Unit has already fought this turn. In the first combat phase, we've only got two Units in combat, so Katherine responds with the Marauders hitting Roaches two times. Roaches are very tanky, with an Armour value of 3+. They block 1 hit, and James puts one Damage Marker next to the Unit. Katherine removes the Activation Marker from the Marauders as well to mark that this Unit has already fought. This is the last fight of the first round.
No Unit had its supply value dropped in the first round, Mission and controlling Markers doesn't grant points in the first Round. Because the Roaches charged off of the objective marker they were on, all objectives are still unclaimed.
Because neither side scored points in the last Round, both players roll off to see who will decide initiative for this Round. James rolls a 3, and Katherine rolls a 1. James decides that this time his Zergs will go first! He activates the Queen and moves the Queen closer to the middle of the table, near the Zerglings. Next, he uses Active Ability "Spawn Creep Tumor" to put a new Creep Tumor token, using the Passive Ability "Psionic Link" to reduce the cost of "Spawn Creep Tumor" to 0.
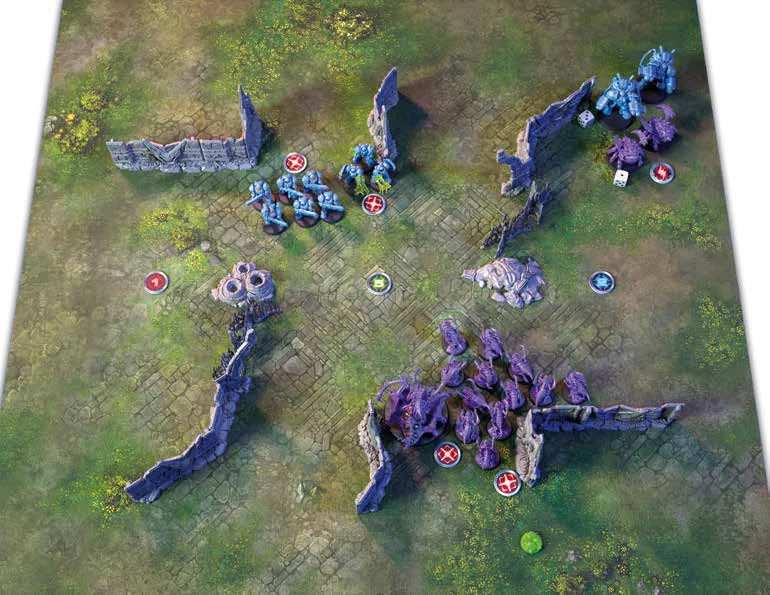
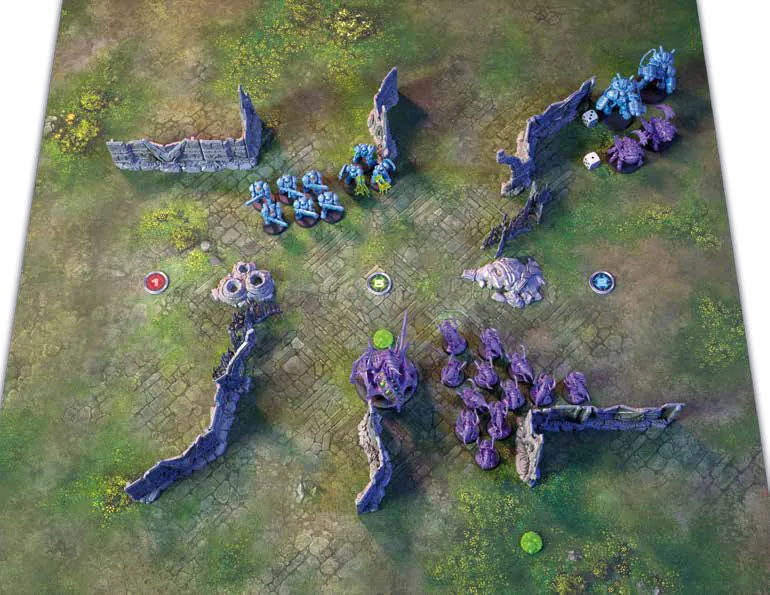
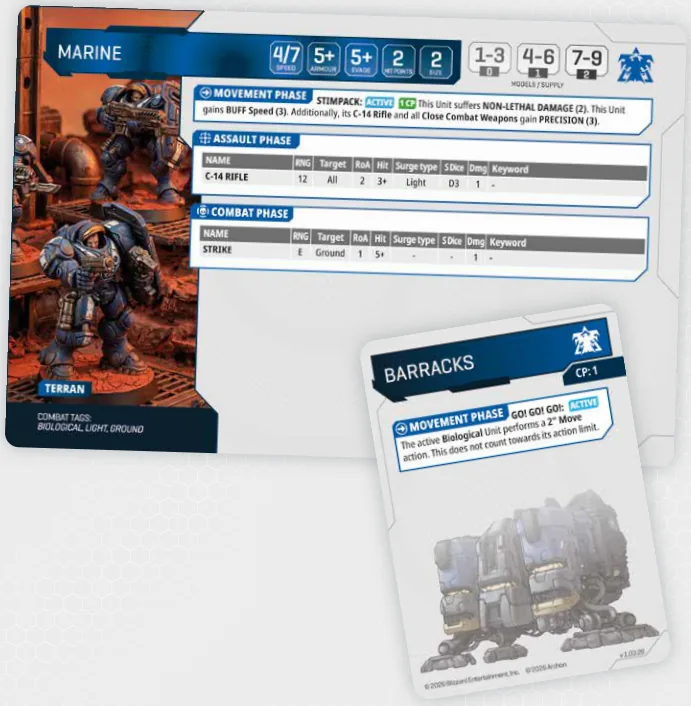
Katherine responds with a bold move of her own, closing in on the middle of the table with Marines. Just after activating Marines, she uses the Active Ability "Stim- Pack" – an iconic ability that boosts the movement and firepower of the unit at the cost of receiving some Non- Lethal Damage. She puts 2 Damage Markers next to the Marines, but it does not trigger the Remove Casualties step, despite having damage equal to the Marines' Hit Points (HP) characteristic of 2. She also needs to pay 1CP for this ability, so she chooses to use her "Barracks" Tactic Card for this.
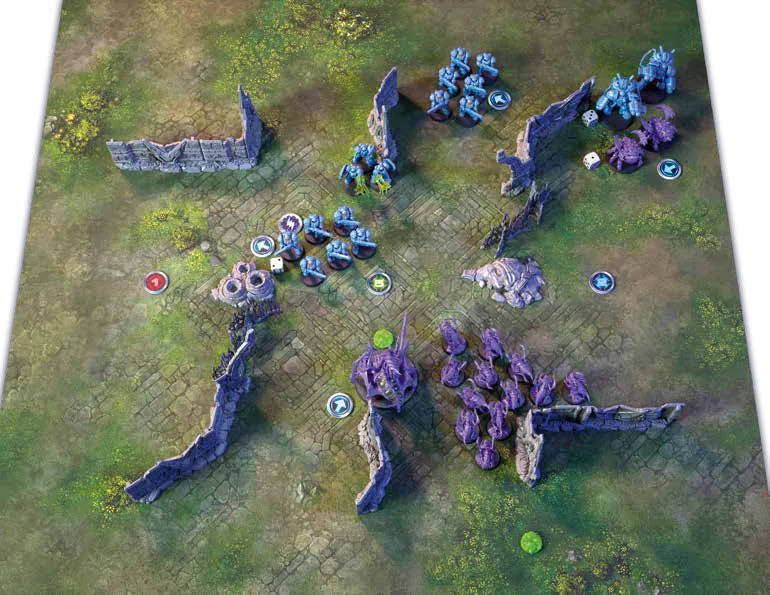
It's time for James to activate his Unit. He wants to see where the Terran player will go, so he activates Roaches and uses the Hold Action. This action allows him to activate the Unit, do nothing and end the activation. He did not plan to move because the Roaches were engaged and did not want to disengage. Their supply value was the same as the Marauders. If they disengaged, they wouldn't be able to shoot or charge in the next phase. Katherine sees that she can dominate the middle of the table, so she brings some fire support from the reserves. StarCraft: Tabletop Miniature Game features escalation. Every player can bring something new to the table with each round. Katherine uses 1 Available Supply to bring a new unit of Marines to the party. They head towards the middle to shoot Zerglings or the Queen, and support the other Unit of Marines.
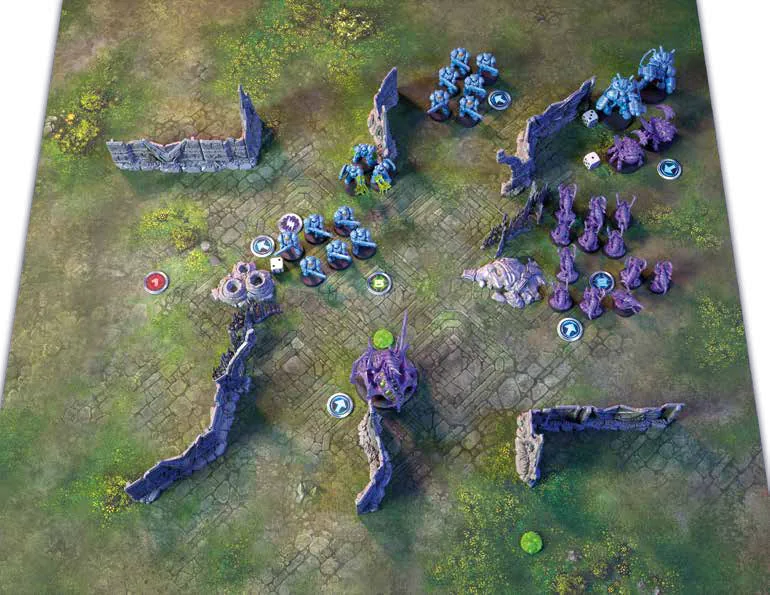
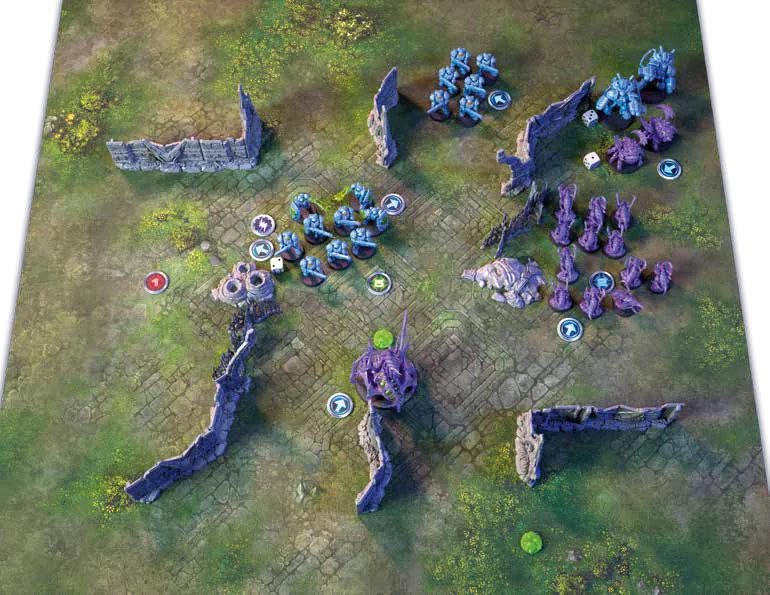
James sees that his Zerglings are going to have a hard time in the middle of the board, so he decides to use some cover and help his Roaches win his right flank! He moves his Zergling and uses his "squadron" passive ability to its full extent, hiding them behind terrain pieces with a Size of 1 (statue head) and terrain with a Size of 2 – grass. This unit of Zerglings is completely hidden from the unit of Marines that just arrived, and the unit of Marines in the middle can now see only 4 Zergling models. Katherine activates a unit of Medics, moves them closer to the injured Marines, and uses the active ability "MedPack" on them to heal the Damage caused by the stimpack. 3 Medics are in range of the Marines, so she can remove up to 3 Damage from them. The Marines only have 2 Damage on them, so the rest of the "heal" effect is lost.
The Zerg player decides to bring a Unit from the Reserves. He also has 1 Available Supply and adds 12 Zerglings to the left flank. Maybe they are late to the party, but they have the potential to secure the left objective marker in the future Rounds. Katherine decides to perform a disengage action with the Marauders and tries to hide them behind the wall. She moves the Leading Model as far as possible. In the end, she can only hide one Marauder from the Line of Sight of the Roaches. She will not be able to shoot or charge in the next Phase, because the Marauder's supply value was the same as Roaches when disengaging. James has activated all of his Units. He decides to pass and claim the First Player Marker. Katherine also passes, and we can move to the next phase.
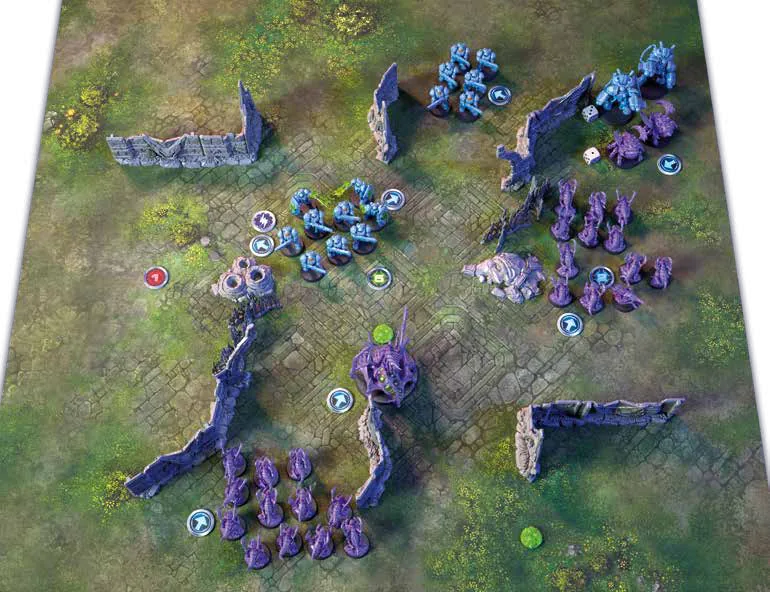
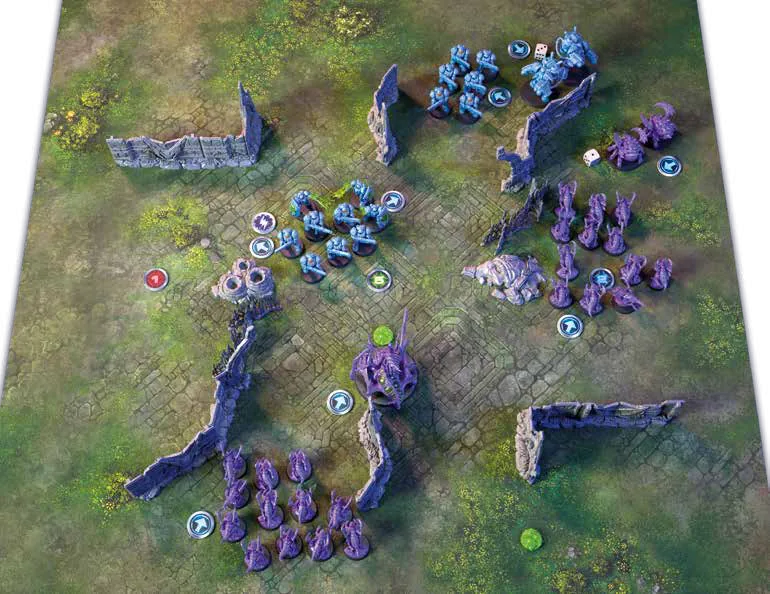
The Zerg player has the First Player Marker. He decides to go first. He sees an opportunity to kill the Marauders with Roaches and activates them first. He knows that his Unit only sees one model, but he is fine with that. If he succeeds, the Marauders will drop in Supply to 0. He shoots with the Roaches, using their acid-saliva ranged weapon. Each model has a Rate of Attack of 3 and hits on 3+, with each unsaved Armour Roll dealing
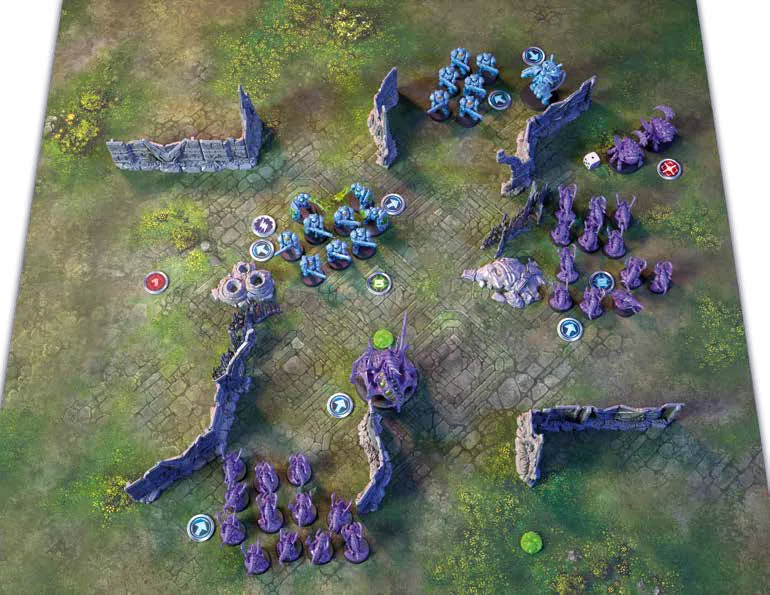
Now it's Katherine's time for payback! She activates Marines in the middle of the battlefield. This Marine Unit is equipped with five C-14 Rifles and two SPECIALIST weapons: an AGG-12 that replaces one standard rifle, and 1 Rocket Launcher with the SIDEARM keyword, which is shoulder-mounted on a Marine. It can be used alongside a standard rifle. Each weapon type can target different enemies, and all attacks from a weapon 1 Damage. The Roaches hits 4 times. Katherine rolls for Armour, blocking the Damage on 4+, but manages to defend only 1 die! The Marauders receive 3 Damage, and adding the Damage they received earlier, this brings the total to 6 Damage – enough to kill one Marauder, which has 5 HP. There is 1 Damage leftover, but the Roaches cannot see the last Marauder, so this Damage is not applied. The Marauders lose 1 Supply Value, and James receives 1 Victory Point during the Scoring Phase. type must first be fully resolved before going to the next. Katherine used the Stimpack in the previous phase, so her C-14 Rifle will have PRECISION (3). Katherine decides to shoot the Queen with AGG-12 first. This weapon has a Rate of Attack of 2 and is specialised in hunting armoured targets because of its Surge Type – Armoured. She hits twice and rolls a 2 on a D3 for Surge Value. Both hits are successful, and they
go directly to the Damage Pool because of Surge. The Queen won't be able to make Armour Rolls. She receives 2 Damage. The next weapon that Katherine will use is the Rocket Launcher. She targets the Unit of Zerglings that arrived this round, standing near the Queen. The Rocket Launcher has a Rate of Attack of 4 and hits on 3+. All 4 shots find the target. The Zerglings roll for Armour on 6+ and find one success. There are 3 dice in the Damage Pool, totalling to 3 Damage, but as a reaction, James uses the Queen's Special Ability "Transfusion" to reduce the Total Damage by 2. Only 1 Zergling dies. James pays the cost of that skill with the Tactical Card "Roach Warren". Finally, the Marines shoot with their trusty C-14 Rifles. 5 models are equipped with them, and Katherine targets the Zerglings Unit at the 2nd Mission Marker. James and Katherine discuss
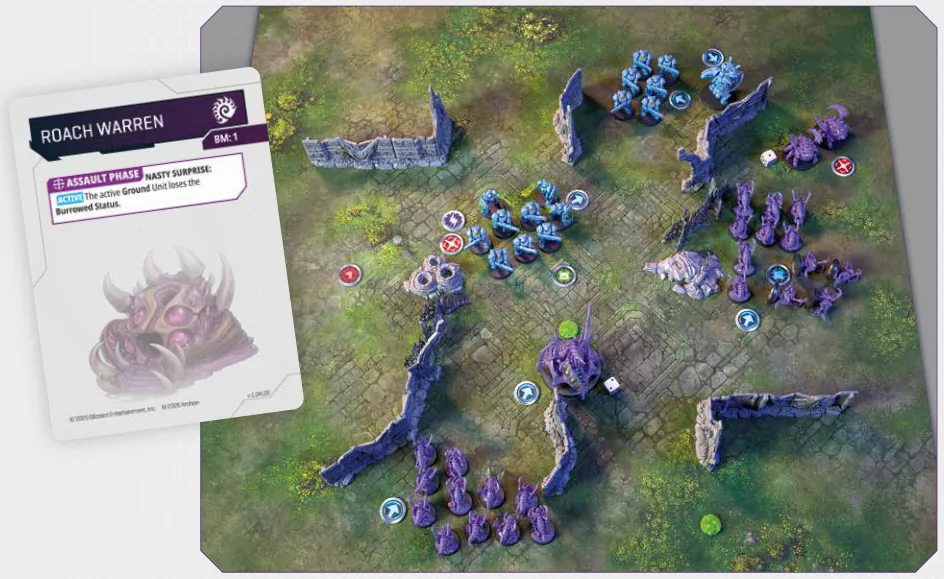
how many Zerglings are visible and agree that 4 are in Line of Sight. They also check the range to enemy models, and only 4 of the 5 Marines equipped with the C-14 Rifle are in Range. 4 Marines have 8 shots because of the C-14's Rate of Attack of 2. Katherine's Marines hit on 3+, and out of 8 shots, they hit with 5 and scored 1 success on the Surge Dice. Luckily, Katherine used the Stimpack on those Marines, converting 3 misses into additional hits. One die is automatically added to the Damage Pool, and James makes an Armour Roll of 6+ for the remaining 7 dice. He managed to save 2 of them, so 6 Damage is assigned to the Zerglings. They have an HP characteristic of 1. However, before shooting, James and Katherine agreed that her Marine unit only sees 4 Zergling models. Only that many die, and the rest of the damage is discarded.
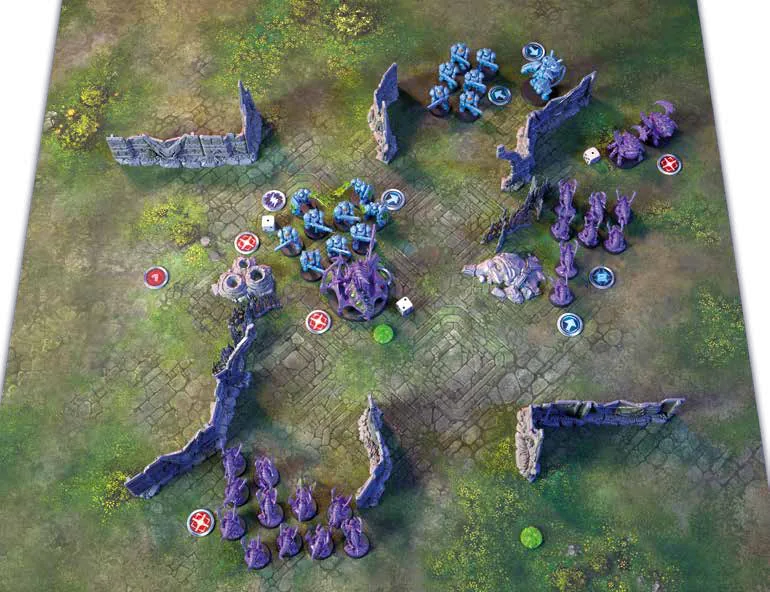
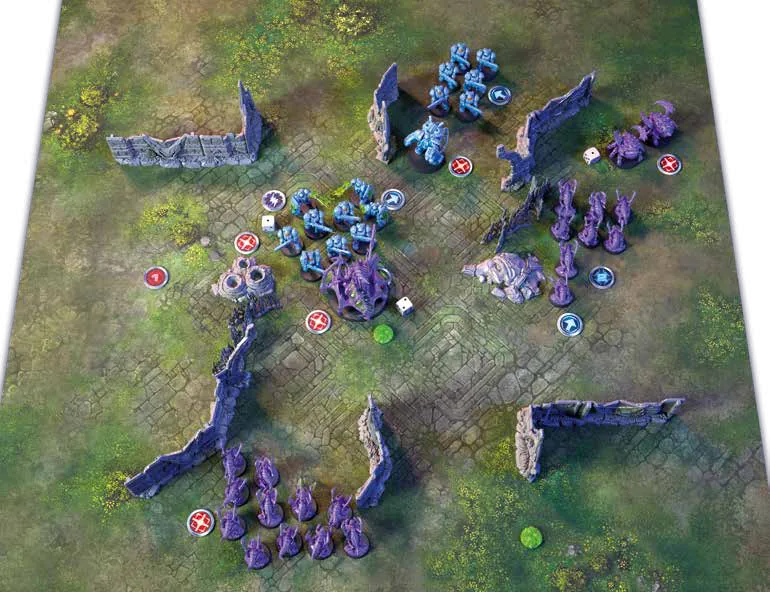
Now it's James' turn to activate a Unit. He goes with the Queen, declaring a charge against the Marines in the middle. The Queen's speed characteristic is 4, but she is on creep, getting 1 more. Now the charge is successful on 2+ instead of 3+. She rolls a 2 and engages the Marines in combat. The Queen, as well as many other Zerg units, have a "Devastating Charge" ability, so she rolls 4 dice on 3+ to hit. She succeeds twice and Marines with an Armour Roll of 5+ block one hit, so Katherine puts 1 Damage Marker near the Unit. Katherine moves the Marauders. Normally, a Unit of Marauders has a Speed Value of 4, but when there is only one model in the Unit, Katherine can use the second value of 7 and Move the last Marauder closer to the Medics. James declares a charge with Zerglings to support the Queen with a fresh Unit of Zerglings. He needs to roll a 5+ to engage. Sadly for him, he only rolls a 4.
Katherine moves the Medics closer to Mission Marker 5, towards the Queen, but not within the Unit's Engagement Range. James declares a multi-charge with a Unit of Zerglings. These were upgraded with Shredding Claws to chew through armoured Units as easily as through light Units. He declares a Charge against the Marauder and the fresh Unit of Marines. He needs to be able to engage both Units with the Leading Model to succeed with this Charge. He rolls a 6 and succeeds. Zerglings move over the grass, removing it. Now he needs to roll for IMPACT hits. Models engaged with only one Unit must resolve impact hits against that Unit, but when engaging with multiple Units, you get to decide how to split their impact hits. James decides that 3 IMPACTs will hit the Marauder and 5 will hit the Marines. Impact hits on Zerglings hit on 5+. He scores 1 success against the Marauder, and the Marauder fails the Armour Roll, taking 1 Damage. Next, James rolls 5 dice for Impact hits against the Marines, and he hits 4 of them. Katherine does an Armour Roll for the Marines at 5+ but fails 2 of them. She has to remove one Marine that is not engaged with the Zerglings.
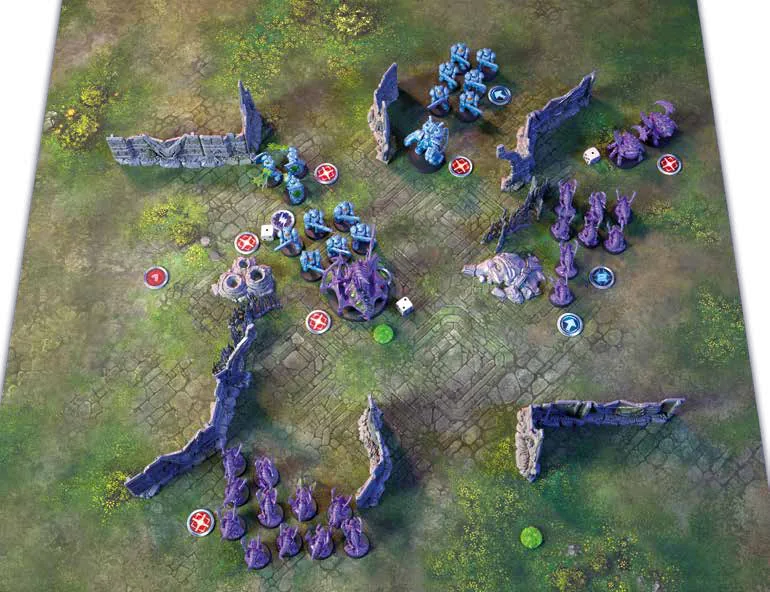
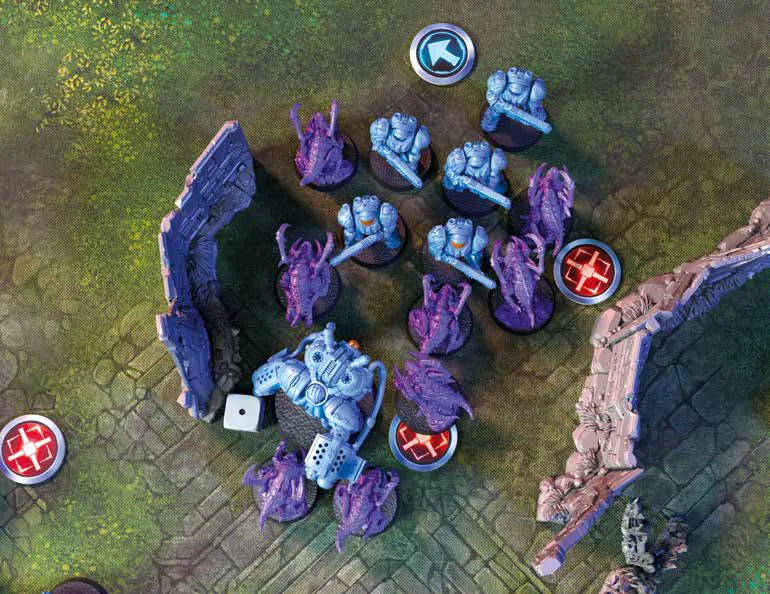
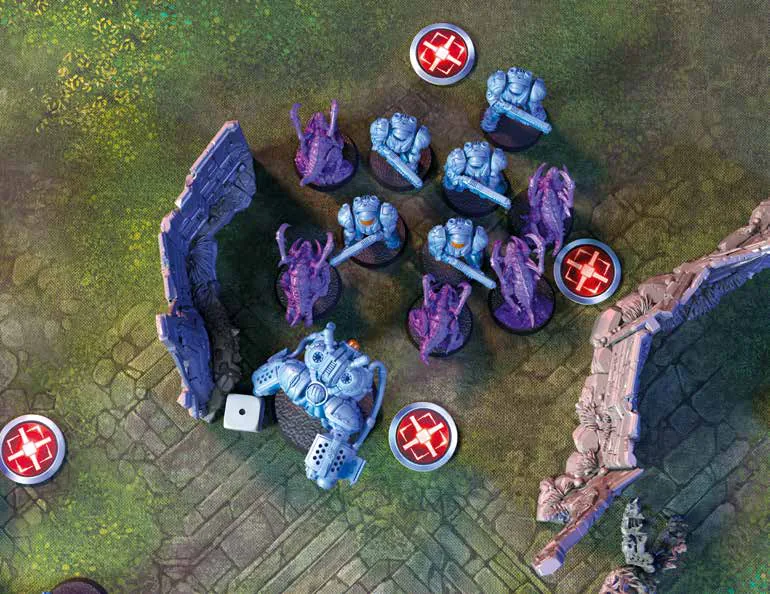
Next, Katherine activates the Marines, engaged in close combat with a Unit of Zerglings. They can only target the Zergling Unit they are engaged with. This Unit of Marines has no upgrades; all 5 remaining Marines will fire their C-14 Rifles. She hits 7 times. The Zerglings are engaged, so they perform an Armour Roll of 6+ and manage to succeed once. Next, the Zerglings have 6 dice in the damage pool. James now makes an Evade Roll. Zerglings are fast, especially in close combat, so they have an Evade characteristic of 4+, and he manages to succeed 3 times. At the end, he needs to deal 3 Damage to his Zergling Unit, killing 3 models that are not in base-to-base contact with the Marines. The Supply Value of these Zerglings now drops because there are only 5 left. In the Scoring Phase, Katherine will receive 1 Victory Point. James has activated all of his Units. He passes and claims First Player Marker. Katherine has already activated everything as well and passes second.
James activates the Zergling Engaged Unit with the Marauder and the Marines. All models are in base-to- base contact. James can't perform the Close Ranks. Two models are Engaged with the Marauders, two models are Engaged with the Marines and one model is Engaged with both – this individual model will target the Marauders. His surge die works against light and armoured targets, so he decides that the surge die will be used against the Marauder.
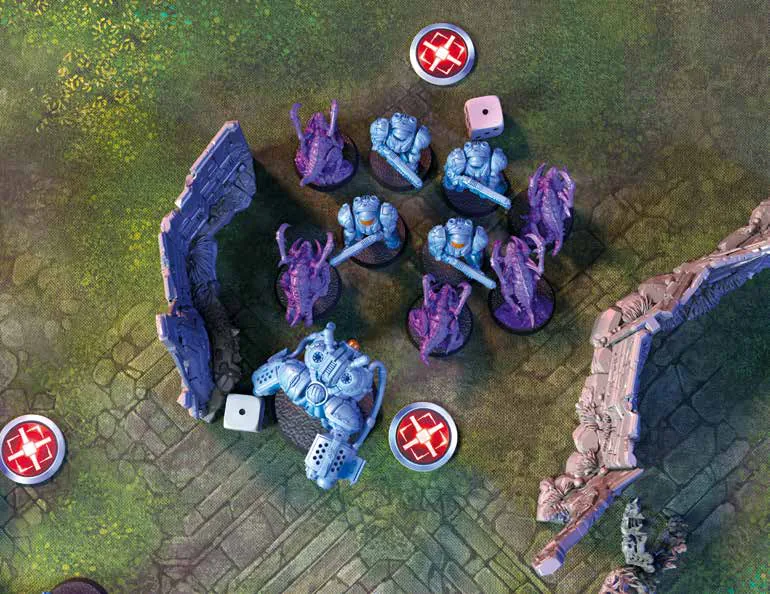
Now for the Marines – 3 of the attacks hit, but as James has already used his Surge in this combat, he doesn't have it against the Marines. Katherine makes 3 Armour Rolls on 5+ value and fails to block all of them. 1 Marine is dead, and 1 Damage Marker is put near the Unit. Zerglings' weapons have a RoA of 2, so 6 attacks go toward the Marauders and 4 toward the Marines. Marauders are hit 4 times, 3 of those dice go directly into the damage pool thanks to the Surge Die. The Marauder's Armour Roll is successful. They receive 3 Damage and stay on the table with 1 wound remaining!
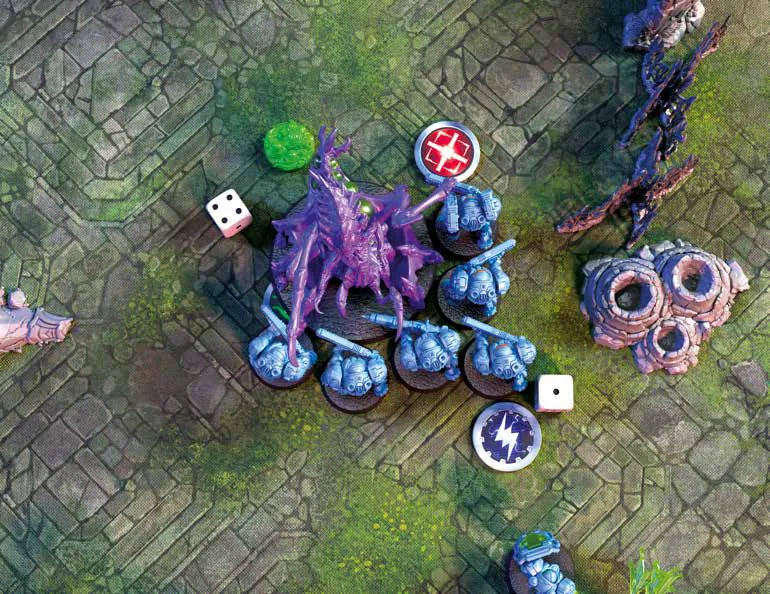
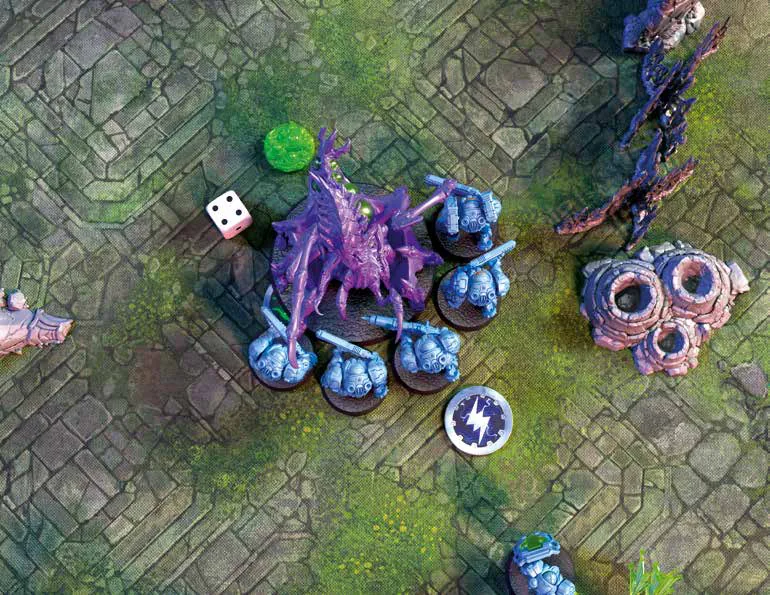
Katherine activates Marines Engaged with the Queen. She can perform the Close Ranks on each model to move it closer to the target. Each Marine attacks with a Strike (RoA 1, hits on 5+). They hit the Queen 4 times, but she manages to save 2 of them with an Armour Roll of 4+. James activates the Queen with 3 attacks on a 4+ and manages to hit once. Unfortunately, the Marines Armour Roll fail their Damage. and receive 1 The Marines already had 1 Damage in the pool, so one of them dies.
Katherine activates the Marines engaged with Zerglings to attack them. She hits 3 times, but James succeeds with two Armour Rolls of 6+. Only one Zergling dies. James has no more unactivated Units engaged with the Terran army. He passes. Katherine still has a Marauder to activate – she hits the Zerglings once, and James failed to save that hit. One Zergling dies. This was the last attack of the second Round, and now it is time to calculate some points!
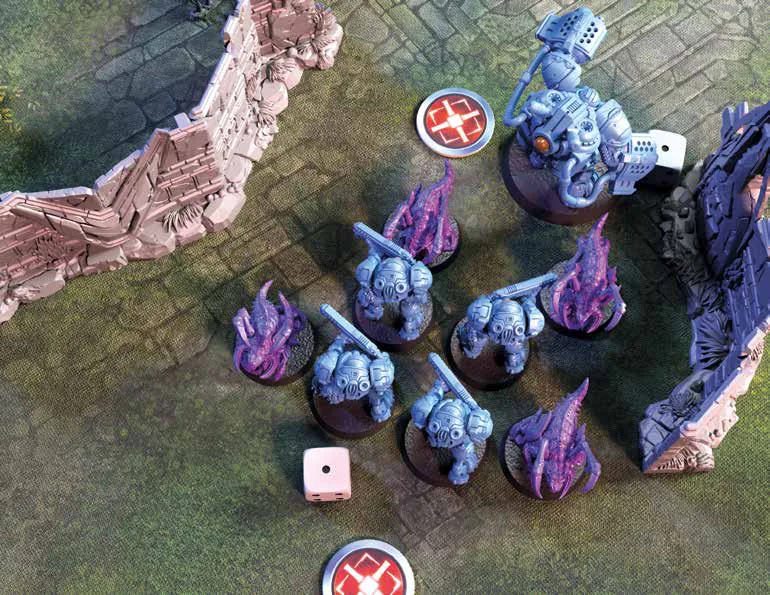
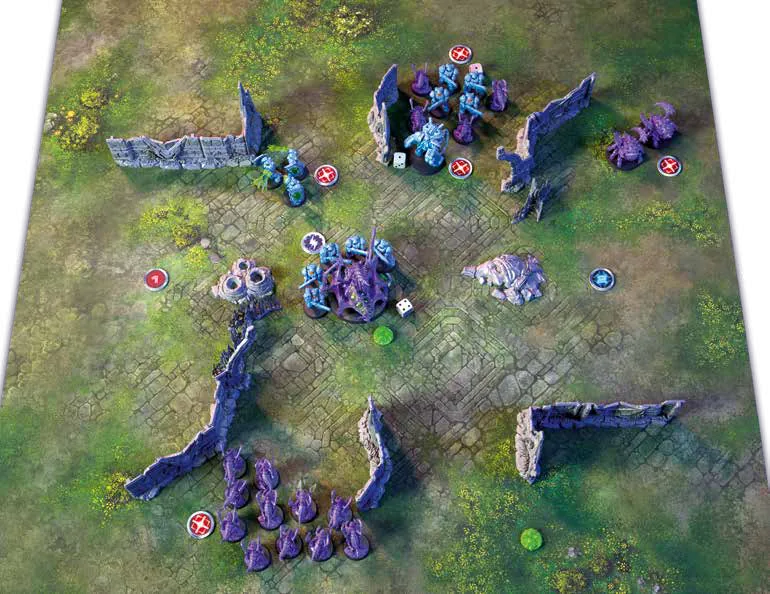
In the second Round, objectives will now give Victory Points in addition to the points that players receive for eliminating Supply. Mission Markers 1 and 2 are currently not under any player's control, but Marker 5 in the middle is a different story. James has a Queen there with a Supply Value of 1, but Katherine has 2 Units there: Marines with a Supply Value of 1 and Medics with a Supply Value of 1. She takes control of this point and is awarded 1 Victory Point. During the Round, both sides manage to drop the Supply Value of enemy Units. Marauders lost 1 Supply, and the Zerglings lost 1 Supply as well, so both Katherine and James receive 1 Victory Point for this. At the end of the second Round, the Terrans under the command of Katherine are winning 2 to 1 against James' Zerg. In the next Round, it will be James who decides who goes first. That concludes two full Rounds of this epic battle. You can learn from it, or recreate this map and play the next two Rounds to see which side would come out on top.
The rules you need for your first battle. Numbers in brackets point to the matching part of the Core Rules.
Every miniature is a model. A group of models forms a Unit, and they act as a single formation. Your Units are always Friendly to each other, while your opponent's Units are Enemy.
Every measurement, every Line of Sight check and every question of contact is resolved from one base to another base. The miniature's pose, weapons and scenic elements are ignored. On a flight stand, the bottom of the stand is the base.
Rules priority: text on a Unit Card, Mission Card or Special Ability overrides the core rules. Keywords in BOLD CAPS always mean the same thing and never stack. Use the highest value.
All distances are measured in inches, from the nearest point of a base to the nearest point of another base.
The game uses six-sided dice (D6). To roll a D3, roll a D6, halve the result and round up (3.1).
| Term | Meaning |
|---|---|
| Tests (3.7) | Roll a D6 against a Target Number (e.g. Hit 4+, Armour 5+). Equal or higher succeeds. |
| Modifiers (3.4) | Modifiers change the Target Number, never the die. +1 makes it easier (5+ becomes 4+), -1 makes it harder. Apply all modifiers before rolling. A Target Number never goes below 2+ or above 6+. |
| Auto results (3.6) | A natural 6 always succeeds, a natural 1 always fails. Nothing overrides this. |
| Null (–) (3.4) | The Unit cannot test this characteristic. No modifier or ability can grant a roll against a null value. A test against it automatically fails. |
| Re-rolls (3.3) | Roll the die again. The new result stands, even if it is worse. A die may only be re-rolled once unless stated otherwise. |
| Roll-off (3.2) | Both players roll 2D6; the higher total wins. Re-roll ties until one side wins. |
Everything a Unit does is on its card (5.1).
| Characteristic | Meaning |
|---|---|
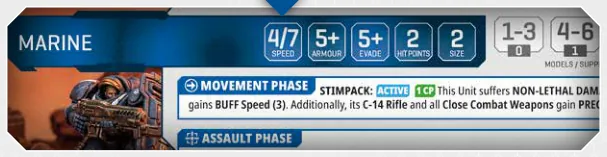
| Speed (5.1.2) | The maximum distance in inches the Leading Model may travel in a Move action. A split value (4"/7") uses the second number only when the Unit has just one model. |
| Armour (5.1.3) | The Target Number the defender needs to cancel a hit. |
| Evade (5.1.4) | Used only when a rule grants an Evade Roll. The Target Number the defender needs to cancel a hit. |
| Hit Points (5.1.5) | The damage one model can sustain before it is removed as a casualty. |
| Shield (5.1.6) | If present, add it to the first model's HP. The Unit is Shielded until it receives damage equal to its Shield value. Shield cannot be healed back. |
| Size (5.1.7) | Vertical height category, used for Line of Sight and terrain. A model equal to or smaller than a piece of terrain can hide behind it. |
| Supply Profile (5.1.8) | How much supply the Unit uses when deployed. When casualties drop its supply, the opponent can score Victory Points. |
| Phase boxes (5.1.9) | Which abilities and weapons are usable in which Phase. |
Weapon profiles (5.1.10): a weapon is used either in the Assault Phase or in the Combat Phase.
| Field | Meaning |
|---|---|
| RNG | Maximum range at which the weapon can target an enemy. Melee weapons use "E" (Engagement Range). |
| Target | Which enemy units it can hit: Ground, Flying or All. |
| RoA | Rate of Attack: how many dice each model adds to the attack. |
| Hit | The Target Number to score a hit. |
| Surge Type | The Combat Tag that triggers the weapon's Surge. |
| S Dice | The die rolled for Surge (D3 or D6). The result is how many dice bypass the Armour roll and go straight to the Damage Pool (if no Evade rolls are made). |
| DMG | Damage inflicted per die in the Damage Pool. |
| Keyword (Part 11) | Special rules such as PIERCE or SIDEARM. |
The back of a Unit Card lists the Upgrades (5.2) bought during army building (9.1). "FOR [weapon]" means the upgrade replaces that weapon. SPECIALIST (9.1.7) upgrades go to one nominated model only.
Armies do not deploy at full strength. Every Unit starts the game in Reserves and arrives in waves, governed by Supply.
Supply shapes the battle in several ways (6.2):
Available Supply = Supply Pool − the Total Current Supply of your Units already on the battlefield.
You may deploy a Unit only if its Current Supply Value fits within your Available Supply. Each player's supply is updated after every action.
Final Round: the Supply Pool is unlimited and everything left in Reserves may deploy. Units still in Reserves when the game ends count as destroyed and grant Victory Points to the opponent as if destroyed on the battlefield.
Every Special Ability is one of three types (Part 10).
| Type | Meaning |
|---|---|
| Active (10.2) | Used when the Unit is activated, just before declaring its action or right after fully resolving one. Once per Round per Unit unless REPEATABLE. |
| Passive (10.3) | Always on while the Unit is on the battlefield. Must be applied whenever possible. |
| Reaction (10.4) | Used when a specific trigger occurs (an incoming attack, a Charge…) and declared at that moment. Each player resolves only one Reaction per Activation, and each named Reaction is used once per Round per Unit. If both players react to the same trigger, the Active Player resolves first. |
Units in Reserves cannot use Special Abilities unless stated otherwise.
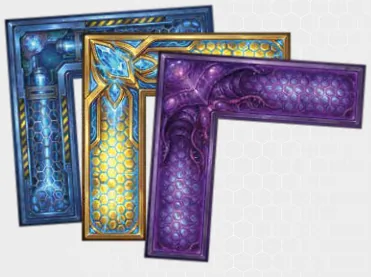
Tactical Cards (5.3) and the Faction Card (5.4) sit next to the battlefield. A card can be Exhausted (flipped face down) to use its ability or to generate its faction resource (Terran CP, Zerg BM, Protoss PE) to pay for other special abilities (10.5.1). Exhausted cards flip back during Cleanup at the end of every Round (10.5.2).
A game lasts up to 5 Rounds (set by the Mission Card). Each Round has four Phases played in order (8.1).
| Phase | Key actions |
|---|---|
| 1. Movement | Deploy, Move, Disengage, Hold |
| 2. Assault | Ranged Attack, Charge, Run, Hold |
| 3. Combat | Close Ranks, Close Combat Attack |
| 4. Scoring & Cleanup | Control Markers, score VP, cleanup |
The activation system (8.2): in Phases 1–3 players alternate, activating one Unit at a time. The holder of the First Player Marker (7.3.2) chooses who activates first each Phase. An activated Unit performs exactly one action, then receives an Activation Marker.
Passing (8.2.1): on your turn in the Movement and Assault Phases you may Pass instead of activating (you must if you have no eligible Units). Once you Pass you are done for that Phase, and your opponent finishes their activations. The first player to Pass takes the First Player Marker for the next Phase. When passing, place activation markers by your remaining Units in the Movement Phase and flip them in the Assault Phase.
At the start of the Phase, resolve any "Start of the Round" effects, check each player's Available Supply and add supply equal to the Escalation value. Then take turns activating Units. Each Unit takes one action below, or the player passes.
New Units join the battle.
An Unengaged Unit moves across the battlefield to take objectives or set up an assault.
After any action that changes a Unit's position, every model must be Wholly Within 3" of the Leading Model and able to trace a Coherency Link to it: a model-to-model chain that cannot pass through other Units' models or terrain. A Unit Out of Coherency cannot control or contest Mission Markers. A model with no legal position (no Coherency Link) is removed as a casualty.
Sometimes the best decision is to live and fight another day.
Do nothing. Place an Activation Marker by the Unit.
Flying Units ignore terrain and models while moving (point to point), are never Engaged, may end in contact with Ground models, and must end at least 1" from Enemy Flying Units. They cannot Charge, be Charged, or contest Markers.
Check that every Unit's Activation Marker shows its Movement side. Then take turns activating Units. Each Unit takes one action only: Ranged Attack, Charge, Run (a normal Move) or Hold, or the player passes. Units in Reserves cannot act. The first to Pass takes the First Player Marker for Phase 3.
Objectives win games, but shooting helps. A valid target must meet all of these:
All models firing the same Weapon Profile shoot the same target. A Unit with SIDEARM profiles may split fire with its other weapons. Declaring a weapon forms a Batch of the same weapons; fully resolve one Batch before declaring the next.
LoS is checked from a bird's-eye view by tracing a straight line base to base. Terrain blocks LoS through Full Cover (terrain size equal to or bigger than both attacker and defender) or Direct Cover (the model is within 1" of terrain of equal or bigger size and the line crosses it). Close Quarters: when both models are within 1" of the same terrain piece and within 3" of each other, normal LoS applies. Gaps and openings within a terrain footprint block LoS unless agreed otherwise at setup.
Rolled dice pass from the Attack Pool to the Armour Pool to the Damage Pool. Each die left in the Damage Pool inflicts the weapon's damage.
Sooner or later every StarCraft conflict ends in bloody close quarters.
Every Engaged Unit must act in this Phase. Players alternate activating one Engaged Unit at a time. Unengaged Units cannot act, and you Pass only when you have no Engaged Units left. After a Unit's activation in this Phase, remove its activation marker.
Claws, bayonets and psionic blades: anything to win the fight.
Go step by step, starting with the holder of the First Player Marker.
Final score (8.10): the highest total VP wins. At the start of the final Scoring Phase, Units still in Reserves count as destroyed for scoring. Ties use the Mission Card's tiebreaker; if still tied, or there is none, the game is a draw.
Phase sequence: Start of the Round effects → Phase 1 Movement (Deploy / Move / Disengage / Hold) → Phase 2 Assault (Ranged Attack / Charge / Run / Hold) → Phase 3 Combat (Close Combat Attack) → Phase 4 Scoring & Cleanup (Control Markers, score VP, end of game check, end of the Round effects, cleanup, initiative)
| Term | Value |
|---|---|
| Engagement Range | 1" |
| Coherency (to Leading Model) | Wholly Within 3" |
| Close Ranks move | up to 3" |
| Charge distance | Speed + 1D6 |
| Marker contest range | Within 3" + LoS |
| Zone of Influence | 6" from Entry Edge |
| Game length | 5 Rounds (Mission Card) |
| Natural 6 / Natural 1 | always succeeds / always fails |
Before the first shot is fired, every commander must understand the language of the battlefield. This Part covers the basic building blocks of the game: models, Units, measurements, and the terminology used throughout the rest of the rulebook.
Every Archon Studio miniature in a player's army is a model – a single entity (Marine, Zergling, Ultralisk) mounted on its own independent base. All rules apply to the model through its base. The physical miniature above the base is purely for aesthetic purposes.
An army is made up of Units. A Unit is one or more models acting together as a single formation.
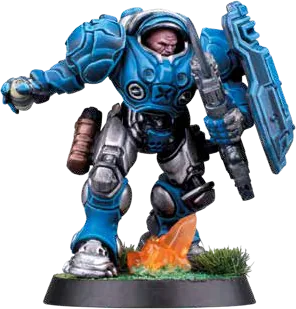
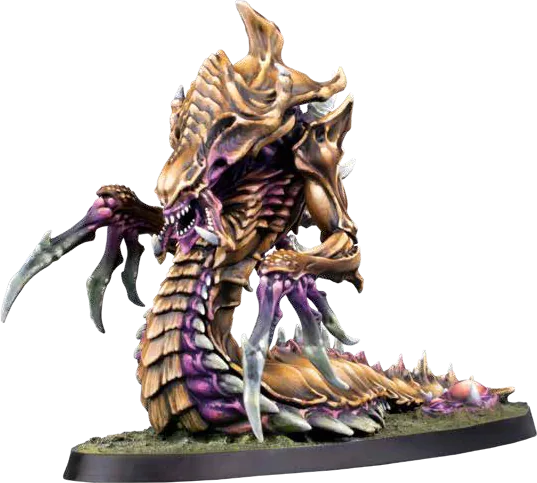
Every model stands on a base, and that base is the single most important physical object in the game. It does not matter how a miniature is posed, whether a Zealot is mid-leap or a Hydralisk is rearing back to strike; the rules see only the base. Every measurement, every Line of Sight check, and every question about whether two models are touching or overlapping is resolved by looking at their bases, nothing else. Every model must be mounted on the correct base size as specified on its Unit Card. Using the wrong base size changes a model's physical footprint and directly affects gameplay, so consistency matters.
Tags are keywords printed at the bottom of each Unit Card. They allow rules to target specific types of Units without repeating lengthy definitions.
Faction Tags identify a Unit's allegiance.
Combat Tags identify a Unit's physical nature and tactical class. Type Tags: Armoured, Biological, Light, Mechanical, Psionic, Flying, and Ground.
At any given moment, each player occupies one or more of the following roles. These terms appear throughout the rules and determine who makes decisions, who rolls dice, and who is affected by an ability.
Some rules, particularly Reactions, refer to this to determine priority when both sides respond to the same event.
Keywords are written in BOLD CAPS (e.g. SIDEARM, PIERCE, HIDDEN). A keyword always means the same thing, regardless of the Unit in which it appears. Full definitions are in Part 11: Keyword Glossary and Definitions. Keywords do not stack. Gaining the same keyword twice provides no extra benefit. If a keyword has a numeric value (e.g., PRECISION (1) and PRECISION (2)), use only the highest value.
Specific Rules take precedence over General Rules. If text on a Unit Card, Mission Card, or Special Ability contradicts the Core Rules, the card or ability takes precedence.
Every Special Ability falls into one of three categories. Understanding the difference is essential, as it determines when the ability can be used, whether it requires a conscious decision, and what happens if both players want to act at the same time. Part 10 covers these in full detail; what follows is a working summary.
Active Abilities are deliberate choices, a stim injection, a mode switch, a called shot. They require the Unit to be Activated, and must be triggered immediately before declaring an action or immediately after one fully resolves. A player cannot interrupt an action mid-flow to use one.
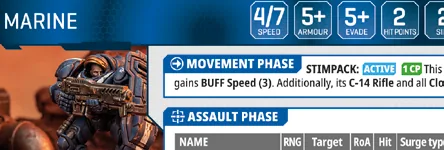
A Unit in Reserves cannot use Active Abilities unless the ability explicitly states otherwise. Each named Active Ability may be used only once per Round by a specific Unit, unless it has the REPEATABLE keyword. Effects granted by Active Abilities expire at the End of the Current Round unless otherwise stated.
Passive Abilities are always active. They represent innate traits, permanent equipment, or biological adaptations that require no decision to activate; they simply function as long as the Unit is on the battlefield.
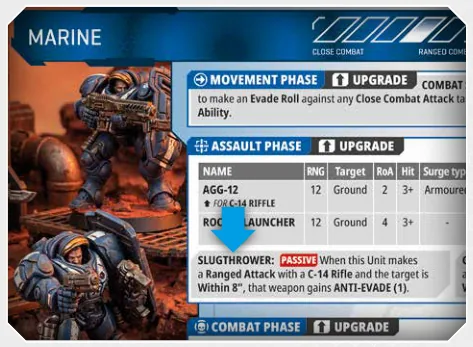
Like Active Abilities, Passive Abilities are inactive while the Unit is in Reserves, unless otherwise stated.
Reaction Abilities are the battlefield's reflexes. They fire in response to a specific trigger, such as an incoming attack, an Enemy Charge, or a model being Destroyed, and allow a player to act outside the normal activation sequence. The catch is timing: a Reaction must be declared at the exact moment its trigger occurs. If the moment passes, the opportunity is gone.
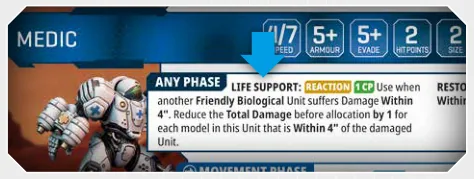
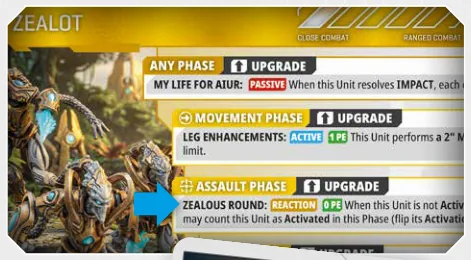
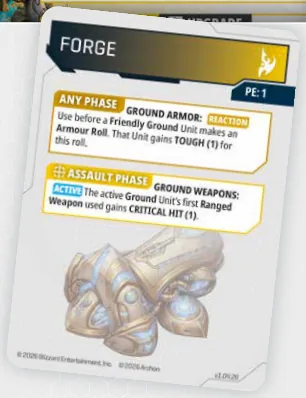
Each player may resolve only one Reaction per Activation. Each named Reaction Ability may be used only once per Round by a specific Unit. This limit applies across the entire Round (all Phases and all Activations). A single Unit cannot use the same-named Reaction more than once per Round, even on different triggers. Different Units may each use the same named Reaction once per Round. If both players want to react to the same trigger, the Active Player resolves their Reaction first. Like Active and Passive Abilities, Reaction Abilities cannot be used while the Unit is in Reserves unless stated otherwise. EXAMPLE: If a Zealot Unit is attacked, it may use Zealous Round OR Ground Armour, not both in the same Enemy Activation. If a Marine Unit is attacked, and it uses Infantry Armor for its Armour Roll, the Medic Unit behind will not be able to use its Life Support in the same Enemy Activation.
Chance plays a vital role on the battlefield, as a well- aimed volley can harmlessly ricochet off reinforced armour, or a desperate last stand can turn the tide of an entire battle. In this Part, we'll discuss how dice are used to resolve uncertain outcomes, from basic rolls and modifiers to the Roll-Off, which settles disputes and decides initiative.
The game uses standard six-sided dice (D6).
• 1–2 = 1, • 3–4 = 2, • 5–6 = 3.
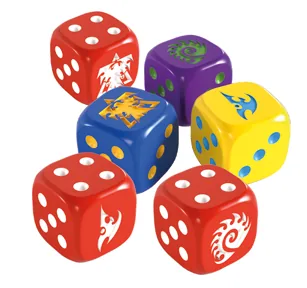
When a rule calls for a Roll-Off, both players roll 2D6. The higher total wins. Ties are re-rolled until a winner is determined.
Some abilities grant the chance to re-roll, allowing a second attempt when the first result is unfavourable. Pick up the die and roll it again. The new result replaces the original, even if it is worse. Unless stated otherwise, a re-roll applies to a single die. If an ability specifies re- rolling multiple dice, follow its instructions.
Modifiers adjust the Target Number of a roll. Apply all modifiers before rolling.
He now hits on 4+.
He now hits on 6+.
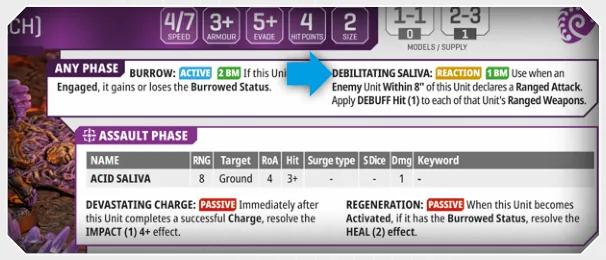
Ability text: "+1 to Armour" means the Armour Roll improves (Target Number decreases). "-1 to Hit" means hitting becomes harder (Target Number increases). A Target Number can never be modified below 2+ or above 6+. A Null Value (-) indicates that the capability does not exist. No modifier can grant a roll where a Null Value applies.
If a rule says "D3+1", roll the die and add 1 to the result. This is not a modifier to a Target Number – it generates a value (e.g. 4 Damage instead of 3).
No amount of preparation guarantees a perfect outcome, and no situation is ever truly hopeless. The dice always leave room for the unexpected. Regardless of the final Target Number, a natural roll of 6 always succeeds, and a natural roll of 1 always fails. No modifier or ability can override these boundaries.
Whenever the rules ask a player to roll against a number, an Armour Roll, a Hit Roll, or an Evade Check, that roll is a Test. Every Test follows the same logic: there is a Target Number, the player rolls, and the result either meets the threshold or it does not.
Tests come in two flavours:
Not everything involving dice is a Test. Value Generation – a Charge Roll, a D3 Damage result, simply produces a number. The player adds the die result to the base value as instructed. There is no Target Number to beat. To resolve any Test: identify the base Target Number, apply all Modifiers to determine the final Target Number, and roll the die. If the result is equal to or exceeds the Target Number, the Test succeeds. If it falls short, the Test fails.
If a die does not land flat on the playing surface, lodged against terrain, tilted on a base, or off the table entirely, the roll is invalid. Pick it up and roll it again. Players should agree before the game on what constitutes a cocked die. The simplest test: if the result isn't obvious at a glance, re-roll it.
Positioning is everything. A few inches can be the difference between a deadly flanking charge and an exposed Unit caught out in the open. This Part covers how distances are measured, how models move across the battlefield, and the rules of Coherency that bind a Unit together.
All distances are measured in inches (ˮ) using a tape measure or ruler. Players may measure any distance at any time, including before declaring an action, during an opponent's activation, and between Phases. There are no restrictions on pre-measuring. Players are encouraged to measure thoroughly and agree on distances before committing to an action. Between Models: Measure from the nearest point of one model's base to the nearest point of the other model's base. For models on flight stands, the bottom of the stand is treated as the model's base for all measurements (Part 2.3).
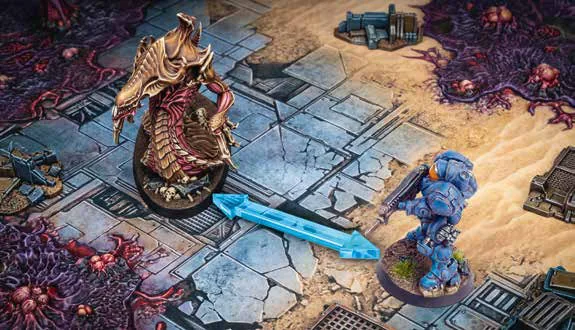
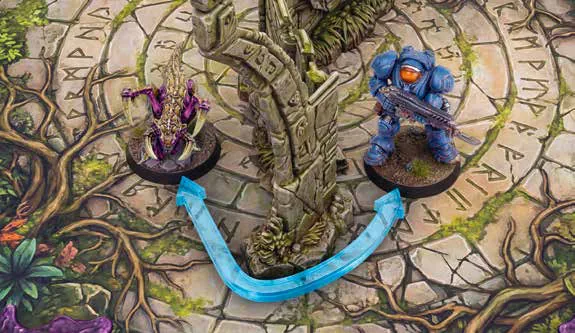
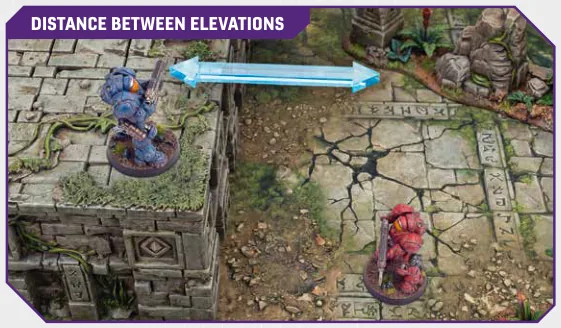
WITHIN A model is Within a distance if any part of its base touches or crosses into that range. A Unit is Within a distance if at least one model's base touches or crosses into that range.
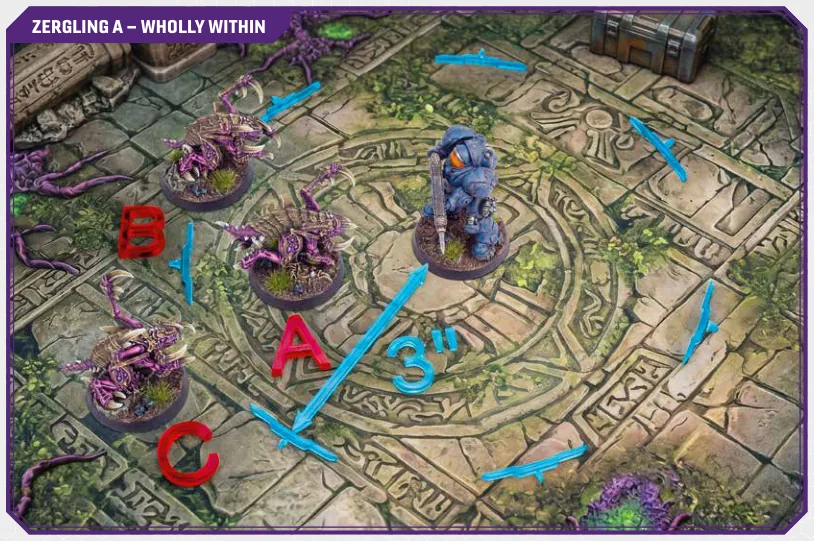
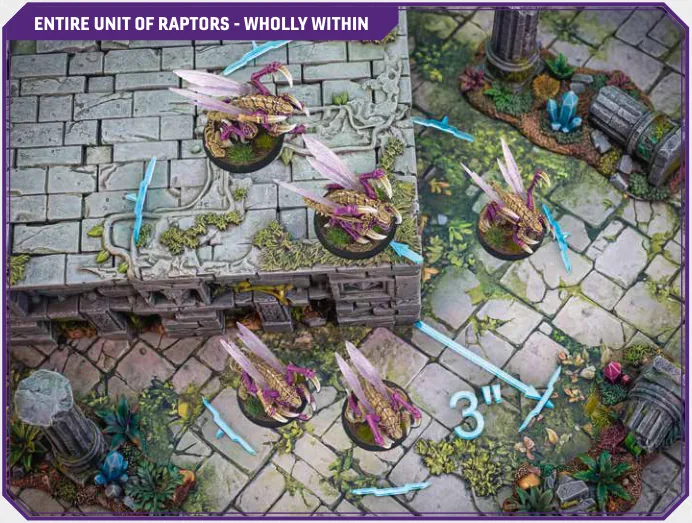
WHOLLY WITHIN A model is Wholly Within a distance only if its entire base sits inside that range – no part of the base may extend beyond the edge. A Unit is Wholly Within only if every model's base in the Unit satisfies this condition.
The Leading Model is a temporary reference point used to execute a Unit's movement. Whenever a Unit resolves a Move, Deploy, Run, Charge, Disengage, or Close Ranks action, or any other action or ability that instructs the Unit to nominate a Leading Model. Move the Leading Model first, measuring its exact path. Then set the remaining models in valid Coherency around the Leading Model's new position. The Leading Model nomination ends once the action resolves.
Coherency is checked at the end of any action that repositions models, including Move, Deploy, Charge, Disengage, Close Ranks, Run, PLACE, and SUMMON. At the end of such an action, all models in the Unit must be Wholly Within 3" of the Leading Model and able to trace a valid Coherency Link to it. If this condition is met, the Unit is In Coherency. The battlefield is rarely so accommodating. Terrain and crowded positions may prevent a model from reaching a legal position Wholly Within 3" of the Leading Model. When this occurs, set the affected model as close as possible to the Leading Model. The model must still maintain a valid Coherency Link. A Unit with one or more models set beyond 3" is Out of Coherency. If a model cannot be set in any legal position while maintaining a valid Coherency Link, it is removed as a casualty immediately. A Unit that is In Coherency remains so until its next repositioning action. Casualties from any source never trigger a Coherency check and never cause a Unit to become Out of Coherency. A Unit is Out of Coherency only if this condition was not met at the end of its last repositioning action. While In Coherency, the Unit may control and contest Mission Markers normally (see 8.9.1). COHERENCY LINK When placing models after a move, set the Leading Model first. Then set each remaining model one at a time, Wholly Within 3" of the Leading Model, and able to trace a Coherency Link to it. A Coherency Link is a chain of imaginary lines drawn model-to-model through models of the same Unit. Links cannot pass through models from other Units, terrain, or gaps that the Leading Model itself could not move through. A link may pass through Enemy models that the Unit is currently Engaged with and ACCESS POINTS. Any model that cannot find a legal position maintaining the Coherency Link is immediately removed as a casualty. FLYING UNITS AND COHERENCY LINKS: When drawing Coherency Links for a Flying Unit, ignore terrain. Links may pass freely through terrain pieces of any Size, and may also pass through models from other Units. OUT OF COHERENCY If at the end of an action that repositions models, any model is not Wholly Within 3" of the Leading Model, the Unit is Out of Coherency. Out of Coherency Units cannot control or contest Mission Markers (Part 8.9.1).
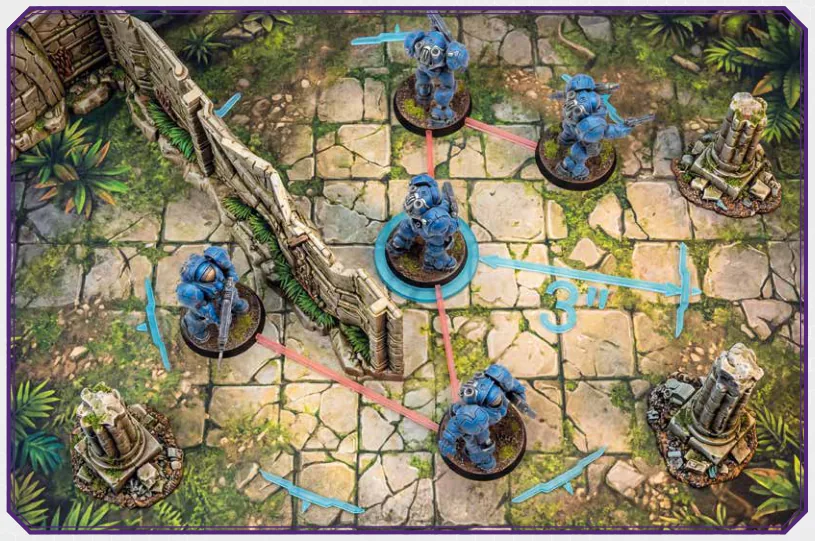
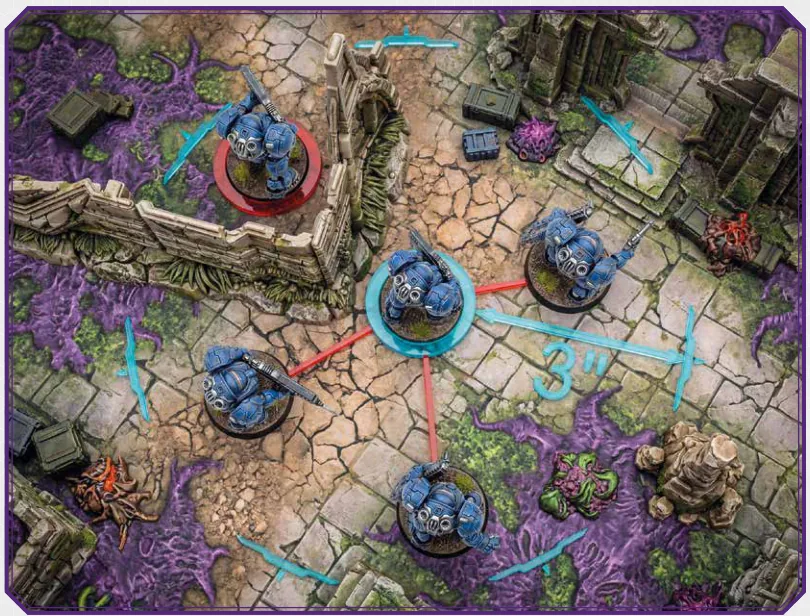
Some abilities force a Unit to move DIRECTLY TOWARDS or DIRECTLY AWAY from another Unit. Draw an imaginary straight line from the centre of the acting model's base through the centre of the target model's base. The affected model follows this line. If terrain or another model blocks the path, the affected model bypasses it via the shortest possible route, then continues in the original direction. If two routes are equally short, the controlling player chooses. After completing the move:
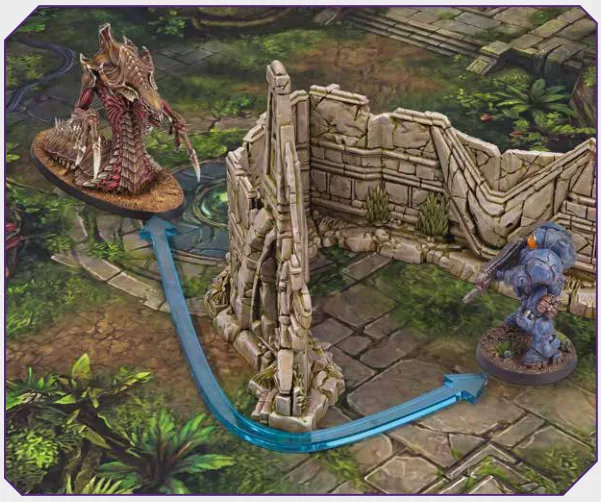
Multi-model Units moving DIRECTLY TOWARDS: The Leading Model must be the one with the shortest route to the target. Move it first. Set the remaining models as close to the target as possible while maintaining Coherency. Multi-model Units moving DIRECTLY AWAY: The Leading Model must be the one with the shortest route to the target. Move it first. Set the remaining models as far from the target as possible while maintaining Coherency. When multiple models exist in the target Unit, draw an imaginary line to the model that is physically closest (when moving towards) or furthest (when moving away) from the acting model. If a model is forced to move off the battlefield edge by any involuntary movement effect, it stops at the edge of the battlefield in contact with the table edge. The model cannot be moved beyond the battlefield boundary.
Not every gap in the terrain is wide enough to squeeze through, and a Siege Tank does not thread the same needle as a Zergling. A gap is any physical space between terrain pieces or models, through which a model's path of movement passes. The Leading Model can pass through gaps depending on the Unit's Size:
Regardless of clearance, a model cannot be set where its base doesn't physically fit. Clearance governs movement through a space, not stopping inside one. Openings in terrain pieces – such as archways, doorways, and breaches – are treated as gaps for the purpose of Gap Clearance, even if the surrounding terrain piece is Size 2 or larger. The gap must be wide enough for the model's Size category. Players should agree on which terrain openings are passable during Battlefield Setup. This applies to all movement types: Move, Run, Charge, Disengage, and Close Ranks. Flying Units ignore Gap Clearance during movement. Their Leading Model moves point-to-point, bypassing all terrain in transit. However, the Leading Model must still end in a legal position where its base or stand physically fits without overlapping another model's base or stand, or terrain.
Each Unit, weapon, and ability in the game has a set of characteristics represented on cards. This Part explains the anatomy of Unit Cards and Weapon Profiles, what each statistic means, and how to read the data that drives every action on the battlefield.
Every Unit has a Unit Card that provides all the information needed to use it in a game. 1. UNIT NAME 2. SPEED: The maximum distance in inches the Leading Model may traverse in a standard Move.
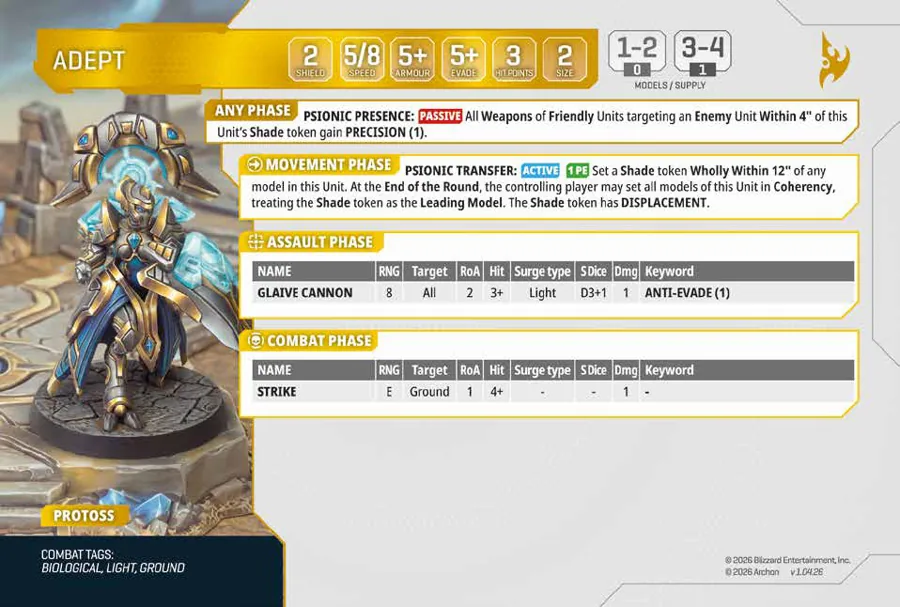
3. ARMOUR: The Target Number the defender must meet or exceed on a D6 to cancel a hit. 4. EVADE: A secondary defensive characteristic representing agility. Used only when a rule or condition specifically grants an Evade Roll.
An ability that explicitly grants an Evade Roll does not override this. 5. HIT POINTS (HP): Damage a single model must sustain before it is removed. 6. SHIELD (OPTIONAL): If this value is present on a Unit Card, add it to the Hit Points (HP) of the first model. The Unit is Shielded. The Unit loses its Shielded Status when the Total Damage assigned to it exceeds its Shield value or when the first model in the Unit is removed.
8 10
7. SIZE: The model's vertical height category, used for Line of Sight and terrain interaction. 8. SUPPLY PROFILE: Links the number of remaining models in the Unit to its Current Supply Value. Update immediately when casualties reduce the model count to a lower bracket. Supply is used for Deployment, Mission Marker Control, and Disengage checks. 9. PHASE BOXES: Special Abilities and weapon profiles available during specific Phases. 10. WEAPON PROFILES: Each weapon is assigned to either the Assault Phase or the Combat Phase and may be used only during that phase. Each weapon profile lists:
11. COMBAT TAGS: The Unit's Combat Tags. 12. FACTION TAG: The Faction the Unit belongs to.
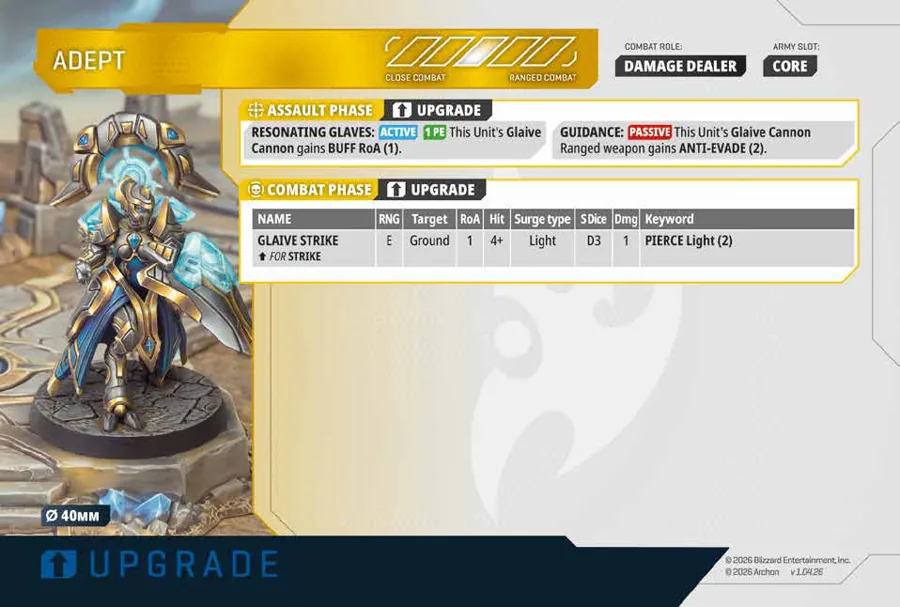
The reverse of each Unit Card lists optional Upgrades available during Army Building. 13. UPGRADE: New abilities or weapons added to the profile. 14. REPLACEMENTS (
15. COMBAT RANGE: The preferred distance this Unit seeks to maintain from enemy Units. 16. ARMY SLOT: The slot type (Core, Elite, Support, Air, or Hero) required to field this Unit. Each Unit occupies a number of slots of this type equal to its starting Supply Value (Part 9.1.6). 17. Flavour text describing the Unit's role. 18. Base diameter on which the model must be mounted on.
No commander goes into combat alone with guns. A creep tumor in a good position, a sensor sweep in reserve, or a psionic storm held back can change a lost battle into a rout. The Tactical Cards are the strategic resources, orders, and doctrines a military leader has available to them, bought before the battle and deployed when they are most needed. Tactical Cards are purchased with Vespene Gas during Army Building (Part 9.1.4).
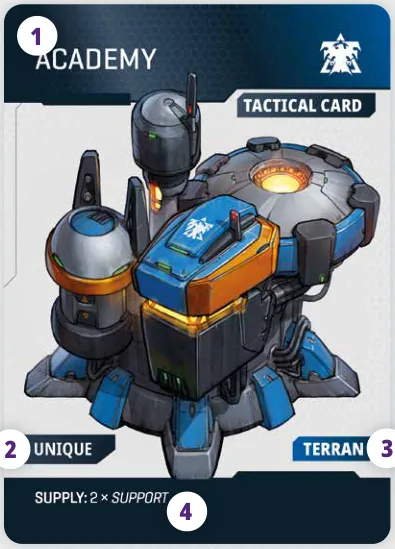
1. NAME: The name of the Tactical Card. 2. UNIQUE MARKING: If present, only one copy of this card may be included in an army. 3. FACTION TAGS: The Race Tag and any Sub- Faction Tags that determine which armies may include this card (Part 9.1.2). 4. ARMY SLOTS: The organisation slots unlocked when this card is included in the army (e.g., 2× Core, 1× Support). These slots are in addition to those provided by the Faction Card. 5. RESOURCE TYPE AND VALUE: The faction's resource (CP for Terran, BM for Zerg, PE for Protoss) and the amount generated when this card is Exhausted instead of using its Special Ability. 6. SPECIAL ABILITIES: One or more Active, Passive, or Reaction Abilities resolved using the standard rules (Parts 10.1–10.4).
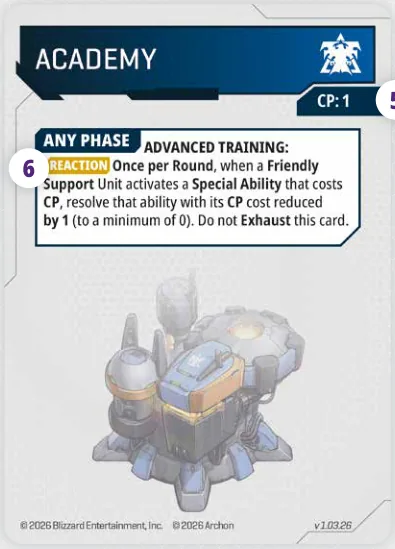
5
The Faction Card is the foundation of every army. It defines who you are, what doctrine you follow, and what forces you are permitted to bring to the battlefield. Every army must include exactly one Faction Card, selected during Army Building. 1. FACTION NAME: The name of the Faction. This may also function as a keyword referenced by other rules and abilities. 2. FACTION TAGS: The Race Tag and any Sub- Faction Tags that specify which Units and Tactical Cards can be included in the army (Part 9.1.2).
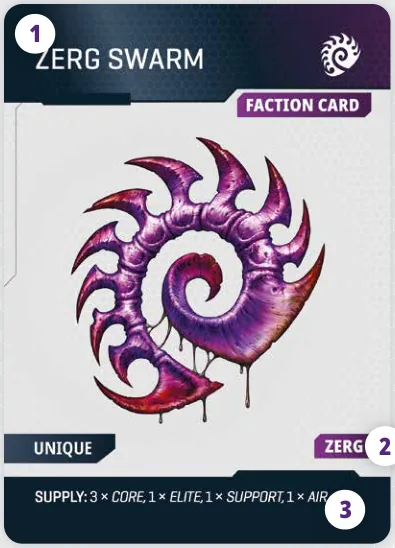
3. STARTING ARMY SLOTS: The organisation slots provided by the Faction Card itself (e.g. 3× Core, 1× Hero, 2× Support). Additional slots are unlocked by purchasing Tactical Cards. 4. RESOURCE TYPE AND VALUE: The faction's resource (CP for Terran, BM for Zerg, PE for Protoss) and the amount generated when this card is Exhausted instead of using its Special Ability. 5. SPECIAL ABILITIES: One or more Active, Passive, or Reaction Abilities resolved using the standard rules (Parts 10.1–10.4).
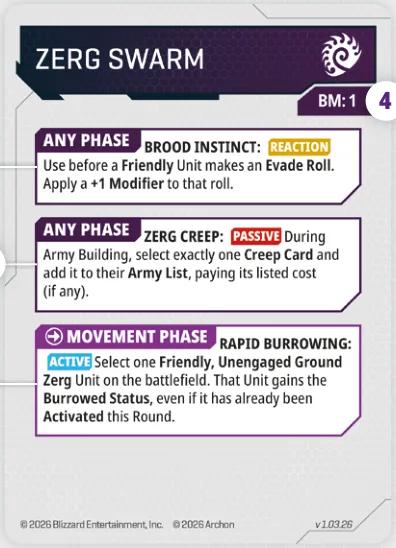
5
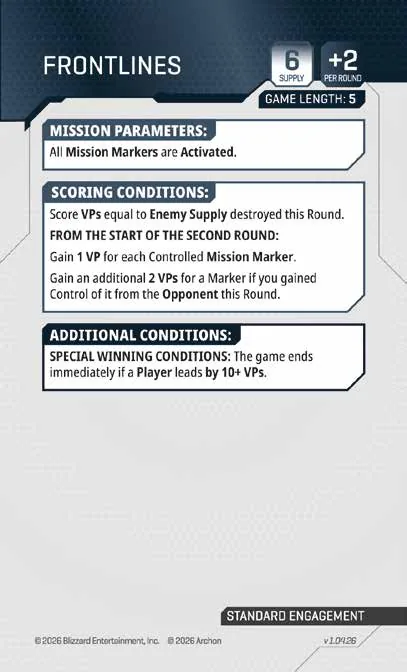
Every conflict has a purpose. A contested line of minerals, a crashed shuttle with vital information, or a Xel'Naga relic glowing with power buried deep beneath the surface. Mission Cards decide what the conflict is about, how long the battle will last, and what must be achieved to win. The mission determines the fight, not the other way round. Mission Cards are chosen during the Draft (Part 9.2). 1. NAME: The name of the Mission. 2. ENGAGEMENT SCALE: The game scale this mission is designed for (Skirmish, Standard, or Grand Offensive). 3. STARTING SUPPLY: The Supply Pool available to each player in Round 1.
4. SUPPLY ESCALATION: The amount by which the Supply Pool increases at the start of each subsequent Round. 5. GAME LENGTH: The number of Rounds played before the game ends (usually 5). 6. MISSION PARAMETERS: Setup instructions, Mission Marker states, and any special conditions that apply from the start of the game. 7. SCORING CONDITIONS: How players earn Victory Points at the end of each Round. 8. ADDITIONAL CONDITIONS: Special rules or winning conditions unique to this mission, including any instant victory triggers.
The location from which you engage in the battle is as important as what you bring into it. A narrow canyon channels the entire attack into a kill zone. Parallel zones of deployment across open ground give the victory to whoever shoots first. The Deployment Cards determine the war's geometry, entry points, restricted zones, and the ground that must be taken. Deployment Cards are selected during the Draft. 1. NAME: The name of the Deployment layout. 2. ENGAGEMENT SCALE: The game scale this deployment is designed for (Skirmish, Standard, or Grand Offensive). 3. BATTLEFIELD DIMENSIONS: The required table size for this deployment. 4. ENTRY EDGES: The table edges assigned to each player. Units enter the battlefield from their assigned Entry Edge when deploying from Reserves.
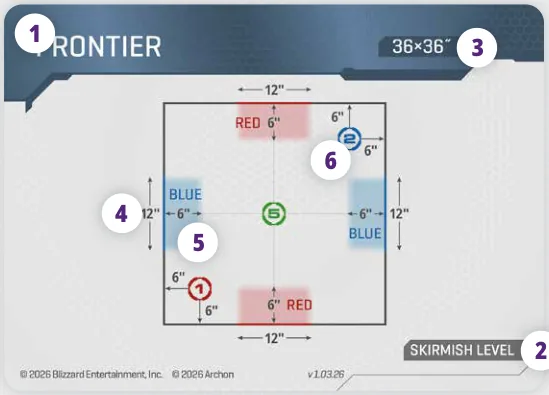
5. ZONE OF INFLUENCE: A restricted area extending 6" inward from each player's Entry Edge. Enemy Units arriving from Reserves cannot end their deployment within this area. The Zone of Influence does not affect Units already on the battlefield. 6. MARKER COORDINATES: The precise measurements for positioning each numbered Mission Marker on the battlefield. Using the Deployment Card during Setup: Once the Deployment Card is selected, follow its instructions in this order: confirm the table dimensions, assign Entry Edges to each player, set Zone of Influence Markers at the corners of each player's Entry Edge, where applicable, then set Mission Markers at the listed coordinates. See Part 9.3 for the full setup sequence.
The armies in StarCraft: Tabletop Miniature Game do not deploy at full strength. Reinforcements arrive in waves, and as Units take casualties, their ability to deploy effectively shrinks. The Supply system governs when and how many Units a player can field, creating a constant tension between committing forces now and holding them in reserve.
Supply represents a Unit's battlefield presence, its manpower, momentum, and command resources necessary to keep it fighting. Unlike fixed characteristics, Supply is dynamic: as a Unit takes casualties, its Supply declines.
Every Unit Card includes a Supply Profile in the top- right corner, linking the number of remaining models to a Current Supply Value. As casualties reduce the model count into a lower bracket, update the Current Supply Value immediately.
EXAMPLE: A squad of 9 Marines has a Supply of 2. A squad of 6 Marines has a Supply of 1. When reduced to 3 models, their Supply drops to 0.
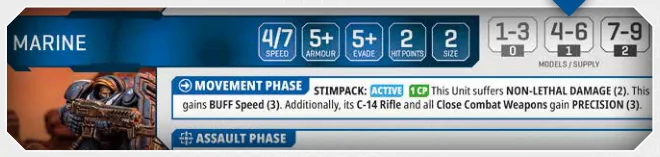
DEPLOYMENT Each mission establishes a Supply Pool, which is the maximum amount of Supply that can be on the battlefield at any one time. The Supply Pool starts at the value listed on the Mission Card and increases by the Supply Escalation value each Round.
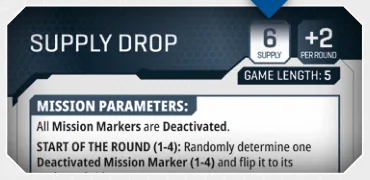
A player can only set a Unit in play from Reserves if the Unit's Current Supply Value is less than or equal to the Available Supply, which is the current Supply Pool value minus the total Supply of all Friendly Units already in play on the battlefield. At no point can the Total Current Supply of a player's Units on the battlefield exceed the Supply Pool. In the final Round of play (as determined by the Mission Card), the Supply Pool is unlimited. All Units remaining in Reserves may be set into play without Supply restrictions, following the normal alternating activation sequence. MISSION MARKER CONTROL Supply determines who controls the ground. To determine control of a Mission Marker, each player calculates the Current Supply Value of all their eligible Units contesting that Marker (see Part 8.9.1 for full eligibility requirements), not the number of models, but their total Supply. The player with the highest total controls the Marker. A Unit with Supply 0 can control a Marker if no Enemy Units are contesting it. However, a Unit that is Out of Coherency can never control or contest a Mission Marker. Flying Units cannot Contest or Control Mission Markers, as they are airborne and do not hold ground. TACTICAL MASS Breaking away from a melee is a desperate act. A Unit that Disengages suffers a severe penalty: it cannot perform Ranged Attack or Charge actions in the following Assault Phase. The squad is too busy pulling back to mount an effective attack. However, if at the moment the Disengage is declared, the Disengaging Unit's Current Supply Value exceeds the Combined Supply of all Enemy Units it is Engaged with, this penalty is ignored. A superior force has the mass to pull away cleanly. A lone screening squad should slow the enemy, not shut them down entirely. UNIT STARTING SUPPLY Some Mission Cards award Victory Points equal to the Enemy Supply destroyed in a Round. In such cases, the Supply Value destroyed in that Round is added to the score during the Scoring Phase.
The terrain where a battle takes place is as crucial as the armies involved. Walls block Line of Sight, height offers a commanding fire position, and narrow passages can funnel an entire assault into a killing zone. This part explains how Line of Sight functions, how terrain impacts models of various Sizes, and how cover and elevation influence the flow of combat.
Every shot, every ability, and every order that requires a clear view of the target follows the same process. Line of Sight determines what a model can see and, by extension, what it can shoot at. StarCraft: Tabletop Miniature Game uses a 2D Line of Sight (LoS) system. All Line of Sight checks are resolved from a top-down perspective, looking directly down at the battlefield from above. To determine whether an acting model can see a target, trace an imaginary straight line from any part of the acting model's base to any part of the target model's base.
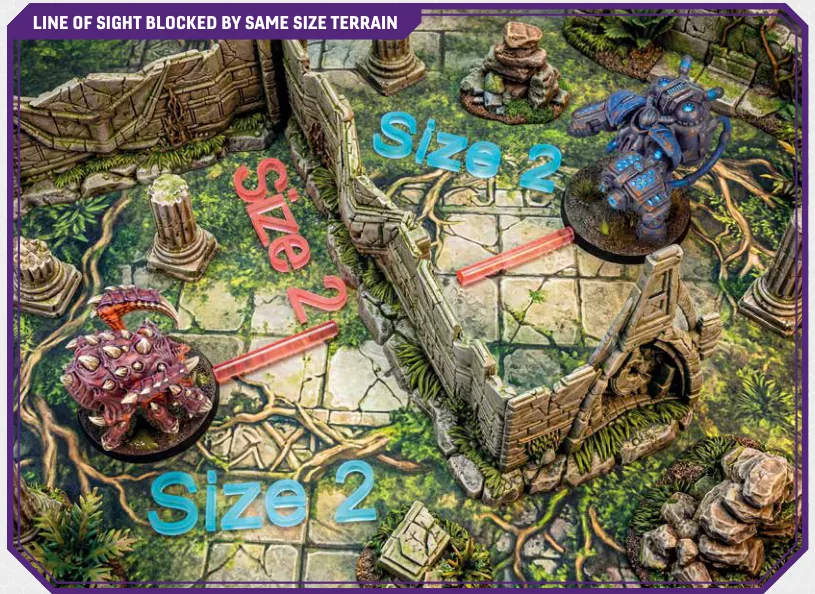
If the line does not pass through any Blocking Terrain (any terrain piece with an Effective Size of 1 or greater – see Part 11), the target is Visible. No further checks are required. If the line passes through Blocking Terrain, the target is not automatically hidden. Check the Cover rules (Part 7.1.1) to determine whether the terrain actually blocks Line of Sight. Terrain that intersects the trace but does not meet the requirements for Full Cover or Direct Cover does not block Line of Sight. The target remains Visible. For Line of Sight purposes, a terrain piece's footprint is defined by its physical base or, if it has no base, the outermost edges of its solid structure viewed from above. Unless players agree otherwise during Battlefield Setup, gaps, windows, doorways, and open interiors within the footprint do block the Line of Sight. A terrain opening may be passable for movement without counting as open for Line of Sight (see Part 4.6 for Gap Clearance rules). Players must agree during Battlefield Setup on the footprint of each terrain piece and on which openings, if any, count as passable gaps for movement.
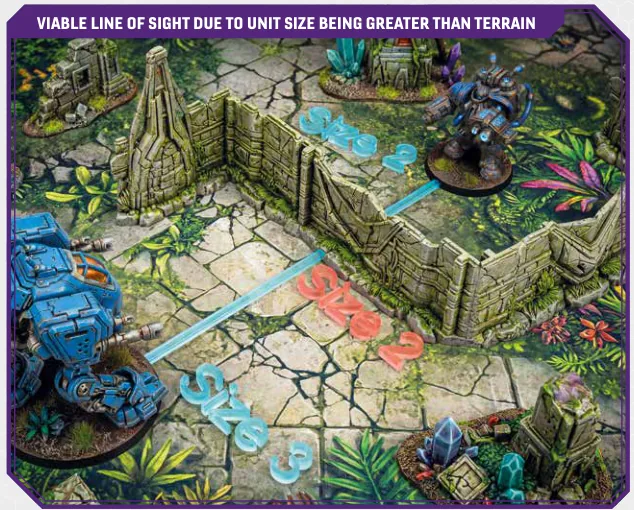
Terrain pieces may block the Line of Sight between models. A terrain piece provides Cover in one of two ways:
Each terrain piece is assessed for Cover independently. Terrain pieces do not combine their Effective Size or proximity. If no single terrain piece meets the requirements for Full Cover or Direct Cover, Line of Sight is not blocked, regardless of how many terrain pieces the trace passes through. ELEVATION DEAD ZONE If a model on HIGH GROUND (Size 3+) draws Line of Sight to a model at GROUND LEVEL that is Within 1" of the base of the same terrain piece, Line of Sight is blocked. This applies in both directions – neither model can see the other. CLOSE QUARTERS If both models are Within 1" of the same terrain piece and Within 3" of each other, Direct Cover, Elevation and Dead Zone do not apply. Resolve Line of Sight normally using the standard trace (Part 7.1).
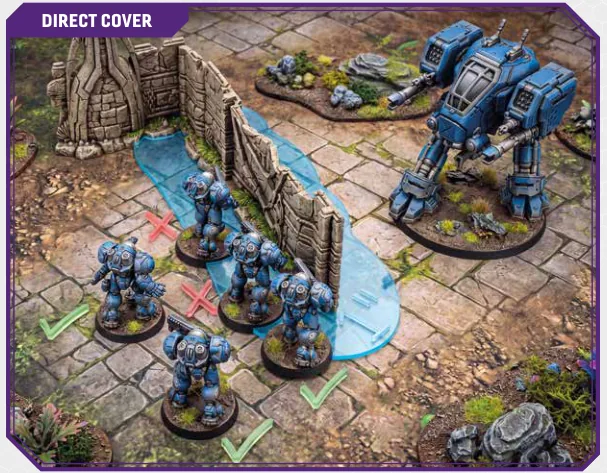
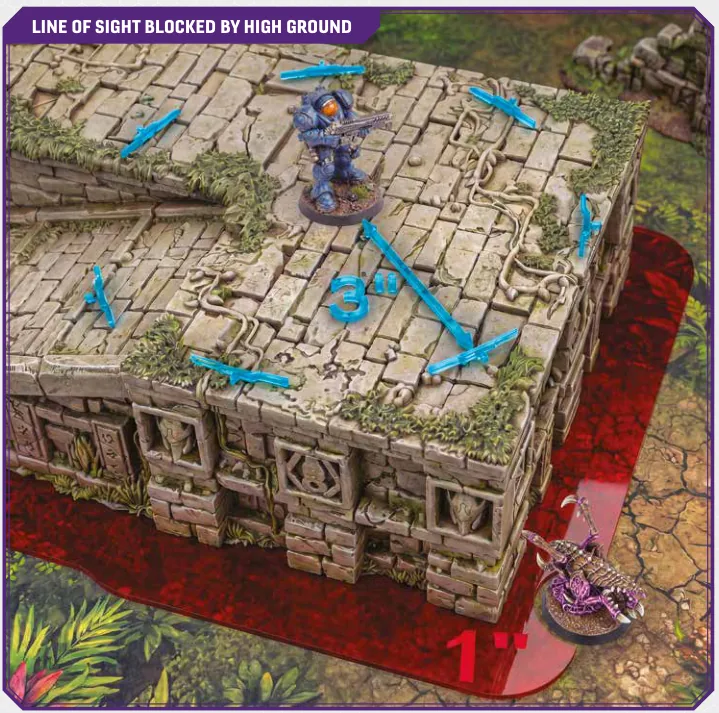
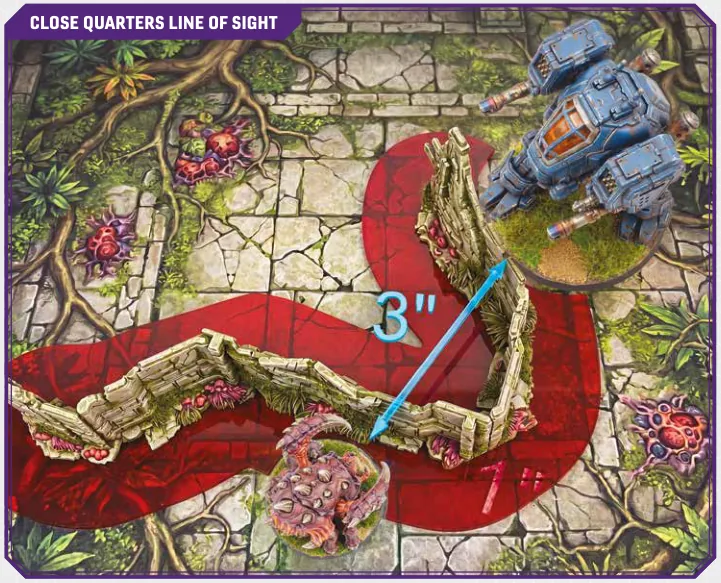
When a model stands on top of a terrain piece (such as HIGH GROUND): Effective Size is equal to the model Size plus the terrain Size. HIGH GROUND or MID GROUND, its Effective Size increases in the same way as a model's – it gains the Size of the terrain it stands on.
EXAMPLE: A Marine (Size 2) on HIGH GROUND (Size 4) has an Effective Size of 6. He can see over Size 5 walls that would blind him at GROUND LEVEL.
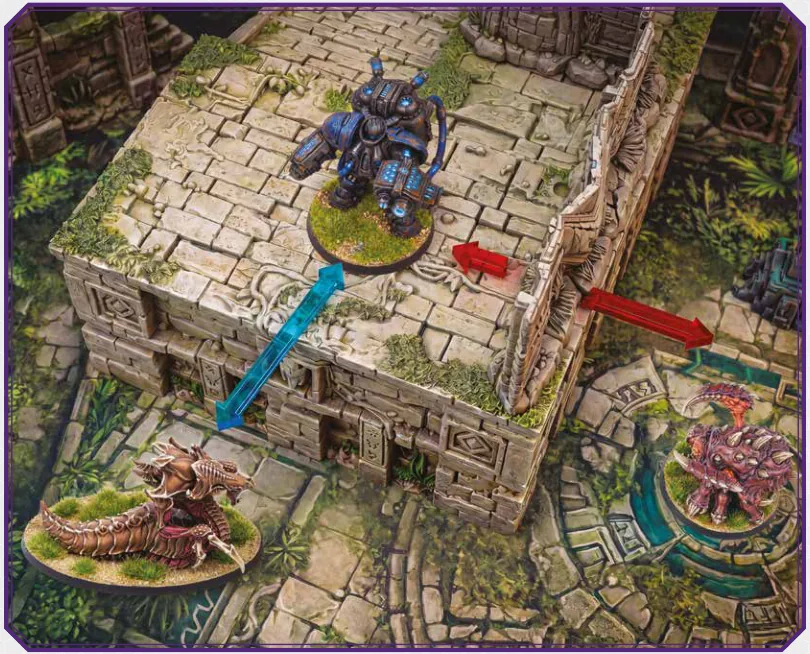
If all models of a Unit are standing on HIGH GROUND (Size 3 or larger terrain) with any part of their bases, the Unit becomes eligible to make an Evade Roll against all Ranged Attacks originating from a lower elevation. The attack originates from the lower elevation if at least
one model of the attacking Unit isn't standing on the HIGH GROUND with any part of their base. Exception: Flying Units never benefit from HIGH GROUND Cover, regardless of their physical position on the battlefield. Ranged Attacks made by Flying Units never originate from the lower elevation, regardless of their position on the battlefield.
When checking Line of Sight to or from a Flying model, ignore the Full Cover rule.
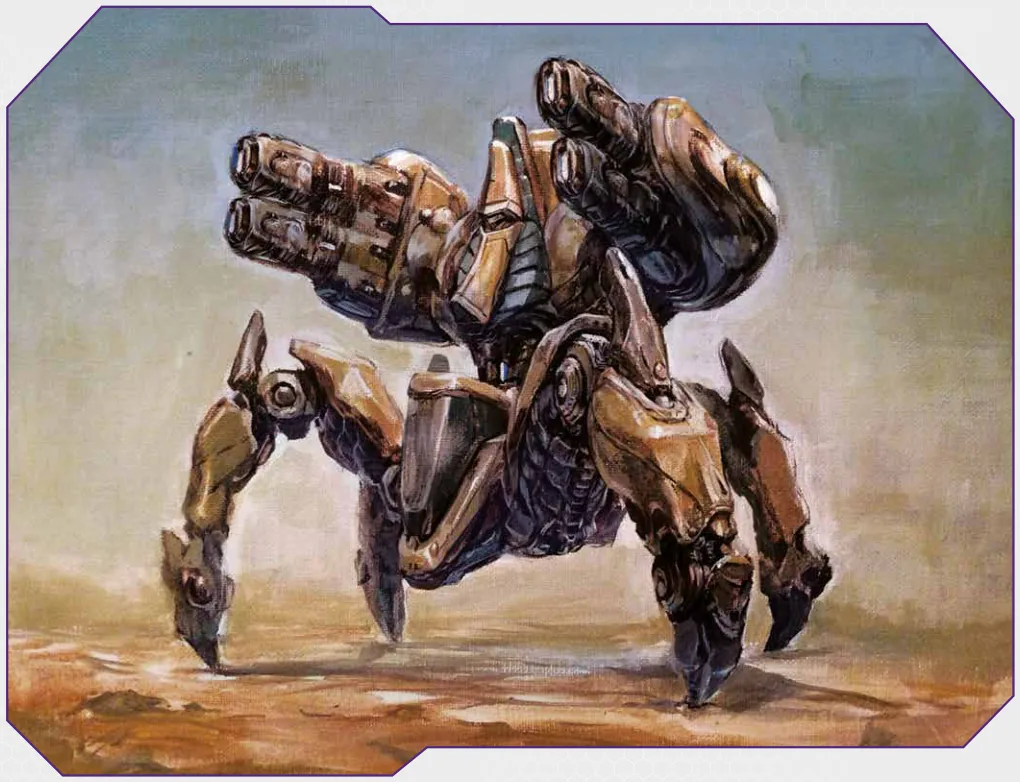
Direct Cover and the Elevation Dead Zone rules still apply. For Cover purposes, treat a Flying model's Effective Size as higher than the Effective Size of any terrain piece on the table. Because of this, terrain can never provide Full Cover against a Flying model and can never provide Direct Cover to a Flying model as the model that is Within 1" of terrain. However, a Flying model still obeys any Direct Cover or Elevation Dead Zone rule that applies to the other model in the attack.
| RULE / CASE | RESULT | DETAIL |
|---|---|---|
| BASE SYSTEM (§7.1) | ||
| LoS method | 2D TOP-DOWN | Trace a straight line from any part of the attacker's base to any part of the target's base, viewed from directly above. |
| Measurement | HORIZONTAL ONLY | Vertical height never factors into Range or LoS checks. |
| Trace does not pass through Blocking Terrain | ✔ VISIBLE | No further checks required. |
| Trace passes through Blocking Terrain | ◆ CHECK COVER | Apply Full Cover or Direct Cover rules (§7.1.1). Target may still be Visible. |
| Terrain footprint definition | OUTER EDGE | Gaps, windows, and doorways inside a terrain piece do block LoS. |
| EFFECTIVE SIZE & ELEVATION (§7.1.2) | ||
| Model on HIGH GROUND | MODEL+TERRAIN SIZE | E.g. Marine (Size 2) on HIGH GROUND (Size 4) = Effective Size 6. |
| Terrain piece on HIGH GROUND | TERRAIN+TERRAIN SIZE | The same stacking rule applies to terrain set on elevated surfaces. |
| Model at GROUND LEVEL | — NO BONUS | Effective Size = model's own Size characteristic only. |
| ELEVATION DEAD ZONE (§7.1.1) | ||
| HIGH GROUND model traces LoS to the GROUND LEVEL model Within 1" of the terrain base | ✖ LoS BLOCKED | Applies in both directions. Neither model can see the other. |
| Close Quarters override (both Within 1" of the same terrain AND Within 3" of each other) | ✔ LoS RESTORED | Standard LoS rules apply. Dead Zone is ignored. Works in both directions. |
| COVER TYPE | CONDITION | LoS RESULT | REFERENCE |
|---|---|---|---|
| FULL COVER | |||
| Full Cover | Terrain Effective Size ≥ Effective Size of BOTH attacker AND target | ✖ LoS BLOCKED | §7.1.1 |
| DIRECT COVER | |||
| Direct Cover (attacker behind terrain) | LoS trace passes through terrain, AND attacker is Within 1" of that terrain AND terrain Effective Size ≥ attacker Effective Size. ⚠ Close Quarters exception: if both models are Within 1" of the same terrain piece AND Within 3" of each other, this rule is bypassed – use standard LoS instead. | ✖ LoS BLOCKED (unless Close Quarters) | §7.1.1 |
| Direct Cover (target behind terrain) | LoS trace passes through terrain, AND target is Within 1" of that terrain AND terrain Effective Size ≥ target Effective Size. ⚠ Close Quarters exception: if both models are Within 1" of the same terrain piece AND Within 3" of each other, this rule is bypassed – use standard LoS instead. | ✖ LoS BLOCKED (unless Close Quarters) | §7.1.1 |
| NO COVER / VISIBLE DESPITE TERRAIN | |||
| Terrain too small | Full Cover fails, AND neither model is Within 1" of terrain (Direct Cover fails) | ✔ VISIBLE | §7.1.1 |
| Multiple small terrain pieces | Trace passes through several pieces, but no single piece satisfies Full or Direct Cover | ✔ VISIBLE | §7.1.1 |
| Model not Within 1" of terrain | Trace passes through terrain; Direct Cover proximity condition not met for that model | ✔ VISIBLE | §7.1.1 |
| HIGH GROUND COVER - EVADE BONUS | |||
| HIGH GROUND Cover | ALL models of defending Unit are Wholly Within HIGH GROUND (Size 3+), AND at least one attacking model is NOT Wholly Within HIGH GROUND | ◆ EVADE ROLL GRANTED | §7.1.3 |
| Attacker is also on HIGH GROUND | All attacking models are Wholly Within HIGH GROUND | ✖ NO EVADE BONUS | §7.1.3 |
| COVER TYPE | CONDITION | LoS RESULT | REFERENCE |
|---|---|---|---|
| FLYING UNITS | |||
| Full Cover | When checking Line of Sight to or from a Flying model, ignore the Full Cover rule. | ✔ VISIBLE – NO COVER | §7.1.1 |
| Direct Cover target | Flying Units' Effective Size is always higher than the Effective Size of any terrain piece on the table. | ✔ VISIBLE – NO COVER | §7.1.1 |
| Direct Cover attacker | LoS trace passes through terrain, AND target is Within 1" of that terrain AND terrain Effective Size ≥ target Effective Size | ✖ LoS BLOCKED (unless Close Quarters) | §7.1.1 |
| HIGH GROUND Cover | Flying Units never benefit from HIGH GROUND Cover, regardless of their physical position on the battlefield. | ✖ NO EVADE BONUS | §7.1.3 |
| SIZE | BLOCKING? | PASSABLE? |
|---|---|---|
| Size 0 | ✖ NOT BLOCKING | ✔ PASS FREELY |
| Size 1 | ✔ BLOCKING | ✔ PASS FREELY |
| Size 2 | ✔ BLOCKING | ✖ CANNOT PASS |
| Size 2 - GRASS | ✔ BLOCKING | ◆ PASS (destroyed) |
| Size 3+ | ✔ BLOCKING | ✖ CANNOT PASS |
| ELEVATION | HOW TO REACH / RULE |
|---|---|
| GROUND LEVEL | Standing on the battlefield |
| MID GROUND | Horizontal terrain Size 1–2 |
| HIGH GROUND | Horizontal terrain Size 3+ |
| Change elevation | Must use an ACCESS POINT |
| Flying Units | Ignore terrain; move point-to-point |
The Engagement Range extends 1" horizontally from any model's base. When two Enemy models are Within 1" of each other, they are Engaged – locked in close combat. Unless stated otherwise, a Unit cannot end any movement or be PLACE within the Engagement Range of any enemy model. When any model in a Unit is Engaged with any model in an Enemy Unit, both Units are considered Engaged.
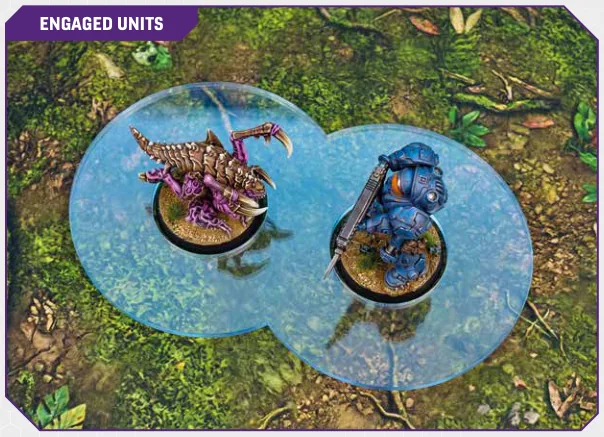
Models are Engaged only when all of the following conditions are met:
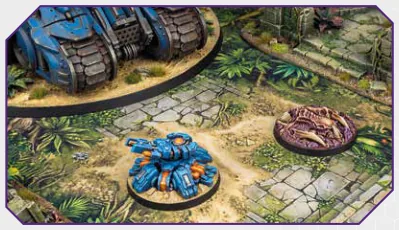
Tokens represent tangible battlefield assets – Creep Tumors, Corrosive Bile, and Shades. Treat them as Terrain (Size 0) with their own base. Models may move through Tokens, but cannot end movement overlapping them unless specified. Tokens are removed at the end of the Game Round unless stated otherwise. Always measure to the closest base edge of a Token.
Markers are used to keep track of status or game states. Unlike Tokens, they have no physical presence. They do not block Line of Sight or Movement.
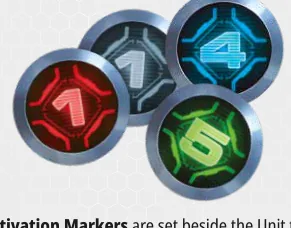






When the last model falls, the Unit is Destroyed. Every effect, ability, and condition currently on the Destroyed Unit immediately ends. Tokens created by the destroyed Unit are removed (unless they are STAY IN PLAY). Effects that the Destroyed Unit applied to other Units remain on those Units unless the effect explicitly states otherwise. A Destroyed Unit cannot return to play unless a specific rule states otherwise.
With the basics covered and the troops assembled, the time to fight has arrived. Each Round of the battle follows a straightforward progression: moving Units, shooting, savage close combat, and scoring objectives. This section will cover each step of the fight cycle, beginning with the initial Move action and concluding with the final Victory Point tally.
A game lasts up to 5 Rounds. Each Round has four Phases resolved in strict order:
| PHASE | NAME | KEY ACTIONS |
|---|---|---|
| 1 | The Movement Phase | Deploy, Move, Disengage, Hold |
| 2 | The Assault Phase | Ranged Attack, Charge, Run, Hold |
| 3 | The Combat Phase | Close Ranks, Close Combat Attack |
| 4 | The Scoring & Cleanup Phase | Control Markers, Score VP, Cleanup |
During Phases 1, 2 and 3, players use Alternating Activation. The holder of the First Player Marker decides which player activates first each Phase. Players then alternate, each activating one Unit per turn. Each Activated Unit performs exactly one action from the list available in that Phase.
At any point during a turn, the Active Player may Pass instead of activating a Unit. A player must Pass if they have no eligible Units left.
The first player to Pass in a Phase takes the First Player Marker for the next Phase. Once a player Passes, they cannot activate any further Units this Phase. The opponent then completes their remaining activations.

Players Roll-Off (Part 3.2). The winner assigns the First Player Marker to either player for Round 1.
No Units begin on the battlefield. All Units included in the Army List start in Reserves. Bring them onto the battlefield during the Movement Phase as Supply allows.
Reinforcements do not arrive all at once; Warp conduits take time to stabilise, Overlords require flight corridors, and Dropships queue on orbital approach vectors. The Supply Pool is the total available capacity that any commander may have at any instant, and this increases as logistics close the gap on the frontline.
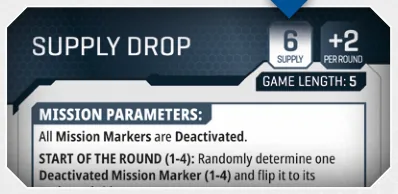
A commander's resources are only so plentiful. Every squad draws from the same pool of ammunition, bandwidth, and command focus. The resources you've committed so far will determine what remains available. Managing the gap between what's been committed and what's still accessible is what distinguishes a measured escalation from an army peaking too early. Available Supply equals the Current Supply Pool minus the Total Supply of Friendly Units on the Battlefield. A Unit can only be fielded if its Current Supply Value is less than or equal to the Available Supply. Units Destroyed in battle (or reduced by casualties) free up Available Supply for new arrivals.
When a Unit arrives from Reserves, that Unit cannot end its arrival during that Activation inside the opponent's Zone of Influence. This restriction applies to all forms of arrival, whether the Unit enters from an edge, arrives via a Warp Prism, or is summoned. Additionally, a Unit can never end a Deploy action Out of Coherency. If all models cannot be placed legally while maintaining Coherency, the Unit cannot be deployed in that location.
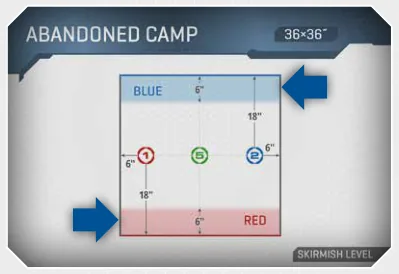
Information about the Influence Zone can be found on the deployment card.
The ground is constantly shifting even before the first shot is fired. Teams dig in, reinforcements pour in from above, and exhausted Units fall back to regroup. During the Movement Phase, the battlefield terrain changes as a command decides where the battles will be fought. At the start of the Movement Phase:
Orders are issued one at a time. A squad moves, a position is taken, and the Enemy reacts. Every activation is a commitment. On the Active Player's turn, choose one:
After the action, set an Activation Marker (Movement side) next to the Unit.

The first player to Pass takes the First Player Marker for Phase 2. Set Activation Markers (Movement side) next to any Friendly on-table Units that did not activate.
The Unit performs no action. Set an Activation Marker beside it. The Unit counts as Activated for the current Phase.
An Unengaged Unit changes its position on the battlefield.
When a rule instructs a Unit to Move, Run, or otherwise reposition using standard movement, resolve it as follows: STEP 1 - THE LEADING MODEL
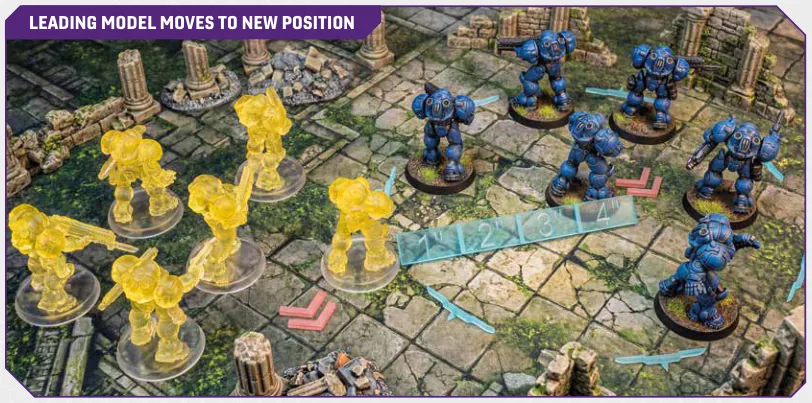
STEP 2 - OTHER MODELS
TERRAIN INTERACTIONS
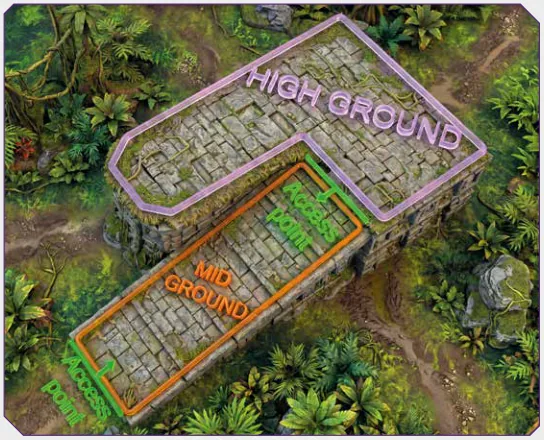
ELEVATION Models can stand on one of three elevations:
The model stands on Elevation if its base is at that elevation. If the model's base is on multiple elevation levels, assume it is standing on the highest of those elevations. ACCESS POINTS connect different elevation levels. Models change elevation only by moving through an ACCESS POINT (examples: ladders, portals, doors). Coherency links may pass through ACCESS POINTS. RAMPS are Size 1 MID GROUND terrain. A model on a ramp at any point along its surface is at MID GROUND elevation. Models cannot pass through a ramp freely – they may only enter and exit through the ramp's two ACCESS POINTS (one at the base, one at the top) and may end their movement on the ramp.
FLYING MOVE Units with the Flying Combat Tag ignore all normal movement restrictions. The Leading Model moves point-to-point, ignoring all terrain and models between the start and end. Other models may pass through a Flying model's base as if it were not there. Flying Units and Engagement Range:
A Flying Unit must end its movement at least 1" away from all Enemy Flying Units.
The most challenging manoeuvre a squad will ever make is to pull back under heavy fire. Losing the initiative on a pinned position demands calm discipline, swift action, and enough firepower to keep the pursuers at bay.
An Engaged Unit withdraws from melee.
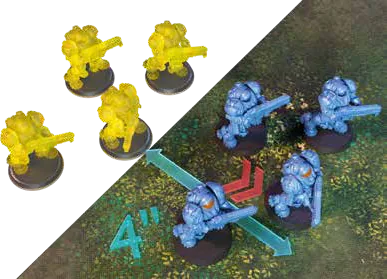
The moment boots hit the ground, there is no going back. Timing a deployment correctly can swing an entire flank. Timing it wrong feeds reinforcements into a meat grinder. A Unit from Reserves enters the battlefield.
UNITS RETURNED TO RESERVES Some rules will remove the Unit from the battlefield and return it to the Reserves. The Unit is not Destroyed; it has left the battlefield. When the Unit is returned to the Reserves, the Current Supply used by the Unit is released, and the Available Supply is recalculated from that moment onwards. The Unit keeps all the equipment it had when it left the battlefield. The Damage recorded by the Damage Marker that the Unit suffered before it was removed remains with the Unit. When the Unit is redeployed, it will carry the same Damage. Any buffs, debuffs, or mission effects with a set duration "until the End of the Round" and similar effects stay on the Unit. However, the clock does not pause just because the Unit has left. If an effect were to expire during Cleanup & Refresh (Part 8.9.5), it still would, whether the Unit is on the table or not. While in Reserves, the Unit keeps all its Active, Passive, and Reaction Abilities, but none of them function. They cannot be triggered, they produce no effects, and they cannot be used to pay costs or respond to events. They are on the card, not on the battlefield. When the Unit redeploys, all its abilities resume immediately unless an ability explicitly states otherwise. However, the Tokens and Markers that the Unit left behind on the battlefield will be removed, unless they have the STAY IN PLAY keyword. If the Unit was Activated during the current Phase, once it is returned to the Reserves, it will remain Activated and will not be able to take further action within the current Phase.
It is here that the line finally breaks. Gauss Rifle fire cracks along the fire lanes, siege shells soar over the barricades, and Zealots charge the last metres in a last- ditch push. The Assault Phase is when the Damage is done, Ranged Attacks tear through exposed Units, and Charges strike defenders who chose a poor position.
On the Active Player's turn, activate a Unit with an Activation Marker (Movement side) and select one action: Run, Hold, Charge, or Ranged Attack. After completing the action, set an Activation Marker (Assault side) next to it. Units still in Reserves cannot act during this Phase.

The first player to Pass takes the First Player Marker for Phase 3. Set Activation Markers (Assault side) next to any Units that did not activate.
Sometimes the best use of a Unit's activation is not to fight at all. A squad repositioning to claim a Marker next Round, a flanking force closing the gap before a decisive Charge, or a screening Unit pulling back from an exposed position are all valid reasons to give up an entire Assault Phase activation without firing a shot.
An Unengaged Unit moves across the battlefield following the standard Move rules (Part 8.5.3). The procedure is identical to a Movement Phase Move: Nominate a Leading Model, move it up to the Unit's Speed, and set remaining models In Coherency. All standard restrictions apply, including Gap Clearance (Part 4.6) and the prohibition on ending Within the Engagement Range of Enemy Units.
The Unit does not take any action. Set an Activation Marker (Assault side).
Fire is the language of the Assault Phase. A volley of Gauss Rifle rounds tears through a Unit caught crossing open ground. A Hydralisk spine salvo pins down an advancing squad behind a wall. A single Siege Tank shell lands among a cluster of infantry and scatters them. Every ranged weapon on the battlefield has the potential to reshape the fight before the enemy can close the distance, but only if the shot is aimed at the right target, at the right time, with the right weapon. A Ranged Attack is resolved in two stages. First, the attacking player selects a valid target and assigns weapons to it. Second, the attack is resolved through the three-pool system: dice move from the Attack Pool through the Armour Pool to the Damage Pool, with each stage giving both sides a chance to influence the outcome. Units with multiple weapon profiles may split their fire across different targets, resolving each weapon as a separate Batch. 1. TARGET ELIGIBILITY A valid target must meet all of the following criteria:
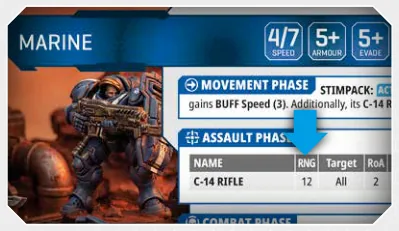
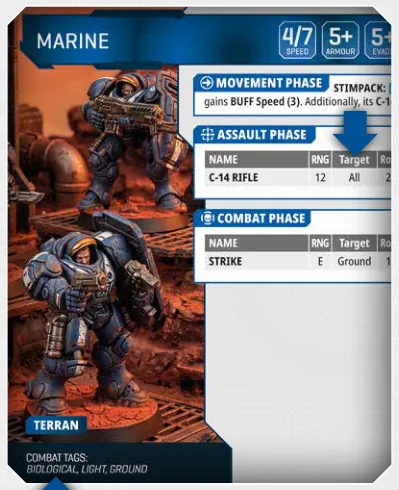
2. WEAPON SELECTION AND BATCHING Each model fires one of its available Assault Phase weapons. All models using the same Weapon Profile must fire at the same target – the player cannot split a single profile's fire. A Batch consists of all models firing the same weapon at the same target. This same-profile, same-target rule applies to SIDEARM weapons as well – all models firing the same SIDEARM profile must target the same Unit, although that Unit may differ from the target of the Unit's other weapons.

If a Unit has multiple Weapon Profiles, it may fire at different targets – resolved in separate Batches. REMOVING DICE: When a Special Ability reduces the number of dice within a Batch, the player controlling the Unit resolving that ability chooses which dice are removed. BATCH SEQUENCE: Declare the target of one Batch, resolve it fully, and then declare the next Batch. The player does not declare all targets simultaneously.
Every attack is resolved by moving dice through three pools. Dice begin in the Attack Pool, pass through the Armour Pool, and end in the Damage Pool. Dice that survive the entire sequence inflict casualties. ATTACK POOL. Generate a number of dice equal to each attacking model's Rate of Attack (RoA). Roll all dice in this pool against the weapon's Hit characteristic. Each die that meets or exceeds the Hit value is a success. Move it to the Armour Pool. Discard all failures. ARMOUR POOL. The defender rolls all dice in this pool against the target Unit's Armour characteristic. Each die that meets or exceeds the Armour value is a success. Discard it. Move all failures to the Damage Pool. Some effects bypass this roll entirely: dice moved out of the Armour Pool by Surge or CRITICAL HIT are set directly into the Damage Pool without an Armour Roll. DAMAGE POOL. Each die remaining in this pool inflicts Damage equal to the weapon's Damage characteristic. If the target Unit is eligible for an Evade Roll, the defender rolls all dice in this pool against the Unit's Evade characteristic before Damage is applied. Each die that meets or exceeds the Evade value is a success and is discarded. Remaining dice inflict Damage as normal.
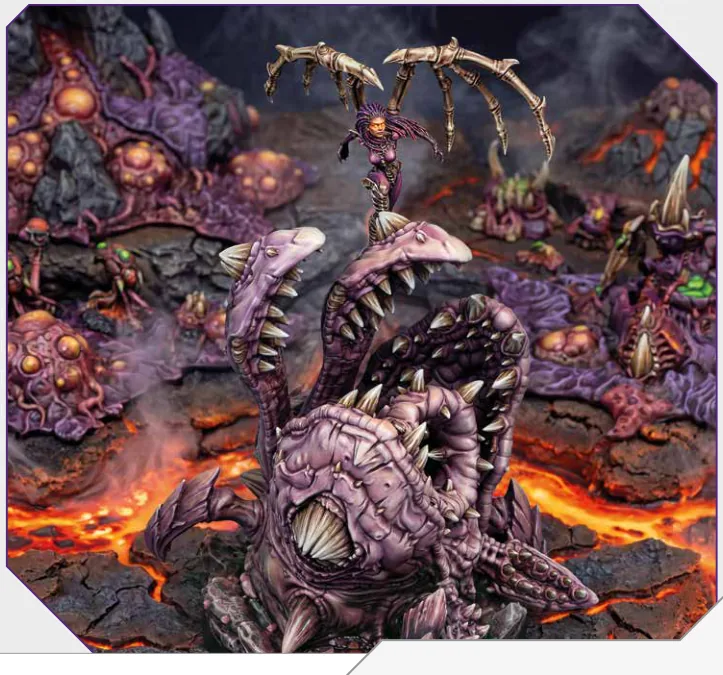
Resolve each Batch in sequence: 1. ROLL TO HIT
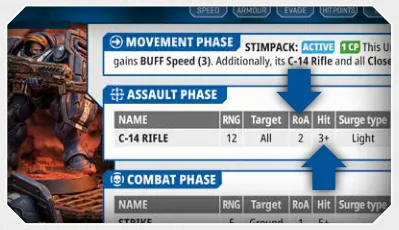
2. RESOLVE SURGE
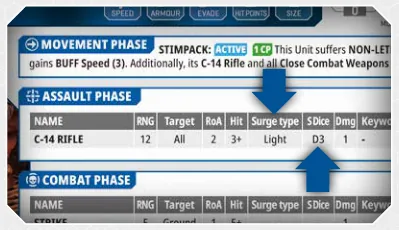
3. ARMOUR ROLLS
4. EVADE ROLLS Perform this step only if the target Unit qualifies:
If eligible, the defender rolls all dice in the Damage Pool. Results equal to or higher than the Unit's Evade characteristic: success – remove those dice. Remaining dice are confirmed Damage. 5. RESOLVE DAMAGE AND CASUALTIES If there are no dice left in the Damage Pool, ignore this phase.
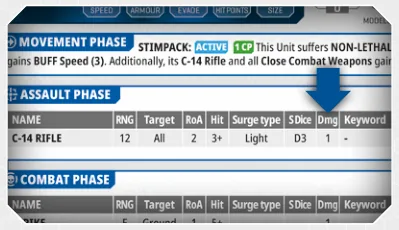
Damage
• The attack cannot remove more models than the number of Visible models in the target Unit. • While Total Damage equals or exceeds a model's HP, remove one Visible model and reduce Total Damage by that model's HP. Repeat. • If all Visible models are Destroyed, discard remaining Total Damage – it does not carry over to non-Visible models. • If Total Damage remains but cannot Destroy the next Visible model, record it with a Damage Marker (e.g. a D6 set next to the Unit).
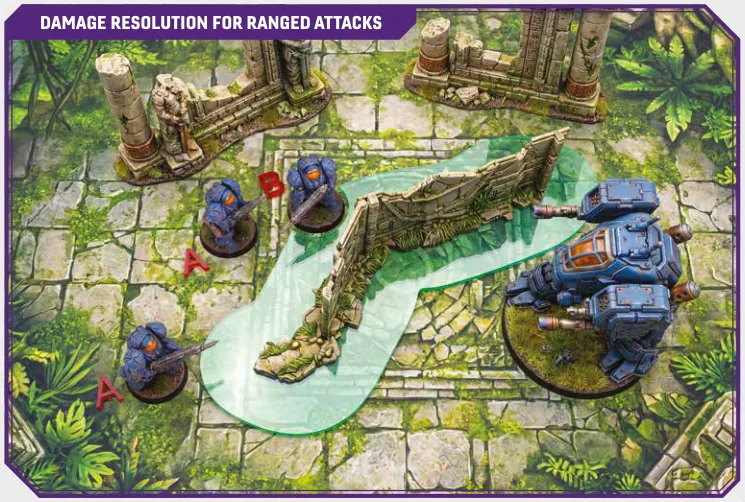
When the target Unit is Engaged, ignore standard Visibility rules. Whenever an Engaged Unit suffers casualties from any source, ignore standard Visibility rules and apply the following priority order instead. The defending player must remove casualties in this strict priority order: Priority 1: Models not Within the Engagement Range of any Enemy Unit.
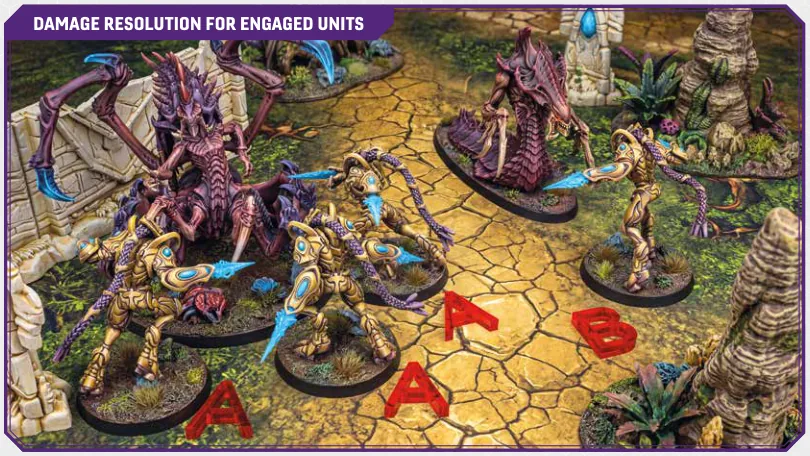
Priority 2: Models Within the Engagement Range but not in Base-to-Base contact. Priority 3: Models in Base-to-Base contact with an Enemy model. When selecting a model to remove at Priority 2 or 3, the defending player cannot choose a model if removing it would cause the Unit to stop being Engaged with a specific Enemy Unit – provided there is another valid casualty in any priority tier.
BLAST TEMPLATE (BT) / FLAMER TEMPLATE (FT) 1. ALIGNMENT
model's base edge and aimed at the target. The centre of the target model's base is the Target Point.
level as the Target Point.
2. DECLARING TARGETS Follow standard Target Eligibility (Part 8.7.3) with this exception: select one Enemy Unit as the Primary target – all models in that Unit covered by the template are the Main target. Every other model (Friendly or Enemy) covered by the template is resolved under Spillover, provided they share the same elevation and Combat Tag as the Primary target.
3. DETERMINING HITS A model is affected if all of the following are true:
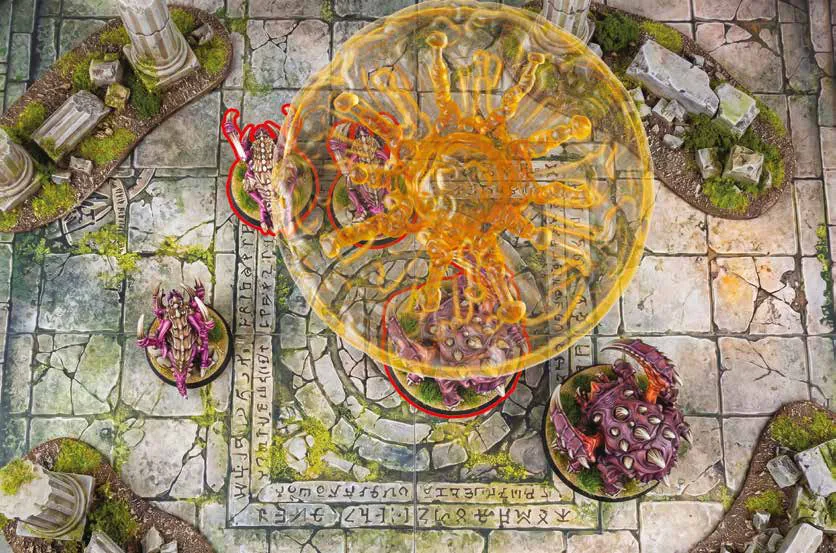
4. ATTACK POOL GENERATION
5. RESOLUTION
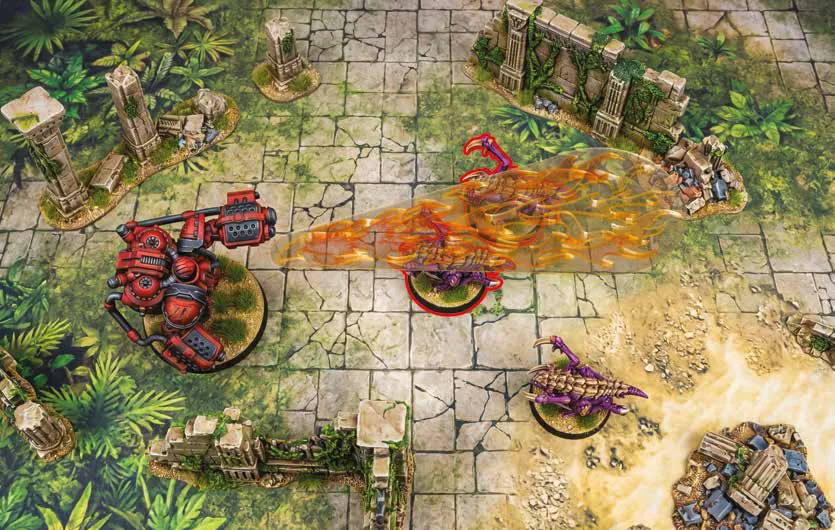
The last few metres are the longest. A charging squad crosses open ground with nothing between them and the Enemy but speed, aggression, and the hope that the dice fall right. An Unengaged Ground Unit moves into the Engagement Range of Enemy Units. 1. DECLARE TARGETS
Flying Units cannot Charge or be Charged.
2. DETERMINE CHARGE DISTANCE
3. SUCCESSFUL AND FAILED CHARGES The Charge succeeds only if the Leading Model can be legally set in a position that is:
Wholly Within the Charge Roll Distance of its starting point.
If the Charge fails, the Unit does not move. Its activation ends immediately.
4. EXECUTE THE MOVE Move the Leading Model into the valid position. Set it in Base-to-Base contact with the Charge target(s)
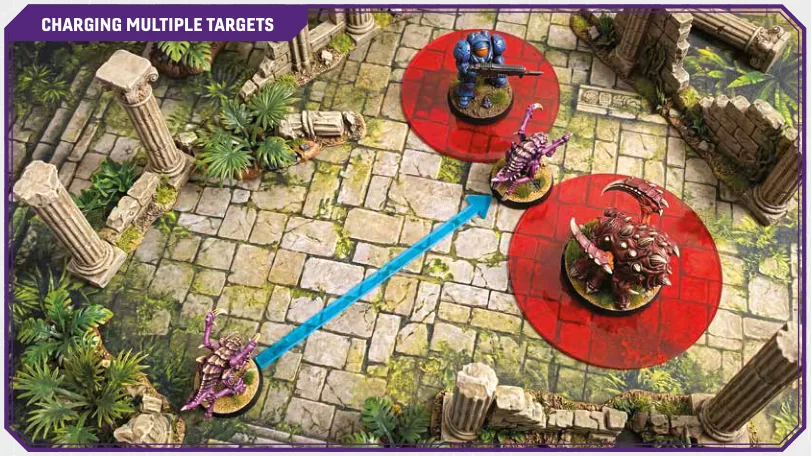
if possible – otherwise as close as possible Within the Engagement Range. Set remaining models In Coherency. Coherency Links may pass through Enemy models the Unit is Engaged with (Part 4.4). None may end Within the Engagement Range of a Unit not declared as a target. Placement priority:
There is no room for tactics at arm's length. Psi blades
clash with claws, bayonets scrape against carapace, and the only thing that matters is who is still standing when the dust settles. During the Combat Phase, Engaged Units close the distance to their foes and trade blows in brutal melee combat. Unlike the previous Phases, where activation is voluntary, every Unit currently in the Engagement Range of an Enemy must act in this Phase. A player cannot choose to skip a fight. Flying Units are never Engaged and therefore never participate in the Combat Phase. They cannot be Activated, cannot Close Ranks, and cannot be the target of Close Combat Attacks.
ACTIVATIONS Players take turns activating one Engaged Unit at a time. The holder of the First Player Marker chooses who activates first. Players then alternate, each activating one Engaged Unit per turn. When an eligible Unit is Activated, it follows the Close Combat Attack (Part 8.8.1).
UNIT ELIGIBILITY Only Engaged Units may be Activated during this Phase. Unengaged Units cannot act. Once a Unit's Close Combat Attack is fully resolved, remove its Activation Marker.
PASSING A player Passes only when they have no remaining Engaged Units to activate. When both players Pass, the Phase ends.
An Engaged Ground Unit attacks Enemy Units it is Engaged with. 1. CLOSE RANKS (OPTIONAL) Before rolling the dice, the Unit may press into the fight:
• The Leading Model must end closer to the Unit(s) it is Engaged with than it started. • This move cannot bring the Unit into Engagement with new Enemy Units not already Engaged at the start of this Phase.
2. DECLARE ATTACKERS Determine which models may strike:
Line of Sight is not required. Eligible models strike the Enemy Unit as a whole.
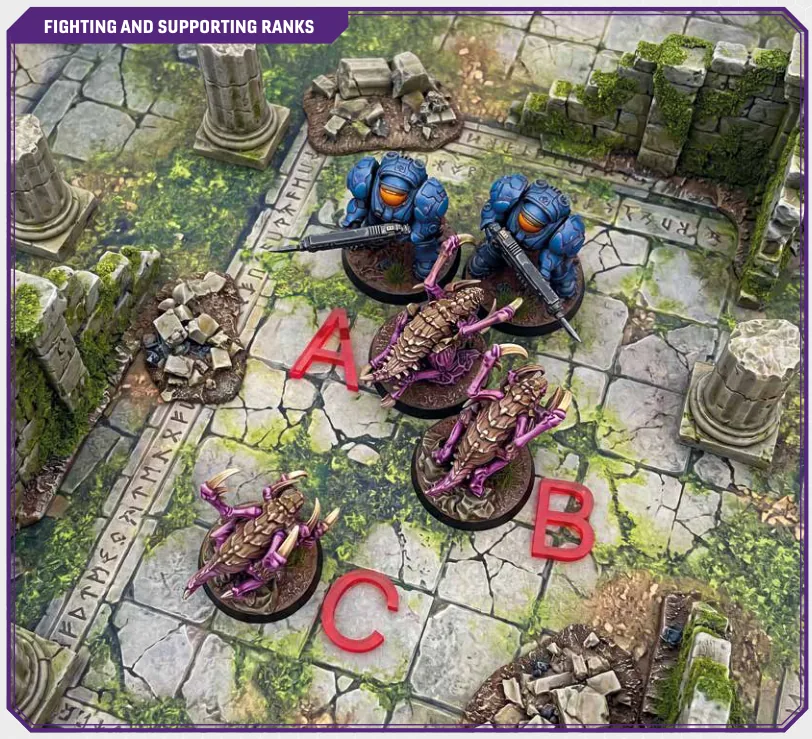
3. ROLL ATTACKS Resolve attacks using the same sequence as Ranged Attacks (Part 8.7.4) with this restriction:
Note: Evade Rolls are only available in the Combat Phase if the Unit has a Special Ability or keyword that explicitly grants an Evade Roll against Close Combat attacks. 4. FIGHTING MULTIPLE UNITS If Engaged with more than one Enemy Unit simultaneously:
5. CASUALTY REMOVAL Follow the Engaged Unit rules (Part 8.7.5). 6. POST-COMBAT STATUS After casualties are removed:
Score, cleanup, set initiative. The first player initiates each step in order: 1. Determine Mission Marker Control 2. Score Victory Points 3. End of Game Check 4. Resolve End of the Round Effects 5. Cleanup & Refresh 6. Determine Initiative
IDENTIFY CONTESTING UNITS A Unit may Contest a Mission Marker only if all three conditions are met:
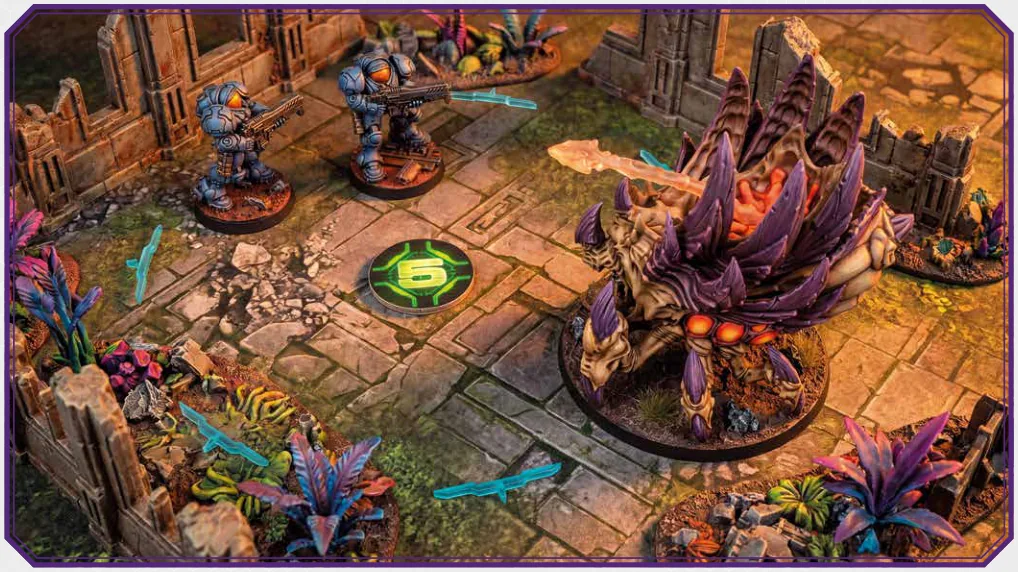
A Flying Unit cannot Contest or Control Mission Markers, regardless of its position or Coherency state. CALCULATE CONTROL For each Marker:
STICKY CONTROL Set a Faction Indicator on each controlled Marker. Once a Marker is controlled, it remains under that player's control – even if they move Units away – until the opponent actively reclaims it by ending a Scoring Phase with a higher contesting Supply total. A Contested result (tied Supply) never transfers control: the Marker stays with whoever currently holds it, or remains neutral if it has never been controlled. A Marker cannot become neutral again once a player has taken control of it.
| SCENARIO | OUTCOME | NOTES |
|---|---|---|
| HOW CONTROL IS DECIDED (§8.9.1) | ||
| Player A Supply > Player B Supply | ✔ PLAYER A CONTROLS | Sum Current Supply Value of all eligible contesting Units - not model count. |
| Player A Supply = Player B Supply | ◆ CONTESTED | No change of control. Stays with current owner (or neutral if never held). |
| Only one player contests | ✔ THAT PLAYER CONTROLS | Includes the case where the only contesting Unit is at Supply 0. |
| No player contests | ● NO CHANGE | Sticky Control - Marker stays with the current owner until actively reclaimed. |
| STICKY CONTROL (§8.9.1) | ||
| Controlled Marker - owner moves away | ✔ STAYS CONTROLLED | Control is only lost if the opponent ends a Scoring Phase with a higher Supply total. |
| Contested result (tied Supply) | ◆ NO TRANSFER | Tied Supply never transfers control. Current owner keeps it. |
| Once controlled - can it revert to neutral? | ✖ NEVER NEUTRAL AGAIN | Once a player has taken control, the Marker cannot become neutral again. |
| MARKER AFFINITY (§9.2.1) | ||
| Markers 1 & 3 | ● RED PLAYER | Affinity is set after the draft is complete. |
| Markers 2 & 4 | ● BLUE PLAYER | Affinity is set after the draft is complete. |
| Marker 5 | — NEUTRAL | No player affinity. |
| CONDITION | REQUIRED? | DETAIL |
|---|---|---|
| ELIGIBILITY TO CONTEST - ALL THREE MUST BE MET (§8.9.1) | ||
| Unit on the battlefield | ✔ REQUIRED | Units in Reserves cannot contest. |
| At least one model Within 3" of the Marker has LoS, on the same elevation | ✔ REQUIRED | Measured from base edge. LoS and elevation checks are both required. |
| Unit is In Coherency | ✔ REQUIRED | Out of Coherency Units cannot contest or control any Marker. |
| SPECIAL STATES | ||
| Supply 0 Unit | ◆ CONDITIONAL | Can control a Marker if no Enemy Units contest it. Cannot win a contest. |
| BURROWED Unit | ✖ CANNOT CONTEST | Overrides standard contesting rules regardless of position. (BURROWED) |
| Out of Coherency Unit | ✖ CANNOT CONTEST | Ineligible even if models are Within 3". |
| Flying Unit | ✖ CANNOT CONTEST | Airborne Units do not hold ground. Overrides standard contesting rules regardless of position. (Flying) |
Both players simultaneously tally VPs based on the Mission Card's scoring conditions.
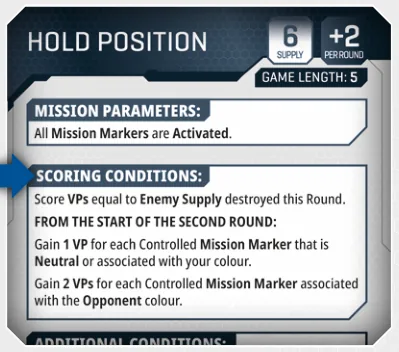
The game ends immediately if:
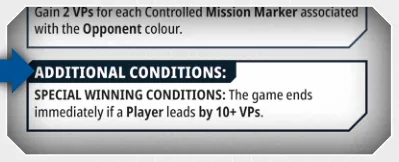
Resolve all "End of the Round" abilities. The holder of the First Player Marker resolves their first. If a player has multiple "End of the Round" effects to resolve, that player chooses the order in which their effects resolve. Each effect is fully resolved before the next begins.
• Tokens and Markers with STAY IN PLAY. • Damage Markers. • Mission Markers. • Faction Indicators that represent Control over Mission Markers.
When the last round is fired, and silence falls, the final victory hinges on territory gained and lives lost. Every objective taken, every Enemy line crossed, every soldier kept in reserve – all details contribute to deciding the day's victor. The battlefield tells a story, but the scoreboard tells who wrote it. If the game ends by the Round Limit:
Determine Winner: The player with the highest final VP total wins. Tiebreaker: If both forces have scored the same number of total VPs, apply the Mission Card's tiebreaker. If none is defined, the game is a Draw.
Before any game begins, each player must prepare their forces, choose the mission and deployment type, and set up the board. This section covers the entire pre- game procedure: building your army with Minerals and Vespene Gas, drafting the Mission and Deployment, and setting up the battlefield.
Every battle begins long before the first shot is fired. Players will build an army using two resources: Minerals, which are used for Units and Upgrades, and Vespene Gas, which is used for Tactical Cards.
To ensure that forces are equal, players agree on the Engagement Scale before building an army:
| SCALE | MINERAL LIMIT | VESPENE LIMIT | BATTLEFIELD |
|---|---|---|---|
| Skirmish | Up to 1 000 | 10% of Minerals | 36" × 36" |
| Standard | Up to 2 000 | 10% of Minerals | 36" × 54" |
| Grand Offensive | 2 001+ | 10% of Minerals | 36" × 72" |
The player chooses one of the three races – Terran, Zerg, or Protoss, and then selects a single Faction Card. This card forms the basis of the army, providing the initial organisation slots (e.g., Kerrigan's Swarm 3× Core, 1× Hero, 2× Support) and determining which Units and Tactical Cards may be included. FACTION TAG ELIGIBILITY Every card in the game features Faction Tags, which indicate the faction it belongs to. A Faction Card always displays a Race Tag (e.g., Zerg) and usually includes a Sub-Faction Tag as well (e.g., KERRIGAN'S SWARM). Unit Cards and Tactical Cards also carry their own Faction Tags in the same manner. When building an army, the player checks whether a Unit or Tactical Card is allowed by comparing its tags to the Faction Card. The rule is simple: every tag on the Unit or Tactical Card must also appear on the Faction Card. If even one tag does not match, that card cannot be included in the army. It does not matter how many other tags match; a single incorrect tag is enough to disqualify it. Cards with fewer tags than the Faction Card are perfectly fine. A Unit only requires its own tags to be present; it does not need to match every tag the Faction Card has.
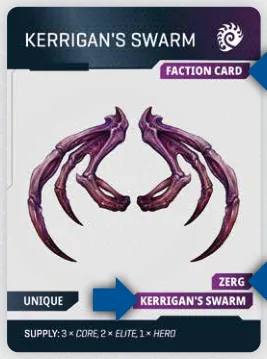
EXAMPLE: A player selects the Zerg Swarm Faction Card, which has one Faction Tag: Zerg. Zerglings (Faction Tags: Zerg) – Eligible. The only tag on the card is Zerg, and Zerg appears on the Faction Card. Kerrigan Swarm Raptor (Faction Tags: Zerg, Kerrigan's Swarm) – Not eligible. Kerrigan's Swarm does not appear on the Faction Card. Even in Zerg matches, a single missing or incorrect tag disqualifies the card.
Spend Minerals to recruit Units and purchase Upgrades. The total Mineral cost must not exceed the Engagement Scale limit. Unspent Minerals are lost.
Spend Vespene Gas exclusively on Tactical Cards. It cannot be converted into Minerals. Unspent Vespene Gas is lost. EXAMPLE: At Standard scale (2,000 Minerals), players have 200 Vespene Gas (10%) to spend on Tactical Cards.
Tactical Cards unlock additional Army Slots (Core, Elite, Support, Air, Hero) beyond those provided by the Faction Card. Tactical Cards may be purchased with Vespene Gas to increase the number of available slots. All Tactical Cards and the Faction Card are set face-up on the table before the game begins. Consult the Army Reference section (Part 12.11) for each Tactical Card's Vespene Gas Costs. If a Tactical Card is marked as Unique, only one copy may be included in the army. EXAMPLE: A Barracks card opens additional Core slots for Marine Units. An Academy card opens Support slots for Medics.
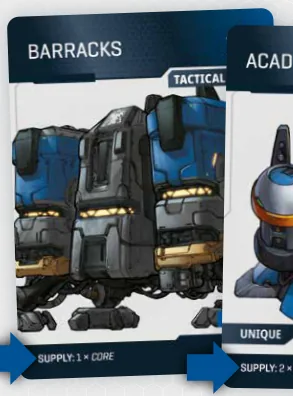
Fill available Army Slots with eligible Units. Consult the Army Reference section (Part 12.12) for each Unit's available Composition Options. Each Composition Option lists a model count and its corresponding Mineral Cost. The player must select one Composition Option per Unit, which determines the number of models in the Unit and its starting Supply Value, as shown on the Unit Card's Supply Profile. A player cannot field a Unit at a model count that does not appear as a Composition Option. Each Unit occupies a number of Army Slots equal to its starting Supply Value. Pay the Mineral Cost for every Unit recruited. Unused Army Slots are lost. Consult the Army Reference section (Part 12.10) for each Unit's available Composition Options and Mineral Costs. EXAMPLE: A Zerg player chooses Kerrigan's Swarm as their Faction Card, which provides them with 2 Elite Army Slots. The player can recruit one small Hydralisk Unit, as its Supply Value indicates that it occupies exactly 2 Elite Army Slots. If the player wishes to include a full-strength Hydralisk Unit instead, it will occupy 3 Elite Army Slots. Therefore, the player must add any Tactical Card to their army that provides an additional Elite Army Slot as needed.
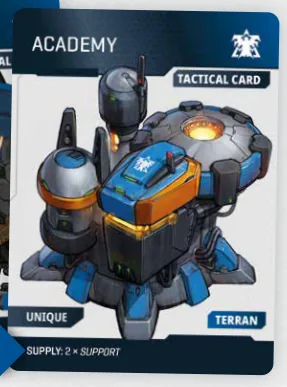
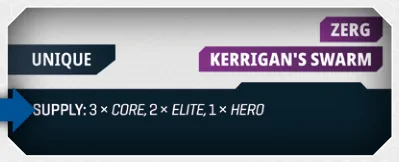
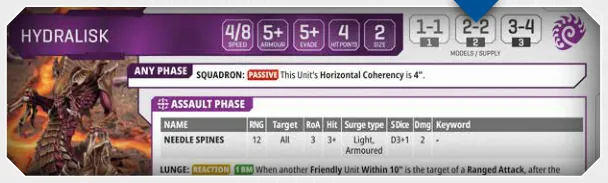
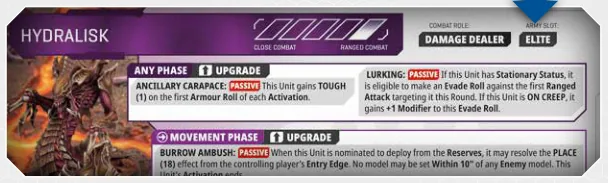
Each Unit Card displays available upgrades on its reverse side. During Army Building, a player may purchase any number of upgrades listed for that Unit, paying the listed cost for each. There is no limit to how many upgrades a Unit may have, provided each is a different entry on the card. A purchased upgrade applies to every model in the Unit unless it has the SPECIALIST keyword. If the upgrade adds a new weapon or ability, all models gain it. If the entry shows ↑ FOR [Weapon Name], it is a replacement; every model carrying the named weapon loses it entirely and gains the upgrade weapon instead. SPECIALIST upgrades work differently. Only one model in the Unit may carry each SPECIALIST upgrade. The player nominates which model receives it during Army Building; all other models keep their original equipment. A Unit may not purchase the same SPECIALIST upgrade more than once, but it can buy two or more different SPECIALIST upgrades, each assigned to a different nominated model. Since a nominated model now carries a different weapon from the rest of the Unit, it resolves its attacks as a separate Batch during the Attack Sequence (Part 8.7.3). EXAMPLE: A player purchases a Rocket Launcher (SPECIALIST) and an AGG-12 (SPECIALIST, ↑ FOR C-14 Rifle) for a Unit of 6 Marines. One Marine is nominated to carry the Rocket Launcher alongside the C-14 Rifle. A second Marine is nominated to carry the AGG-12, losing their C-14 Rifle. The remaining 4 Marines keep their C-14 Rifles.
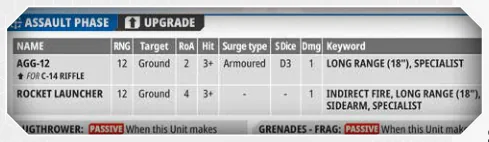
Standard Engagement Scale: up to 2000 Minerals; up to 200 Vespene Gas. Terran player builds a Raynor's Raiders army.
STEP 1 - SELECT FACTION CARD
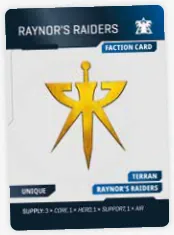
Starting army slots: 3 Core · 1 Hero · 1 Support · 1 Air · 0 Elite
STEP 2 - PURCHASE TACTICAL CARDS, UP TO 200 VESPENE GAS
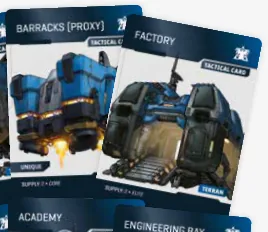
25 [Barracks] + 40 [Barracks (Proxy)] + 35 [Factory] + 25 [Orbital Command] + 35 [Academy] + 25 [Engineering Bay] = 185 Vespene Gas spent
15 Vespene Gas remaining (unspent, lost)
Total army slots (Faction + Tactical Cards combined): 8 Core · 1 Hero · 3 Support · 1 Air · 2 Elite
STEP 3 - MUSTER UNITS, UP TO 2000 MINERALS
| UNIT | COMPOSITION | SUPPLY | SLOT | MINERALS | SLOTS USED |
|---|---|---|---|---|---|
| Marine | 9 Models | 2 | Core | 210 | 2 of 8 |
| Marine | 9 Models | 2 | Core | 210 | 2 of 8 |
| Marine | 6 Models | 1 | Core | 160 | 1 of 8 |
| Marauder | 4 Models | 2 | Core | 280 | 2 of 8 |
| Marauder | 2 Models | 1 | Core | 150 | 1 of 8 |
| Jim Raynor | 1 Model | 1 | Hero | 250 | 1 of 1 |
| Medic | 3 Models | 1 | Support | 110 | 1 of 3 |
| Medic | 3 Models | 1 | Support | 110 | 1 of 3 |
| Goliath | 1 Model | 2 | Elite | 190 | 2 of 2 |
1670 Total Minerals used on Units. 330 Minerals remain for upgrades or additional units.
Slots used: 8/8 Core · 1/1 Hero · 2/3 Support · 0/1 Air · 2/2 Elite
In multiplayer games (2v2, 3v3, Free-For-All), agree on a Total Mineral Value per team. Teams divide the budget among players as they wish, provided the team's total remains within the allowed limits. Each player builds their own army independently, selecting their own Faction Card and Tactical Cards. Teammates may choose the same or different Races.
Some Units, such as the Roachling, Point Defence Drone, and Pylon, have no Mineral Cost. These are Summoned Units:
Tournament Override: Organised tournaments may use their own roster visibility rules, which override the default rules below. Always check the Tournament Organiser's rules pack before attending. Default: Open Lists By default, both players share their entire army rosters – including all Unit selections, upgrades, and weapon swaps with each other before the game starts. Since Tactical Cards and the Faction Card are already set face-up on the table, Open Lists go one step further by revealing exactly which Units and upgrades the opponent has selected. This enables both players to plan their strategy with full information and is the recommended way to play. Optional: Closed Lists Before the game begins, both players may agree to play with Closed Lists instead. If either player does not agree, default to Open Lists. Under Closed Lists, army rosters are hidden. Neither player is required to reveal their Army List or Unit upgrades before the game starts. The specific Units in a player's roster are discovered during play as they are deployed. However, all Tactical Cards and the Faction Card must still be set face-up on the table before the game begins. Both players may inspect each other's Tactical Cards and Faction Cards at any time. Once a Unit is set on the battlefield, the controlling player must immediately inform the opponent of any upgrades or weapon swaps that the Unit carries. This includes replacement weapons purchased through the Upgrade system (Part 9.1.7) or any other modifications that affect how the Unit behaves. The opponent is entitled to inspect the Unit Card and any associated Tactical Cards at any time while that Unit is on the table.
All models should, where possible, accurately depict the weapons and equipment listed on their Unit Card. A Marine equipped with an AGG-12 should carry that weapon on the model, not a standard C-14 Rifle. Accurate modelling allows both players to identify each model's loadout at a glance. Where a model does not accurately represent its equipment – such as a model awaiting conversion, or a Unit carrying weapon swaps that are not visually distinct – the controlling player is obliged to declare all non-represented upgrades and equipment the moment that Unit is deployed to the battlefield. Furthermore, the controlling player must remind their opponent of any such differences before any action where this information could be relevant – including, but not limited to, declaring Charge targets, selecting Shooting targets, or committing to a critical activation. Both players have the right to full and accurate knowledge of all equipment on the battlefield at all times. Failing to disclose non-represented upgrades or equipment is considered unsportsmanlike conduct.
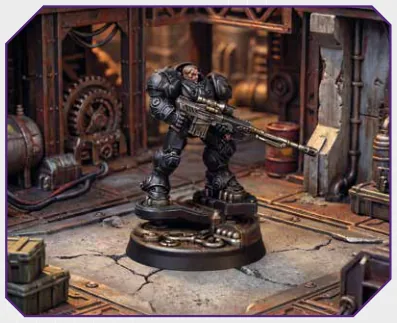
Before the game starts, players use a short draft to determine the Mission and Deployment for the battle. The draft ensures neither player enters with a pre- arranged advantage – both sides have equal say in what is played and where. WHAT YOU NEED Each player brings 2 Mission Cards and 2 Deployment Cards to the table. A player may not bring duplicate cards in their own set, although both players may independently bring the same cards as each other. Arrange all cards face-up in two rows: • Row 1: Mission Cards • Row 2: Deployment Cards
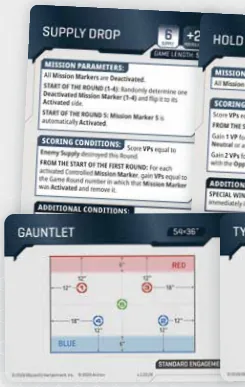
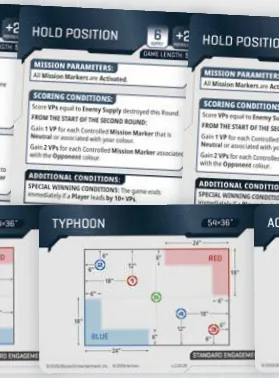
STEP 1 - ROLL-OFF Both players Roll-Off (Part 3.2). The winner makes two choices, in order:
STEP 2 - RESOLVE THE MISSION DRAFT
STEP 3 - RESOLVE THE DEPLOYMENT DRAFT Repeat the same process for the Deployment Cards:
STEP 4 - MARKER AFFINITY Once both cards are chosen, assign Mission Markers' affinity according to the Marker number. Marker Affinity:
Marker affinity indicates which player's colour is printed on each Marker. It does not grant starting control.
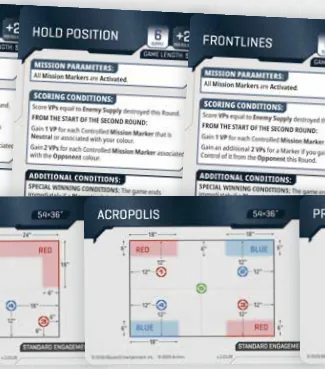
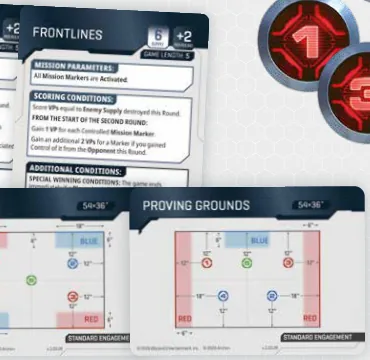
Mission Cards define the game's victory conditions and pacing. Each Mission Card details timing windows for triggered rules, the Starting Supply and Escalation values that control the rate at which armies grow, the Game Length (usually 5 rounds), and any Additional Conditions such as instant win scenarios. Deployment Cards define the battlefield's physical layout. Each Deployment Card details the battlefield dimensions, the coordinates for Mission Markers 1 through 5, the Entry Edge definitions for each player, and the Zone of Influence, which extends 6" inward from each player's Entry Edge.
Once the draft is complete and both cards have been chosen, the battlefield is set up in the following order.
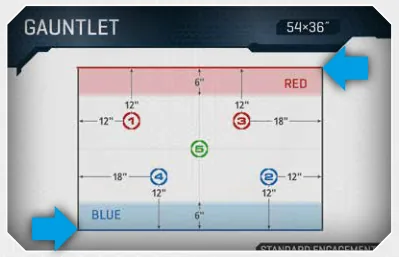
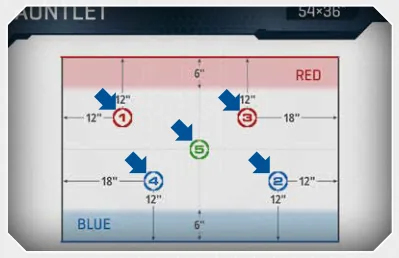
TERRAIN DENSITY GUIDELINES A balanced battlefield requires enough terrain for tactical choices without restricting movement or blocking sight lines. The following guidelines apply to a Standard (36" x 54") table and should be scaled proportionally for other sizes. Recommended Terrain Count: 8 to 12 pieces total, distributed as follows:
Distribution: Divide the table visually into four quarters. Each quarter should contain at least 2 significant pieces (Size 2 or larger). No quarter should be completely empty, and none should be so dense that Units cannot manoeuvre through it. The Centre: The area Within 6" of the table centre should contain at least one significant terrain piece. An empty centre creates a kill zone that punishes whoever moves first and can stall the game. Conversely, a completely blocked centre forces all engagements to the flanks. Fire Lanes: Ensure that at least 2 clear fire lanes of 6" or wider exist, running roughly from one Entry Edge towards the other. Without fire lanes, ranged Units have no role, and melee armies dominate unchecked. Access Points: Every piece of Size 3+ terrain that models can stand on should have at least one ACCESS POINT reachable from GROUND LEVEL without passing through another Size 2+ terrain piece. Elevated positions that are unreachable waste table space.
The basic systems outline the essentials of movement, firing, and hand-to-hand combat, but the true depth of StarCraft: Tabletop Miniature Game lies in the complex systems built upon these fundamental ones. This section will introduce Special Abilities (Active, Passive, and Reaction), the Tactical and Faction Card systems, which give every army a unique personality, and the resources needed to unleash powerful abilities in crucial moments.
All Special Abilities follow the same structure and universal rules. Each ability on a Unit Card or Tactical Card is presented using a consistent format:
An ability may be used only when all its requirements are met.
Unless stated otherwise, all effects granted by Active or Reaction Abilities that expire "at the End of the Round" remain active until all End of the Round effects (Part 8.9.4) are resolved. They are removed during Cleanup & Refresh (Part 8.9.5).
Active Abilities represent deliberate manoeuvres, technologies or enhancements that require a command to execute. A Unit may only use an Active Ability when it is currently Activated.
Once Per Round: A specific Unit may use a named Active Ability only once per Game Round, unless the ability has the REPEATABLE keyword. This limit applies to each Unit individually. Two different squads of the same Unit type can both use the same-named ability in the same Round, but a single squad may not use it twice. If a Unit gains access to an Active Ability via a Tactical Card, the Once Per Round limit still applies, regardless of how many copies of that card the player controls.
Effects granted by Active Abilities that expire at the End of the Round remain active through the resolution of all End of the Round effects (Part 8.9.4). They are removed during Cleanup & Refresh (Part 8.9.5).
Passive Abilities represent innate traits, permanent equipment or constant biological adaptations.
Priority: If multiple Passive Abilities trigger simultaneously, the controlling player chooses the order in which they resolve. If both players have Passive Abilities triggering at the same time, the Active Player resolves theirs first.
Reaction Abilities allow a player to act outside the usual activation sequence, responding to specific events as they occur. A Reaction is used in direct response to a defined trigger (for example, "When this Unit is targeted by an attack").
Frequency Limit: A specific Unit may use a named Reaction Ability only once per Game Round. This follows the same rules as the Active Ability frequency limit described in Part 10.2. Reaction Limit: Each player may resolve only one Reaction per each Activation. If both players wish to use a Reaction in response to the same trigger, the Active Player resolves their Reaction first, and the opponent resolves theirs second. EXAMPLE: If a Zealot Unit is attacked, it may use Zealous Round OR Ground Armour, not both in the same Enemy Activation. If a Marine Unit is attacked, and it uses Infantry Armor for its Armour Roll, the Medic Unit behind will not be able to use its Life Support in the same Enemy Activation.
| ACTIVE ABILITY | PASSIVE ABILITY | REACTION ABILITY | |
|---|---|---|---|
| When to Use | Immediately before declaring an action or immediately after one fully resolves | Always on – no trigger needed | At the exact moment the specified trigger occurs |
| Requires Activation? | Yes – the Unit must be currently Activated | No | No |
| Player Decision? | Yes – a deliberate choice | No – automatic | Yes – must be declared at the trigger |
| Frequency | Once per Round per Unit per named ability, unless REPEATABLE | Always active – no limit | Once per Round per Unit per named ability, unless REPEATABLE |
| Reactions per Activation | - | - | One Reaction per player per Activation |
| Can interrupt an action? | No – only before or after | Resolves as conditions are met | Yes – fires at the trigger point mid-sequence |
| In Reserves? | No, unless the ability states otherwise | No, unless the ability states otherwise | No, unless the ability states otherwise |
| Effect Duration | Expires at the End of the Round unless stated otherwise | Permanent while the Unit remains on the battlefield | Expires at the End of the Round unless stated otherwise |
| Simultaneous Triggers | - | The controlling player chooses order. The Active Player resolves first if both players trigger | The Active Player resolves first |
| Cost | Pay in full before resolving | None | Pay in full before resolving |
An army isn't just men and guns; it's doctrine, infrastructure, and command structure that keep everything in line. The Faction Cards outline what you are, what philosophy you adhere to, and what command structure your men follow. The Tactical Cards represent the facilities, technology, and strategic planning done before the first bullet is ever fired. Together, they define not just what you can bring to the battlefield, but how you can deploy it. Each card is presented with a standard layout. It displays a Card Name. The card specifies its Type (either Faction Card or Tactical Card), lists the resources it provides in CP, BM, or PE when Exhausted, and includes any Special Abilities that are resolved using the standard rules described in Parts 10.1 through 10.4. If a card is marked as Unique, only a single copy is allowed (Part 9.1.5).
Each faction has a separate resource type to spend on the faction's abilities: Terran uses CP, Zerg uses BM, and Protoss uses PE. These resources are provided by Exhausting cards. Exhausting a Card: To pay for an ability's cost, such as "Cost: 1 CP," the player must Exhaust a Ready card that matches the resource type of the cost, such as a CP card. Exhausting a card means flipping it face down, after which it is regarded as Exhausted. If the player cannot Exhaust enough cards to pay the entire cost, they cannot activate the ability. If a card generates more resources than are needed to pay for a cost, any excess resources are lost. Resources generated to activate one ability can not be saved or spent on another ability.
Every Tactical Card and Faction Card is in one of two states: Ready (face-up) or Exhausted (face-down). A Ready card may be Exhausted in two ways: the player Exhausts it to use an Active or Reaction Special Ability printed directly on the card, or the player Exhausts it to generate its Resource in order to pay for an ability located elsewhere (for example, on a Unit Card). Once a card is Exhausted, it provides no resources for the rest of the round, and its abilities can not be used until it is Refreshed (flipped face-up) during Phase 4 Cleanup.
Unit cards and Tactical/Faction cards for the Terran army.
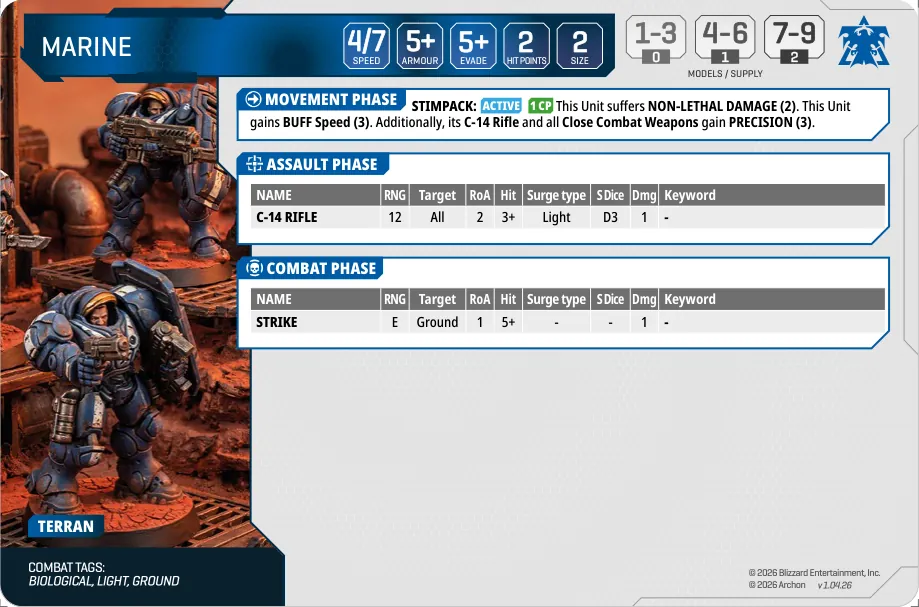
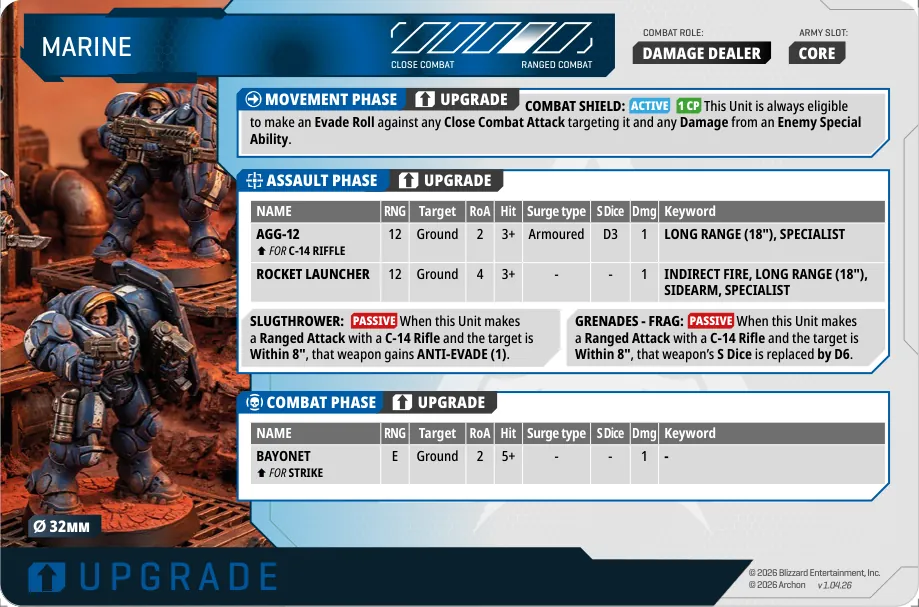
StimpackActive1 CP This Unit suffers NON-LETHAL DAMAGE (2). This Unit gains BUFF Speed (3). Additionally, its C-14 Rifle and all Close Combat Weapons gain PRECISION (3).
| Weapon | RNG | Target | RoA | Hit | Surge | S | Dmg | Keyword |
|---|---|---|---|---|---|---|---|---|
| C-14 Rifle | 12 | All | 2 | 3+ | Light | D3 | 1 | – |
| Weapon | RNG | Target | RoA | Hit | Surge | S | Dmg | Keyword |
|---|---|---|---|---|---|---|---|---|
| Strike | E | Ground | 1 | 5+ | - | - | 1 | – |
Combat ShieldActive1 CP+20 / +30 6 / 9 This Unit is always eligible to make an Evade Roll against any Close Combat Attack targeting it and any Damage from an Enemy Special Ability.
SlugthrowerPassive+10 / +20 6 / 9 When this Unit makes a Ranged Attack with a C-14 Rifle and the target is Within 8", that weapon gains ANTI-EVADE (1).
Grenades - FragPassive+10 / +10 6 / 9 When this Unit makes a Ranged Attack with a C-14 Rifle and the target is Within 8", that weapon's S Dice is replaced by D6.
| Weapon | RNG | Target | RoA | Hit | Surge | S | Dmg | Keyword |
|---|---|---|---|---|---|---|---|---|
| AGG-12↑ for C-14 Rifle+10 / +10 6 / 9 | 12 | Ground | 2 | 3+ | Armoured | D3 | 1 | LONG RANGE (18"), SPECIALIST |
| Rocket Launcher+40 / +40 6 / 9 | 12 | Ground | 4 | 3+ | - | - | 1 | INDIRECT FIRE, LONG RANGE (18"), SIDEARM, SPECIALIST |
| Weapon | RNG | Target | RoA | Hit | Surge | S | Dmg | Keyword |
|---|---|---|---|---|---|---|---|---|
| Bayonet↑ for Strike+20 / +30 6 / 9 | E | Ground | 2 | 5+ | - | - | 1 | – |
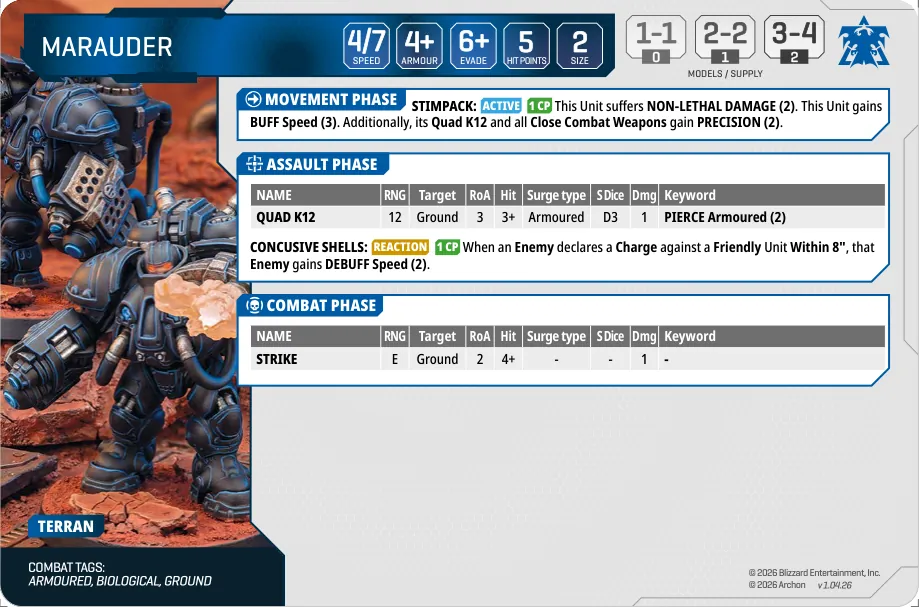
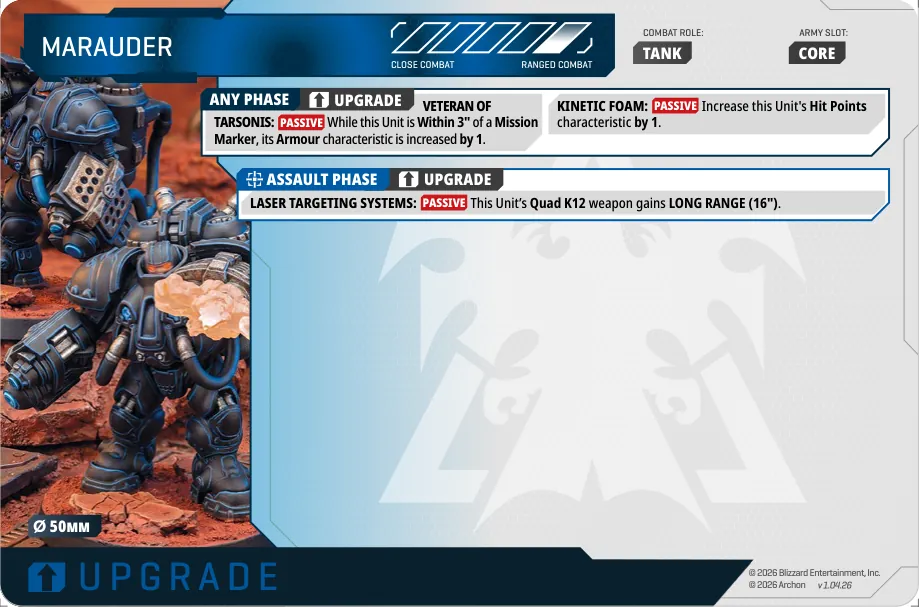
StimpackActive1 CP This Unit suffers NON-LETHAL DAMAGE (2). This Unit gains BUFF Speed (3). Additionally, its Quad K12 and all Close Combat Weapons gain PRECISION (2).
Concusive ShellsReaction1 CP When an Enemy declares a Charge against a Friendly Unit Within 8", that Enemy gains DEBUFF Speed (2).
| Weapon | RNG | Target | RoA | Hit | Surge | S | Dmg | Keyword |
|---|---|---|---|---|---|---|---|---|
| Quad K12 | 12 | Ground | 3 | 3+ | Armoured | D3 | 1 | PIERCE Armoured (2) |
| Weapon | RNG | Target | RoA | Hit | Surge | S | Dmg | Keyword |
|---|---|---|---|---|---|---|---|---|
| Strike | E | Ground | 2 | 4+ | - | - | 1 | – |
Veteran of TarsonisPassive+20 / +30 2 / 4 While this Unit is Within 3" of a Mission Marker, its Armour characteristic is increased by 1.
Kinetic FoamPassive+20 / +40 2 / 4 Increase this Unit's Hit Points characteristic by 1.
Laser Targeting SystemsPassive+20 / +40 2 / 4 This Unit's Quad K12 weapon gains LONG RANGE (16").
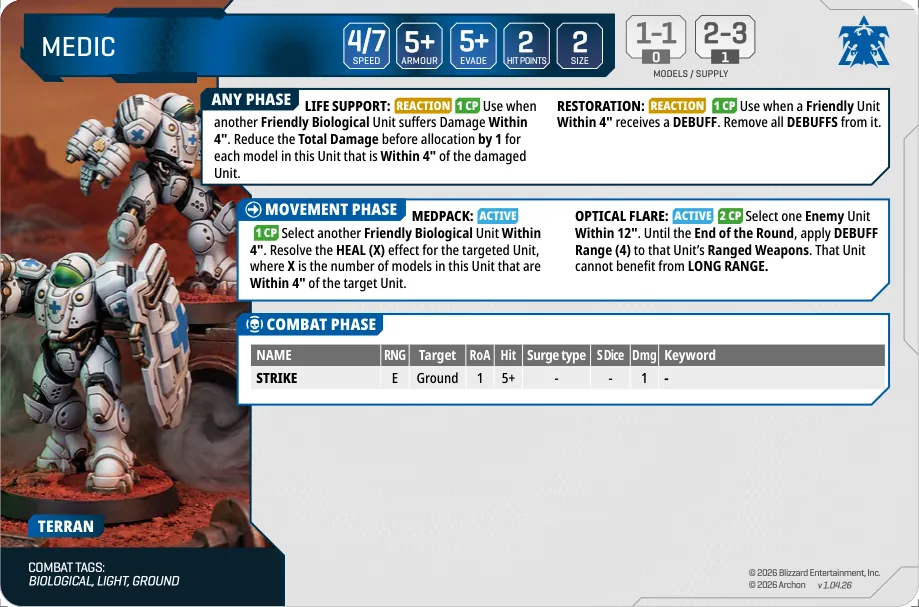
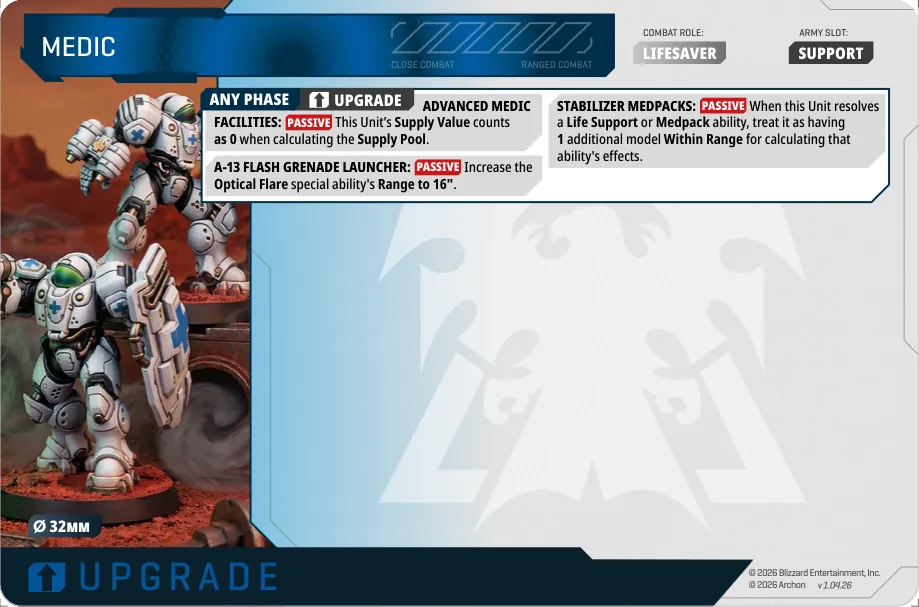
Life SupportReaction1 CP Use when another Friendly Biological Unit suffers Damage Within 4". Reduce the Total Damage before allocation by 1 for each model in this Unit that is Within 4" of the damaged Unit.
RestorationReaction1 CP Use when a Friendly Unit Within 4" receives a DEBUFF. Remove all DEBUFFS from it.
MedpackActive1 CP Select another Friendly Biological Unit Within 4". Resolve the HEAL (X) effect for the targeted Unit, where X is the number of models in this Unit that are Within 4" of the target Unit.
Optical FlareActive2 CP Select one Enemy Unit Within 12". Until the End of the Round, apply DEBUFF Range (4) to that Unit's Ranged Weapons. That Unit cannot benefit from LONG RANGE.
| Weapon | RNG | Target | RoA | Hit | Surge | S | Dmg | Keyword |
|---|---|---|---|---|---|---|---|---|
| Strike | E | Ground | 1 | 5+ | - | - | 1 | – |
Advanced Medic FacilitiesPassive+60 3 models This Unit's Supply Value counts as 0 when calculating the Supply Pool.
A-13 Flash Grenade LauncherPassive+20 3 models Increase the Optical Flare special ability's Range to 16".
Stabilizer MedpacksPassive+30 3 models When this Unit resolves a Life Support or Medpack ability, treat it as having 1 additional model Within Range for calculating that ability's effects.
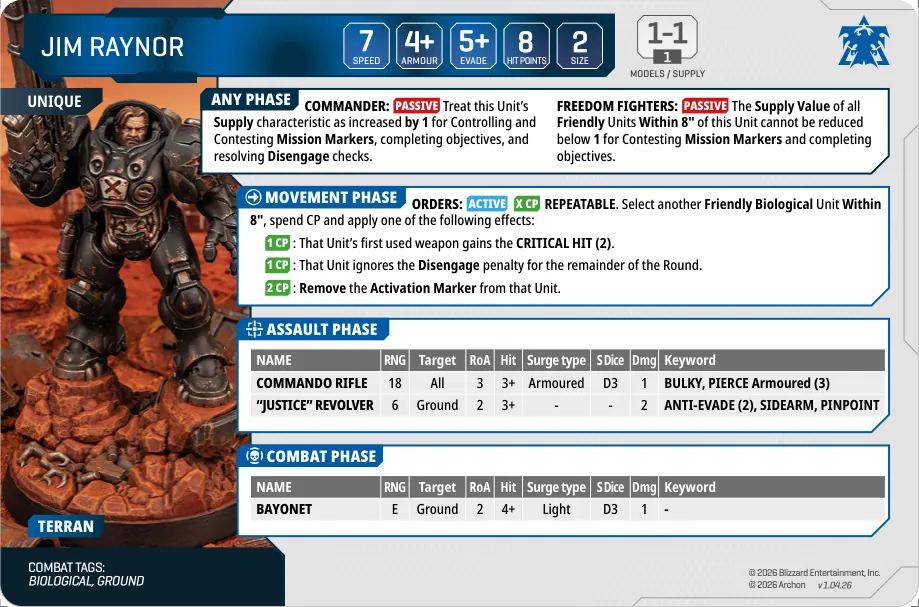
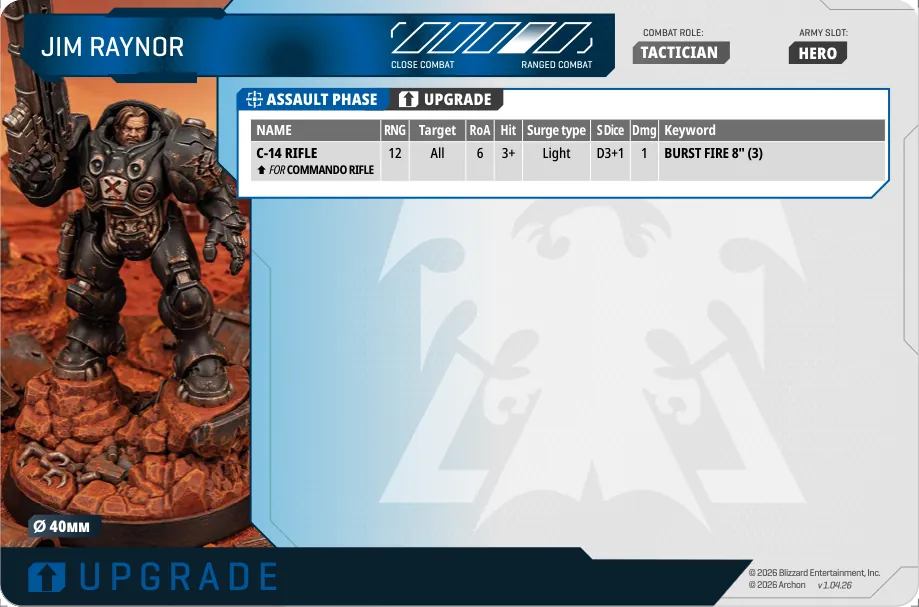
CommanderPassive Treat this Unit's Supply characteristic as increased by 1 for Controlling and Contesting Mission Markers, completing objectives, and resolving Disengage checks.
Freedom FightersPassive The Supply Value of all Friendly Units Within 8" of this Unit cannot be reduced below 1 for Contesting Mission Markers and completing objectives.
OrdersActive X CP REPEATABLE. Select another Friendly Biological Unit Within 8", spend CP and apply one of the following effects: 1 CP : That Unit's first used weapon gains the CRITICAL HIT (2). 1 CP : That Unit ignores the Disengage penalty for the remainder of the Round. 2 CP : Remove the Activation Marker from that Unit.
| Weapon | RNG | Target | RoA | Hit | Surge | S | Dmg | Keyword |
|---|---|---|---|---|---|---|---|---|
| Commando Rifle | 18 | All | 3 | 3+ | Armoured | D3 | 1 | BULKY, PIERCE Armoured (3) |
| “Justice” Revolver | 6 | Ground | 2 | 3+ | - | - | 2 | ANTI-EVADE (2), SIDEARM, PINPOINT |
| Weapon | RNG | Target | RoA | Hit | Surge | S | Dmg | Keyword |
|---|---|---|---|---|---|---|---|---|
| Bayonet | E | Ground | 2 | 4+ | Light | D3 | 1 | – |
| Weapon | RNG | Target | RoA | Hit | Surge | S | Dmg | Keyword |
|---|---|---|---|---|---|---|---|---|
| C-14 Rifle↑ for Commando Rifle+0 1 models | 12 | All | 6 | 3+ | Light | D3+1 | 1 | BURST FIRE 8" (3) |
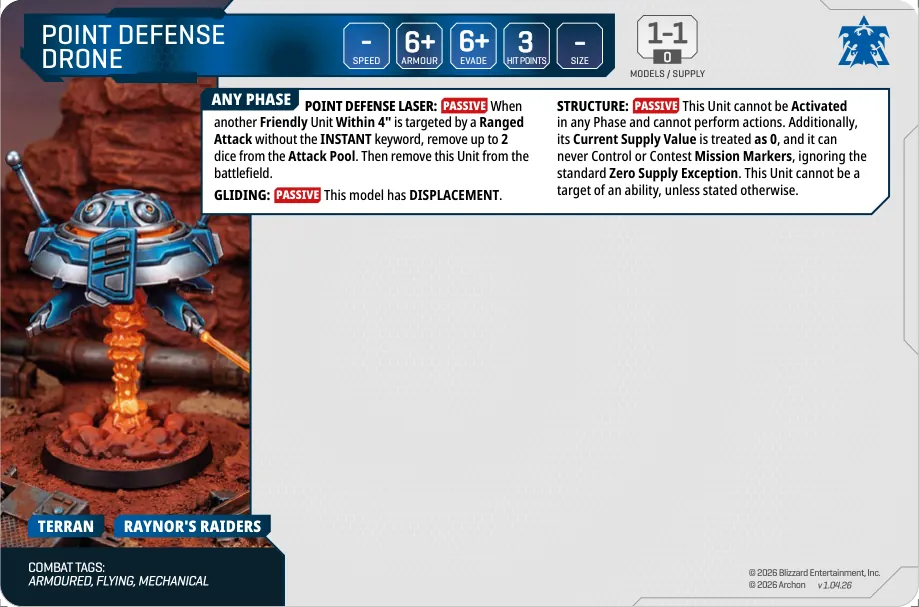
Point Defense LaserPassive When another Friendly Unit Within 4" is targeted by a Ranged Attack without the INSTANT keyword, remove up to 2 dice from the Attack Pool. Then remove this Unit from the battlefield.
GlidingPassive This model has DISPLACEMENT.
StructurePassive This Unit cannot be Activated in any Phase and cannot perform actions. Additionally, its Current Supply Value is treated as 0, and it can never Control or Contest Mission Markers, ignoring the standard Zero Supply Exception. This Unit cannot be a target of an ability, unless stated otherwise.
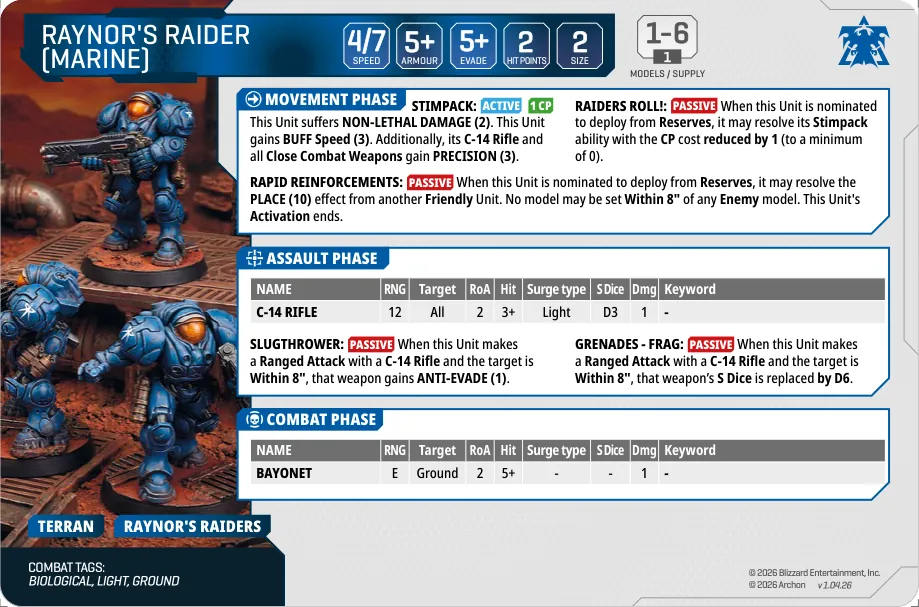
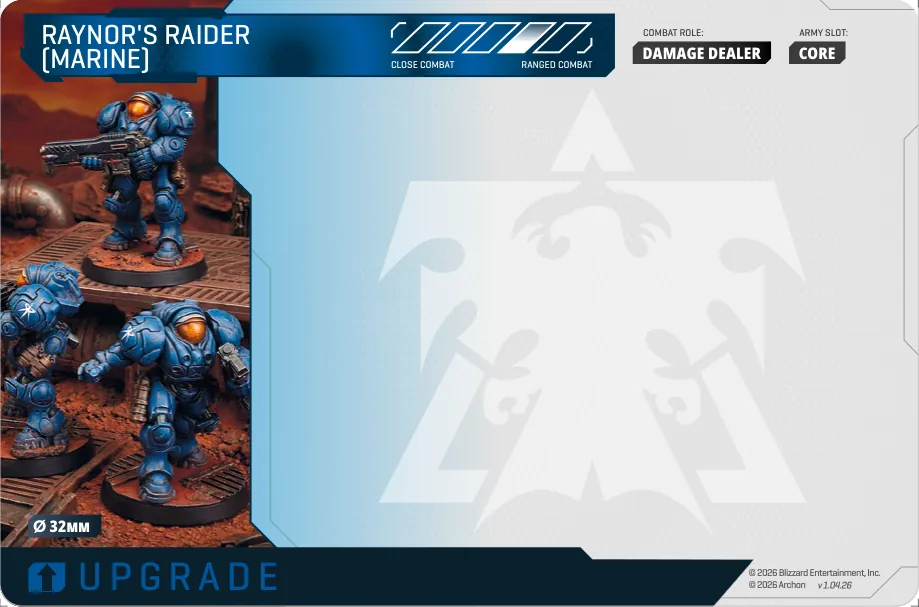
StimpackActive1 CP This Unit suffers NON-LETHAL DAMAGE (2). This Unit gains BUFF Speed (3). Additionally, its C-14 Rifle and all Close Combat Weapons gain PRECISION (3).
Rapid ReinforcementsPassive When this Unit is nominated to deploy from Reserves, it may resolve the PLACE (10) effect from another Friendly Unit. No model may be set Within 8" of any Enemy model. This Unit's Activation ends.
Raiders Roll!Passive When this Unit is nominated to deploy from Reserves, it may resolve its Stimpack ability with the CP cost reduced by 1 (to a minimum of 0).
SlugthrowerPassive When this Unit makes a Ranged Attack with a C-14 Rifle and the target is Within 8", that weapon gains ANTI-EVADE (1).
Grenades - FragPassive When this Unit makes a Ranged Attack with a C-14 Rifle and the target is Within 8", that weapon's S Dice is replaced by D6.
| Weapon | RNG | Target | RoA | Hit | Surge | S | Dmg | Keyword |
|---|---|---|---|---|---|---|---|---|
| C-14 Rifle | 12 | All | 2 | 3+ | Light | D3 | 1 | – |
| Weapon | RNG | Target | RoA | Hit | Surge | S | Dmg | Keyword |
|---|---|---|---|---|---|---|---|---|
| Bayonet | E | Ground | 2 | 5+ | - | - | 1 | – |
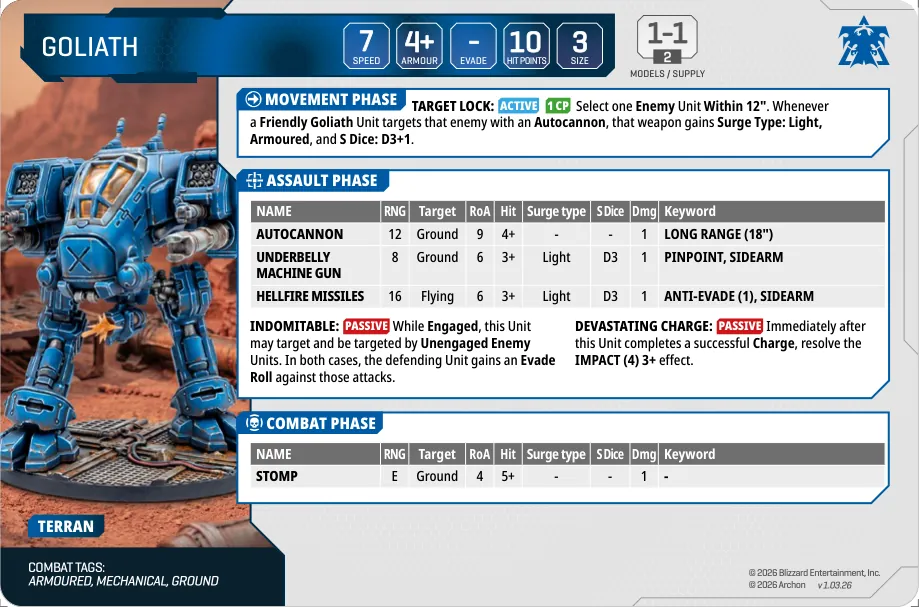
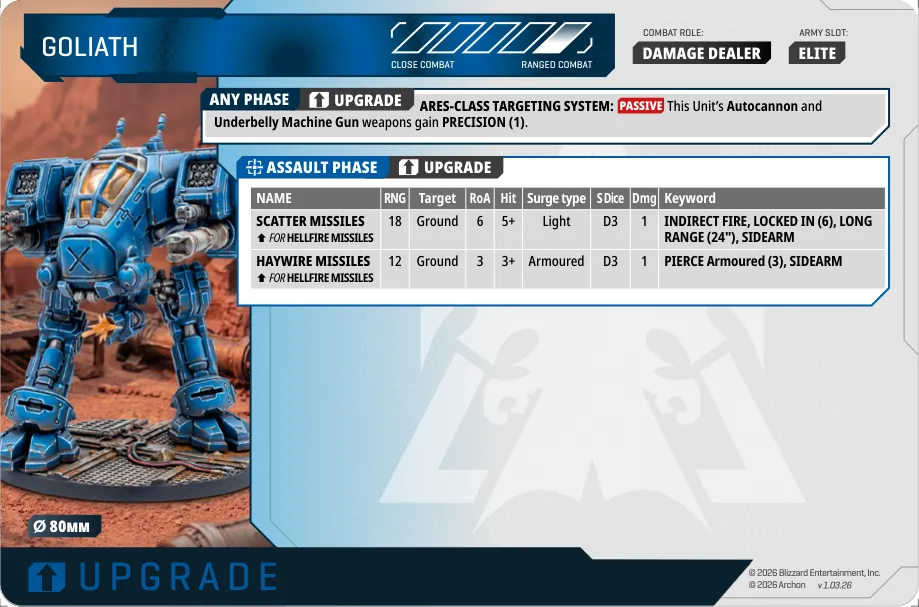
Target LockActive1 CP Select one Enemy Unit Within 12". Whenever a Friendly Goliath Unit targets that enemy with an Autocannon, that weapon gains Surge Type: Light, Armoured, and S Dice: D3+1.
IndomitablePassive While Engaged, this Unit may target and be targeted by Unengaged Enemy Units. In both cases, the defending Unit gains an Evade Roll against those attacks.
Devastating ChargePassive Immediately after this Unit completes a successful Charge, resolve the IMPACT (4) 3+ effect.
| Weapon | RNG | Target | RoA | Hit | Surge | S | Dmg | Keyword |
|---|---|---|---|---|---|---|---|---|
| Autocannon | 12 | Ground | 9 | 4+ | - | - | 1 | LONG RANGE (18") |
| Underbelly Machine Gun | 8 | Ground | 6 | 3+ | Light | D3 | 1 | PINPOINT, SIDEARM |
| Hellfire Missiles | 16 | Flying | 6 | 3+ | Light | D3 | 1 | ANTI-EVADE (1), SIDEARM |
| Weapon | RNG | Target | RoA | Hit | Surge | S | Dmg | Keyword |
|---|---|---|---|---|---|---|---|---|
| Stomp | E | Ground | 4 | 5+ | - | - | 1 | – |
Ares-class Targeting SystemPassive+20 1 models This Unit's Autocannon and Underbelly Machine Gun weapons gain PRECISION (1).
| Weapon | RNG | Target | RoA | Hit | Surge | S | Dmg | Keyword |
|---|---|---|---|---|---|---|---|---|
| Scatter Missiles↑ for Hellfire Missiles+30 1 models | 18 | Ground | 6 | 5+ | Light | D3 | 1 | INDIRECT FIRE, LOCKED IN (6), LONG RANGE (24"), SIDEARM |
| Haywire Missiles↑ for Hellfire Missiles+40 1 models | 12 | Ground | 3 | 3+ | Armoured | D3 | 1 | PIERCE Armoured (3), SIDEARM |
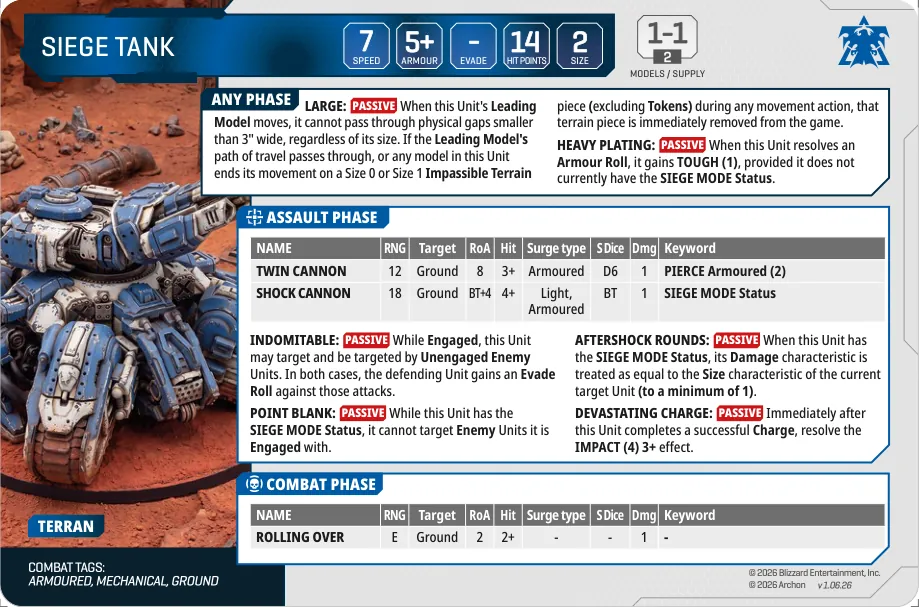
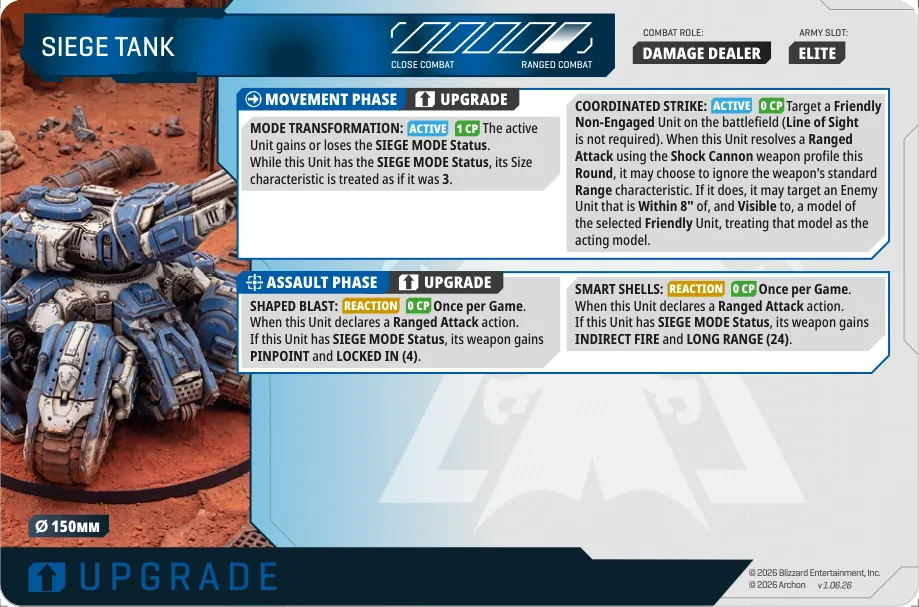
LargePassive When this Unit's Leading Model moves, it cannot pass through physical gaps smaller than 3" wide, regardless of its size. If the Leading Model's path of travel passes through, or any model in this Unit ends its movement on a Size 0 or Size 1 Impassible Terrain piece (excluding Tokens) during any movement action, that terrain piece is immediately removed from the game.
Heavy PlatingPassive When this Unit resolves an Armour Roll, it gains TOUGH (1), provided it does not currently have the SIEGE MODE Status.
IndomitablePassive While Engaged, this Unit may target and be targeted by Unengaged Enemy Units. In both cases, the defending Unit gains an Evade Roll against those attacks.
Point BlankPassive While this Unit has the SIEGE MODE Status, it cannot target Enemy Units it is Engaged with.
Aftershock RoundsPassive When this Unit has the SIEGE MODE Status, its Damage characteristic is treated as equal to the Size characteristic of the current target Unit (to a minimum of 1).
Devastating ChargePassive Immediately after this Unit completes a successful Charge, resolve the IMPACT (4) 3+ effect.
| Weapon | RNG | Target | RoA | Hit | Surge | S | Dmg | Keyword |
|---|---|---|---|---|---|---|---|---|
| Twin Cannon | 12 | Ground | 8 | 3+ | Armoured | D6 | 1 | PIERCE Armoured (2) |
| Shock Cannon | 18 | Ground | BT+4 | 4+ | Light, Armoured | BT | 1 | SIEGE MODE Status |
| Weapon | RNG | Target | RoA | Hit | Surge | S | Dmg | Keyword |
|---|---|---|---|---|---|---|---|---|
| Rolling Over | E | Ground | 2 | 2+ | - | - | 1 | – |
Mode TransformationActive1 CP+20 1 models The active Unit gains or loses the SIEGE MODE Status. While this Unit has the SIEGE MODE Status, its Size characteristic is treated as if it was 3.
Coordinated StrikeActive0 CP+20 1 models Target a Friendly Non-Engaged Unit on the battlefield (Line of Sight is not required). When this Unit resolves a Ranged Attack using the Shock Cannon weapon profile this Round, it may choose to ignore the weapon's standard Range characteristic. If it does, it may target an Enemy Unit that is Within 8" of, and Visible to, a model of the selected Friendly Unit, treating that model as the acting model.
Shaped BlastReaction0 CP+10 1 models Once per Game. When this Unit declares a Ranged Attack action. If this Unit has SIEGE MODE Status, its weapon gains PINPOINT and LOCKED IN (4).
Smart ShellsReaction0 CP+10 1 models Once per Game. When this Unit declares a Ranged Attack action. If this Unit has SIEGE MODE Status, its weapon gains INDIRECT FIRE and LONG RANGE (24).
Tactical RetreatActive The active Unit ignores the Disengage penalty for the remainder of the Round.
Terran TenacityActive Once per Game. Immediately claim the First Player Marker. No other player may claim the First Player Marker for the remainder of this Phase.
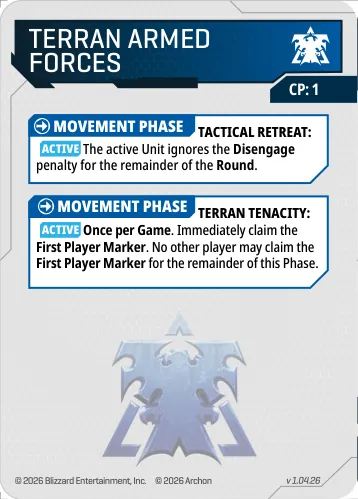
Rapid IngressActive Set a Friendly Point Defence Drone Unit anywhere on the battlefield, more than 1" away from any Enemy model. Remove this Unit at the End of the Round.
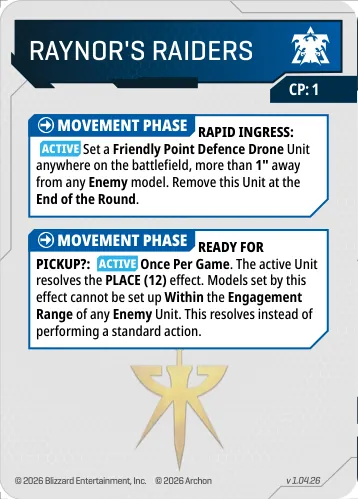
Go! Go! Go!Active The active Biological Unit performs a 2" Move action. This does not count towards its action limit.
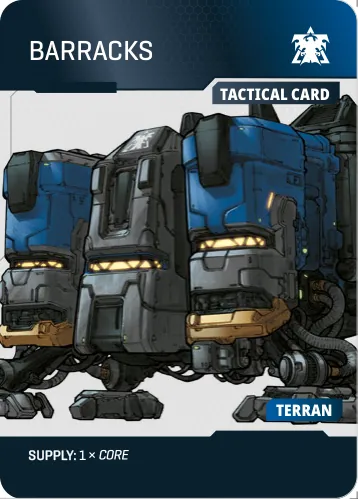
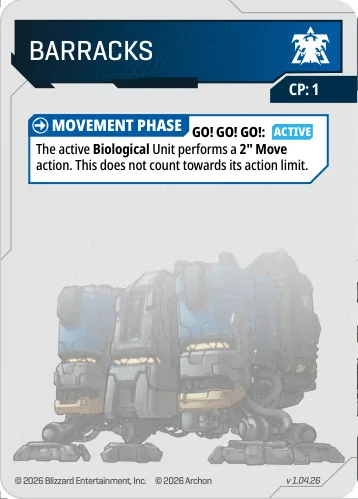
Infantry ArmorReaction Use before a Friendly Biological Unit makes an Armour Roll. That Unit gains TOUGH (1) for this roll.
Infantry WeaponsActive The active Biological Unit's first Ranged Weapon used gains CRITICAL HIT (1).
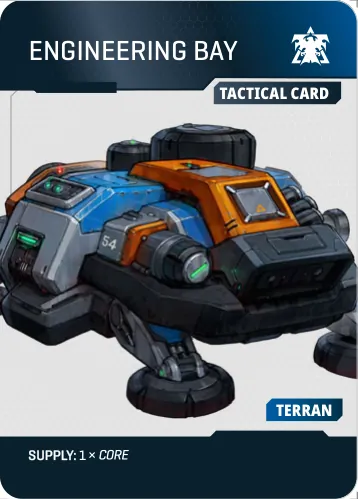
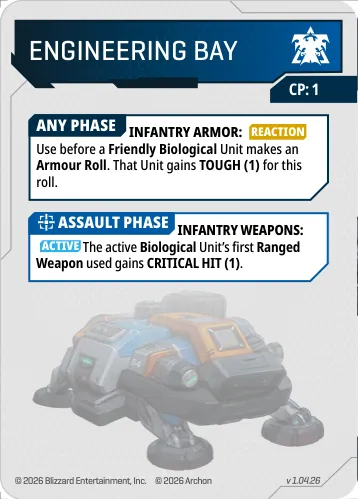
Advanced TrainingReaction Once per Round, when a Friendly Support Unit activates a Special Ability that costs CP, resolve that ability with its CP cost reduced by 1 (to a minimum of 0). Do not Exhaust this card.
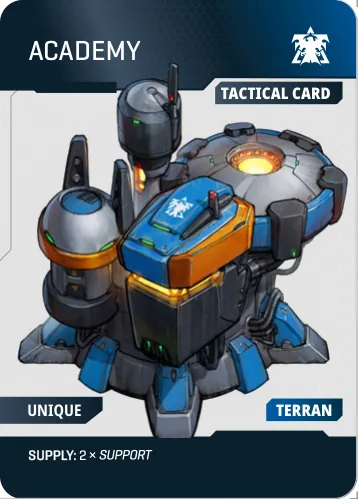
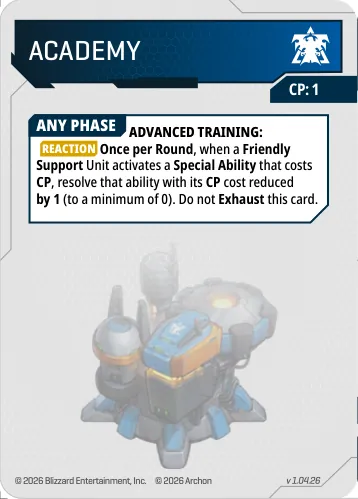
Additional Supply DepotsActive The active Unit's Supply Value is improved by 1 for Controlling and Contesting Mission Markers and completing objectives.
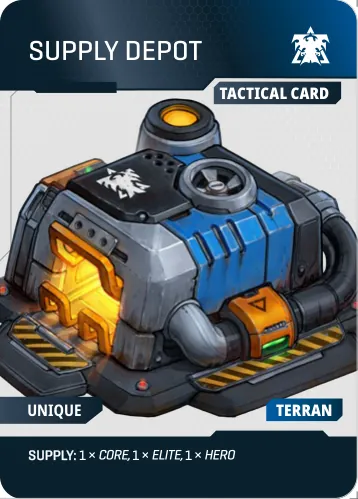
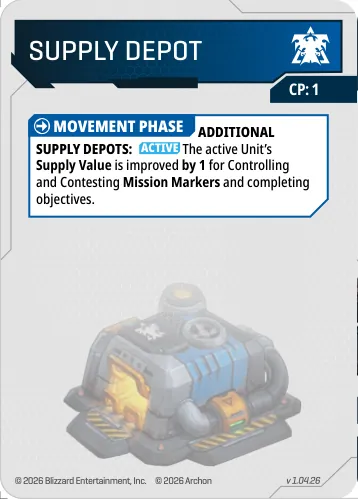
Comsat StationActive Select one table edge that is not a player's Entry Edge. Until the End of the Round, Enemy Units cannot Deploy from that edge.
Scanner SweepActive Set a Faction Indicator anywhere on the battlefield. While Enemy Units are Within 6" of this Faction Indicator, they lose HIDDEN Status.
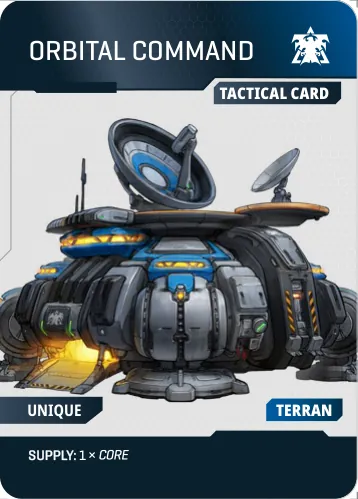
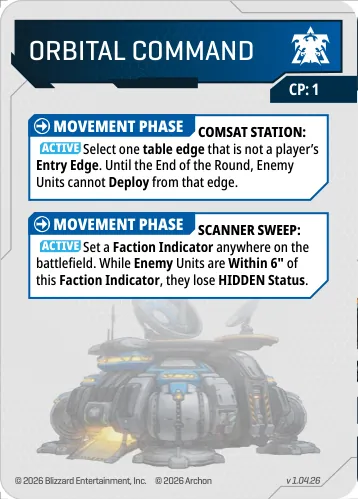
Strap In!Active The active, Unengaged Ground Unit is returned to Reserves instead of performing an action.
Ready for Dust-offActive Set a Faction Indicator anywhere on the battlefield more than 10" away from any Enemy model. At the End of the Round, the controlling player may Deploy one Ground Unit from Reserves in base-to-base contact with this Faction Indicator.
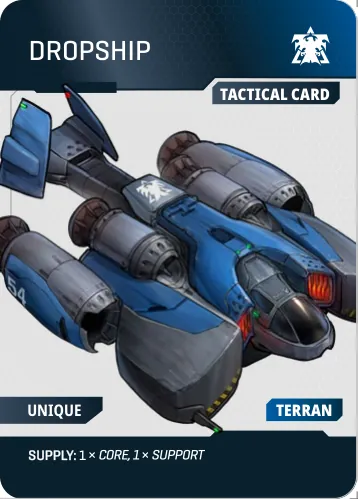
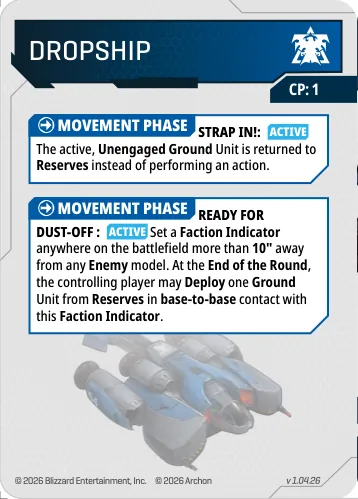
Field RepairActive The active Mechanical Unit resolves the HEAL (2) effect.
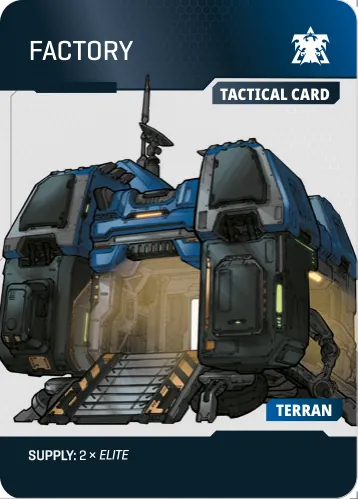
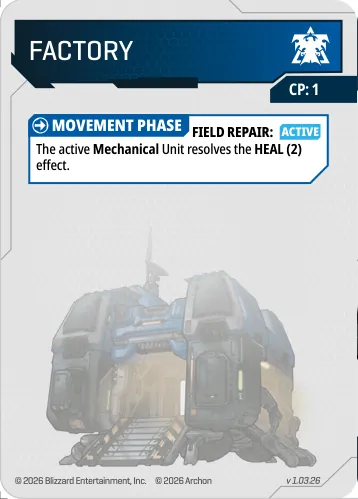
Vehicle PlatingReaction Use before a Friendly Mechanical Unit makes an Armour Roll. That Unit gains TOUGH (1) for this roll.
Vehicle WeaponsActive The active Mechanical Unit's first Ranged Weapon used gain CRITICAL HIT (1).
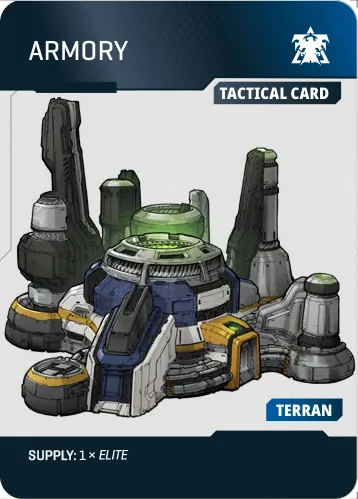
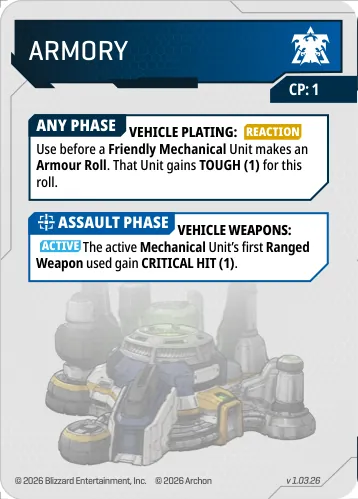
Go! Go! Go!Active The active Biological Unit performs a 2" Move action. This does not count towards its action limit.
Let's Have A Blast!Active The active Biological Unit's first Ranged Weapon used gains ANTI-EVADE (1).
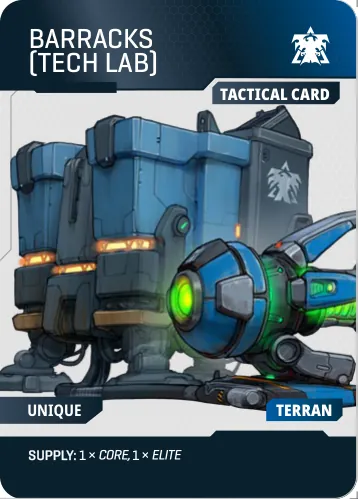
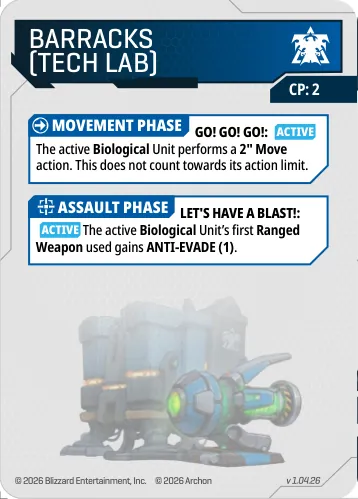
Go! Go! Go!Active The active Biological Unit performs a 2" Move action. This does not count towards its action limit.
Armed and ReadyActive The active Biological Unit Deploys from any table edge that is not a player's Entry Edge. No model may be placed Within 10" of any Enemy model. This ability cannot be used if another Friendly Biological Unit has already been Deployed this Round.
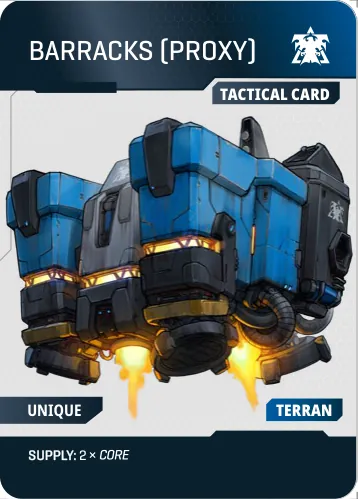
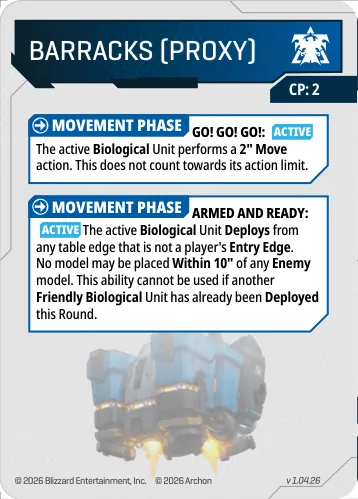
Field RepairActive The active Mechanical Unit resolves the HEAL (2) effect.
Pound 'em Flat!Active If the active Mechanical Unit has the Stationary Status, its first Ranged Weapon used gains PRECISION (2).
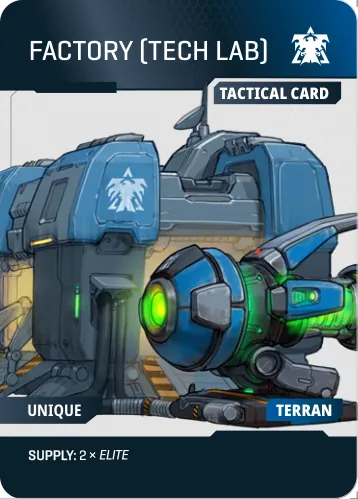
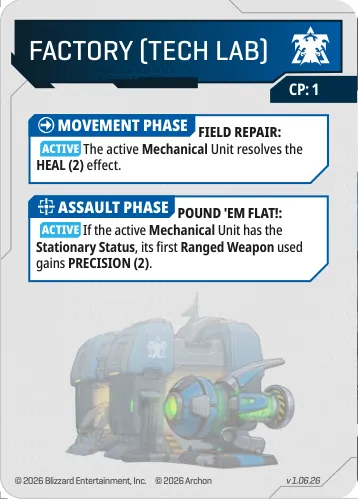
Unit cards and Tactical/Faction cards for the Zerg army.
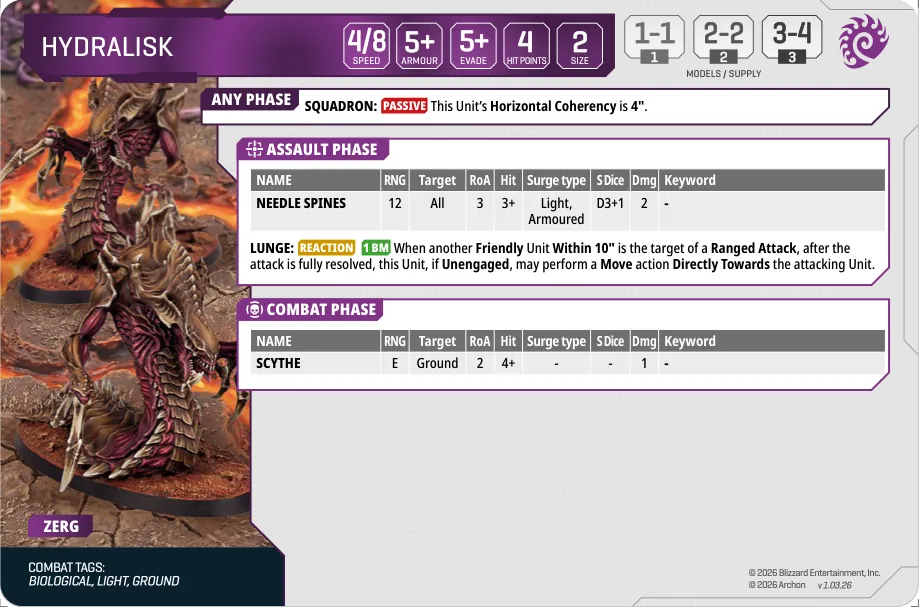
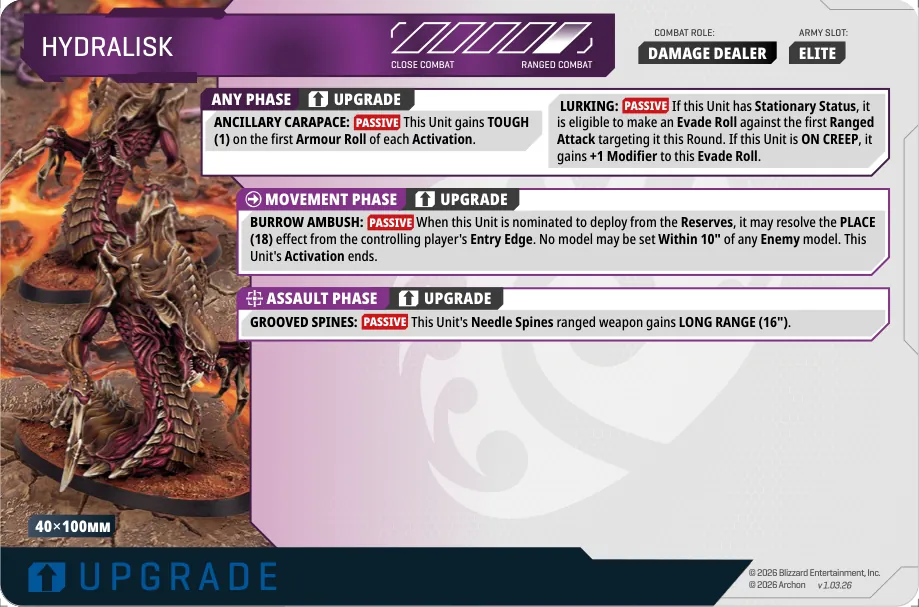
SquadronPassive This Unit's Horizontal Coherency is 4".
LungeReaction1 BM When another Friendly Unit Within 10" is the target of a Ranged Attack, after the attack is fully resolved, this Unit, if Unengaged, may perform a Move action Directly Towards the attacking Unit.
| Weapon | RNG | Target | RoA | Hit | Surge | S | Dmg | Keyword |
|---|---|---|---|---|---|---|---|---|
| Needle Spines | 12 | All | 3 | 3+ | Light, Armoured | D3+1 | 2 | – |
| Weapon | RNG | Target | RoA | Hit | Surge | S | Dmg | Keyword |
|---|---|---|---|---|---|---|---|---|
| Scythe | E | Ground | 2 | 4+ | - | - | 1 | – |
Ancillary CarapacePassive+20 / +40 2 / 4 This Unit gains TOUGH (1) on the first Armour Roll of each Activation.
LurkingPassive+10 / +20 2 / 4 If this Unit has Stationary Status, it is eligible to make an Evade Roll against the first Ranged Attack targeting it this Round. If this Unit is ON CREEP, it gains +1 Modifier to this Evade Roll.
Burrow AmbushPassive+20 / +40 2 / 4 When this Unit is nominated to deploy from the Reserves, it may resolve the PLACE (18) effect from the controlling player's Entry Edge. No model may be set Within 10" of any Enemy model. This Unit's Activation ends.
Grooved SpinesPassive+20 / +40 2 / 4 This Unit's Needle Spines ranged weapon gains LONG RANGE (16").
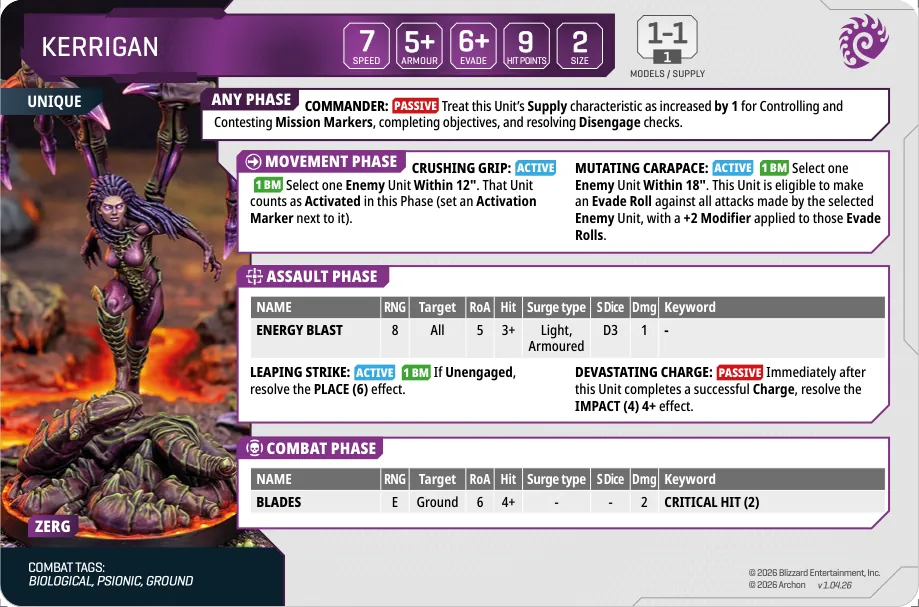
CommanderPassive Treat this Unit's Supply characteristic as increased by 1 for Controlling and Contesting Mission Markers, completing objectives, and resolving Disengage checks.
Crushing GripActive1 BM Select one Enemy Unit Within 12". That Unit counts as Activated in this Phase (set an Activation Marker next to it).
Mutating CarapaceActive1 BM Select one Enemy Unit Within 18". This Unit is eligible to make an Evade Roll against all attacks made by the selected Enemy Unit, with a +2 Modifier applied to those Evade Rolls.
Leaping StrikeActive1 BM If Unengaged, resolve the PLACE (6) effect.
Devastating ChargePassive Immediately after this Unit completes a successful Charge, resolve the IMPACT (4) 4+ effect.
| Weapon | RNG | Target | RoA | Hit | Surge | S | Dmg | Keyword |
|---|---|---|---|---|---|---|---|---|
| Energy Blast | 8 | All | 5 | 3+ | Light, Armoured | D3 | 1 | – |
| Weapon | RNG | Target | RoA | Hit | Surge | S | Dmg | Keyword |
|---|---|---|---|---|---|---|---|---|
| Blades | E | Ground | 6 | 4+ | - | - | 2 | CRITICAL HIT (2) |
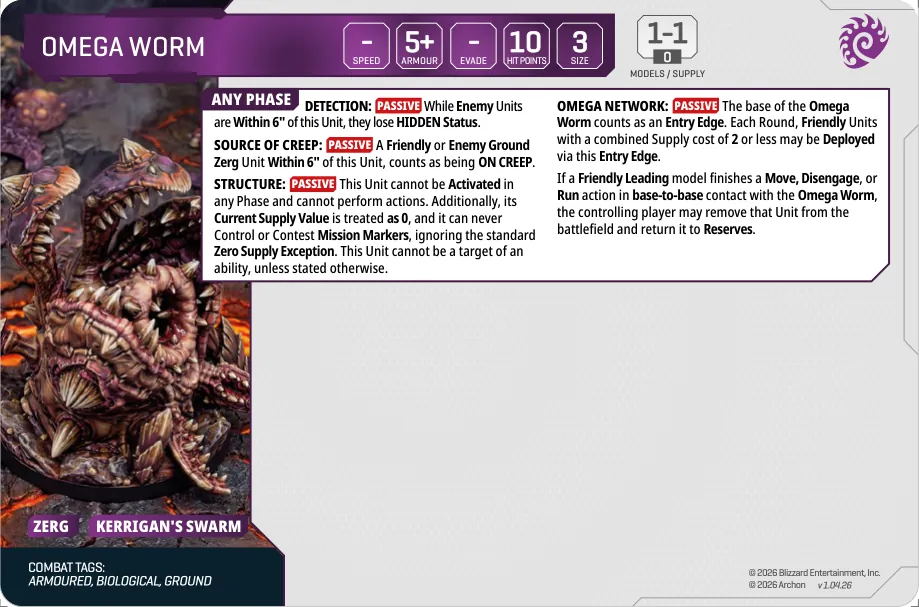
DetectionPassive While Enemy Units are Within 6" of this Unit, they lose HIDDEN Status.
Source of CreepPassive A Friendly or Enemy Ground Zerg Unit Within 6" of this Unit, counts as being ON CREEP.
StructurePassive This Unit cannot be Activated in any Phase and cannot perform actions. Additionally, its Current Supply Value is treated as 0, and it can never Control or Contest Mission Markers, ignoring the standard Zero Supply Exception. This Unit cannot be a target of an ability, unless stated otherwise.
Omega NetworkPassive The base of the Omega Worm counts as an Entry Edge. Each Round, Friendly Units with a combined Supply cost of 2 or less may be Deployed via this Entry Edge. If a Friendly Leading model finishes a Move, Disengage, or Run action in base-to-base contact with the Omega Worm, the controlling player may remove that Unit from the battlefield and return it to Reserves.
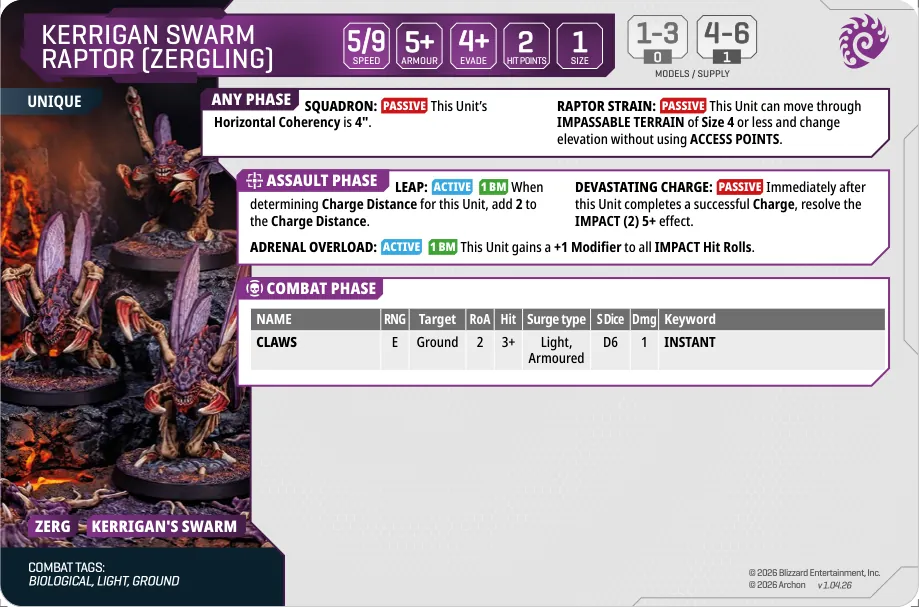
SquadronPassive This Unit's Horizontal Coherency is 4".
Raptor StrainPassive This Unit can move through IMPASSABLE TERRAIN of Size 4 or less and change elevation without using ACCESS POINTS.
LeapActive1 BM When determining Charge Distance for this Unit, add 2 to the Charge Distance.
Adrenal OverloadActive1 BM This Unit gains a +1 Modifier to all IMPACT Hit Rolls.
Devastating ChargePassive Immediately after this Unit completes a successful Charge, resolve the IMPACT (2) 5+ effect.
| Weapon | RNG | Target | RoA | Hit | Surge | S | Dmg | Keyword |
|---|---|---|---|---|---|---|---|---|
| Claws | E | Ground | 2 | 3+ | Light, Armoured | D6 | 1 | INSTANT |
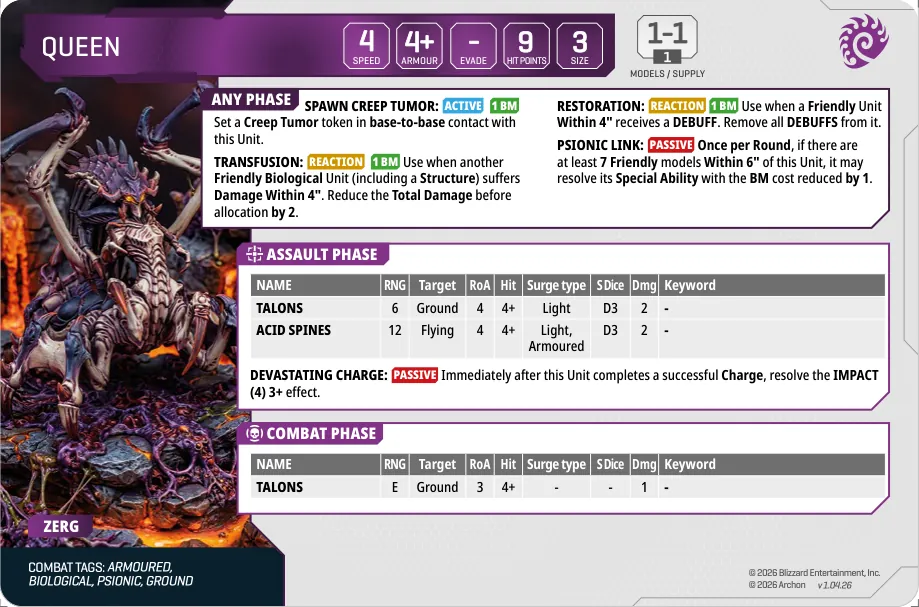
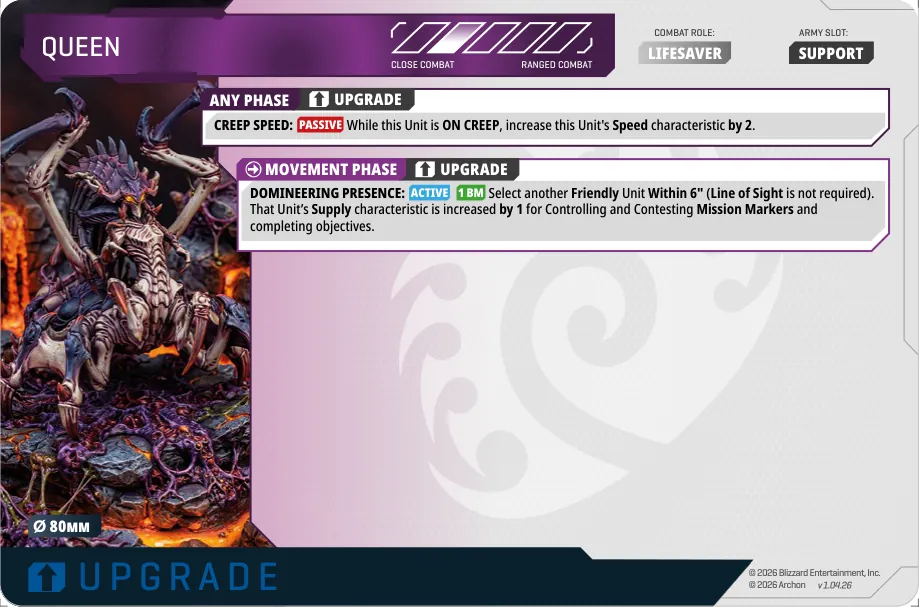
Spawn Creep TumorActive1 BM Set a Creep Tumor token in base-to-base contact with this Unit.
TransfusionReaction1 BM Use when another Friendly Biological Unit (including a Structure) suffers Damage Within 4". Reduce the Total Damage before allocation by 2.
RestorationReaction1 BM Use when a Friendly Unit Within 4" receives a DEBUFF. Remove all DEBUFFS from it.
Psionic LinkPassive Once per Round, if there are at least 7 Friendly models Within 6" of this Unit, it may resolve its Special Ability with the BM cost reduced by 1.
Devastating ChargePassive Immediately after this Unit completes a successful Charge, resolve the IMPACT (4) 3+ effect.
| Weapon | RNG | Target | RoA | Hit | Surge | S | Dmg | Keyword |
|---|---|---|---|---|---|---|---|---|
| Talons | 6 | Ground | 4 | 4+ | Light | D3 | 2 | – |
| Acid Spines | 12 | Flying | 4 | 4+ | Light, Armoured | D3 | 2 | – |
| Weapon | RNG | Target | RoA | Hit | Surge | S | Dmg | Keyword |
|---|---|---|---|---|---|---|---|---|
| Talons | E | Ground | 3 | 4+ | - | - | 1 | – |
Creep SpeedPassive+10 1 models While this Unit is ON CREEP, increase this Unit's Speed characteristic by 2.
Domineering PresenceActive1 BM+10 1 models Select another Friendly Unit Within 6" (Line of Sight is not required). That Unit's Supply characteristic is increased by 1 for Controlling and Contesting Mission Markers and completing objectives.
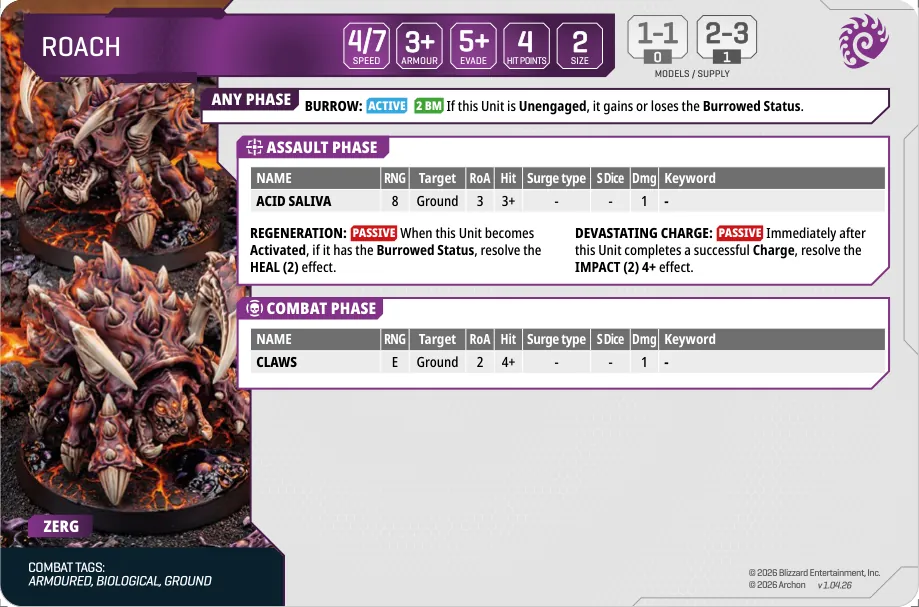
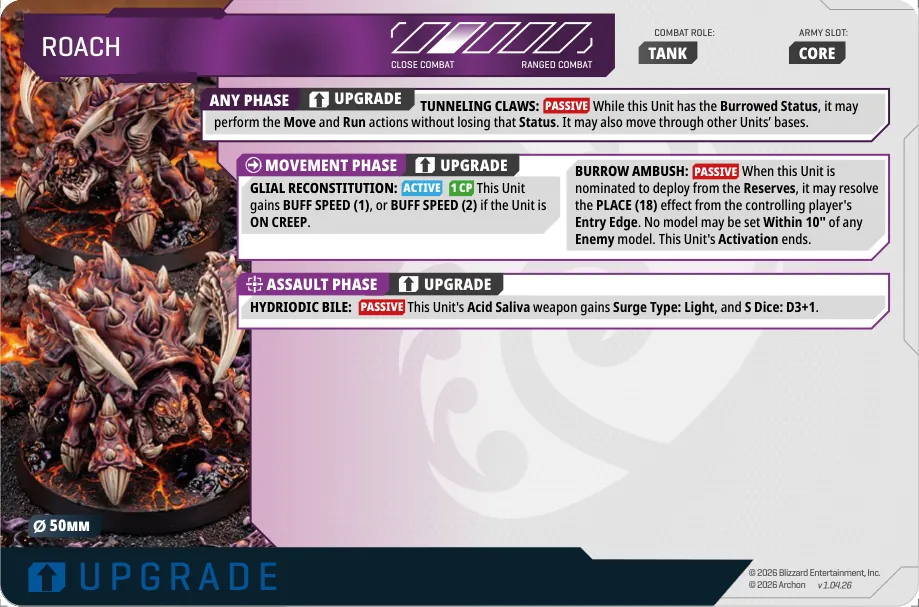
BurrowActive2 BM If this Unit is Unengaged, it gains or loses the Burrowed Status.
RegenerationPassive When this Unit becomes Activated, if it has the Burrowed Status, resolve the HEAL (2) effect.
Devastating ChargePassive Immediately after this Unit completes a successful Charge, resolve the IMPACT (2) 4+ effect.
| Weapon | RNG | Target | RoA | Hit | Surge | S | Dmg | Keyword |
|---|---|---|---|---|---|---|---|---|
| Acid Saliva | 8 | Ground | 3 | 3+ | - | - | 1 | – |
| Weapon | RNG | Target | RoA | Hit | Surge | S | Dmg | Keyword |
|---|---|---|---|---|---|---|---|---|
| Claws | E | Ground | 2 | 4+ | - | - | 1 | – |
Tunneling ClawsPassive+10 3 models While this Unit has the Burrowed Status, it may perform the Move and Run actions without losing that Status. It may also move through other Units' bases.
Glial ReconstitutionActive1 CP+20 3 models This Unit gains BUFF SPEED (1), or BUFF SPEED (2) if the Unit is ON CREEP.
Burrow AmbushPassive+20 3 models When this Unit is nominated to deploy from the Reserves, it may resolve the PLACE (18) effect from the controlling player's Entry Edge. No model may be set Within 10" of any Enemy model. This Unit's Activation ends.
Hydriodic BilePassive+10 3 models This Unit's Acid Saliva weapon gains Surge Type: Light, and S Dice: D3+1.
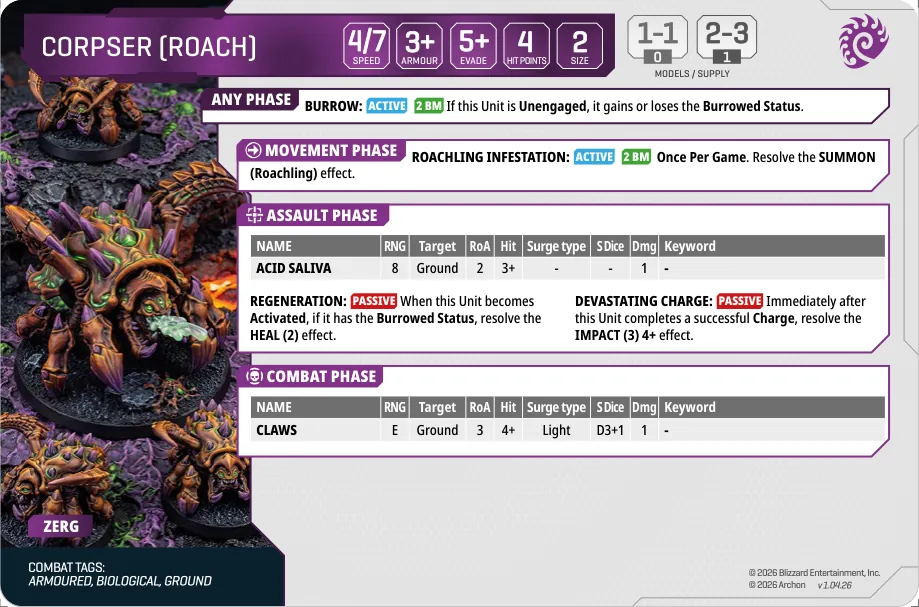
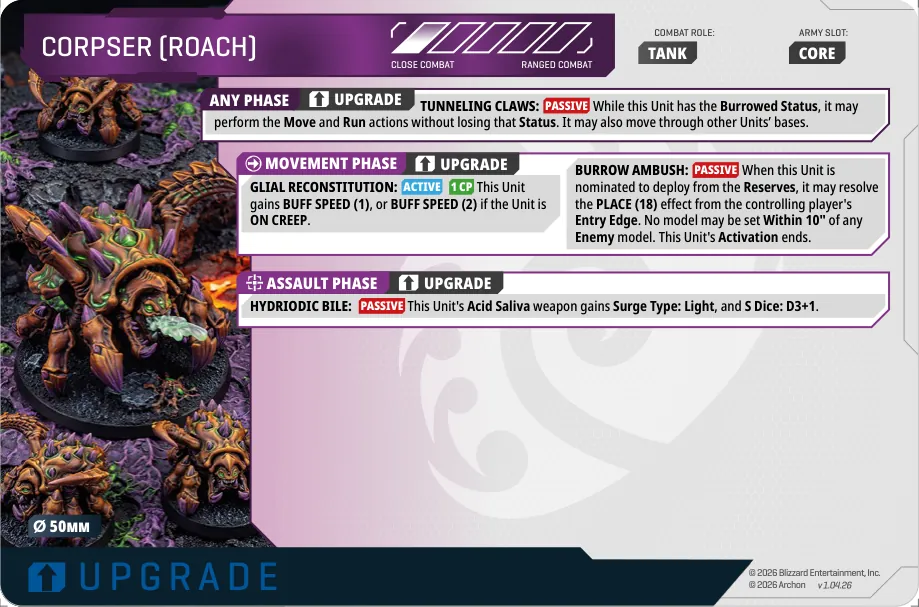
BurrowActive2 BM If this Unit is Unengaged, it gains or loses the Burrowed Status.
Roachling InfestationActive2 BM Once Per Game. Resolve the SUMMON (Roachling) effect.
RegenerationPassive When this Unit becomes Activated, if it has the Burrowed Status, resolve the HEAL (2) effect.
Devastating ChargePassive Immediately after this Unit completes a successful Charge, resolve the IMPACT (3) 4+ effect.
| Weapon | RNG | Target | RoA | Hit | Surge | S | Dmg | Keyword |
|---|---|---|---|---|---|---|---|---|
| Acid Saliva | 8 | Ground | 2 | 3+ | - | - | 1 | – |
| Weapon | RNG | Target | RoA | Hit | Surge | S | Dmg | Keyword |
|---|---|---|---|---|---|---|---|---|
| Claws | E | Ground | 3 | 4+ | Light | D3+1 | 1 | – |
Tunneling ClawsPassive+10 3 models While this Unit has the Burrowed Status, it may perform the Move and Run actions without losing that Status. It may also move through other Units' bases.
Glial ReconstitutionActive1 CP+20 3 models This Unit gains BUFF SPEED (1), or BUFF SPEED (2) if the Unit is ON CREEP.
Burrow AmbushPassive+20 3 models When this Unit is nominated to deploy from the Reserves, it may resolve the PLACE (18) effect from the controlling player's Entry Edge. No model may be set Within 10" of any Enemy model. This Unit's Activation ends.
Hydriodic BilePassive+10 3 models This Unit's Acid Saliva weapon gains Surge Type: Light, and S Dice: D3+1.
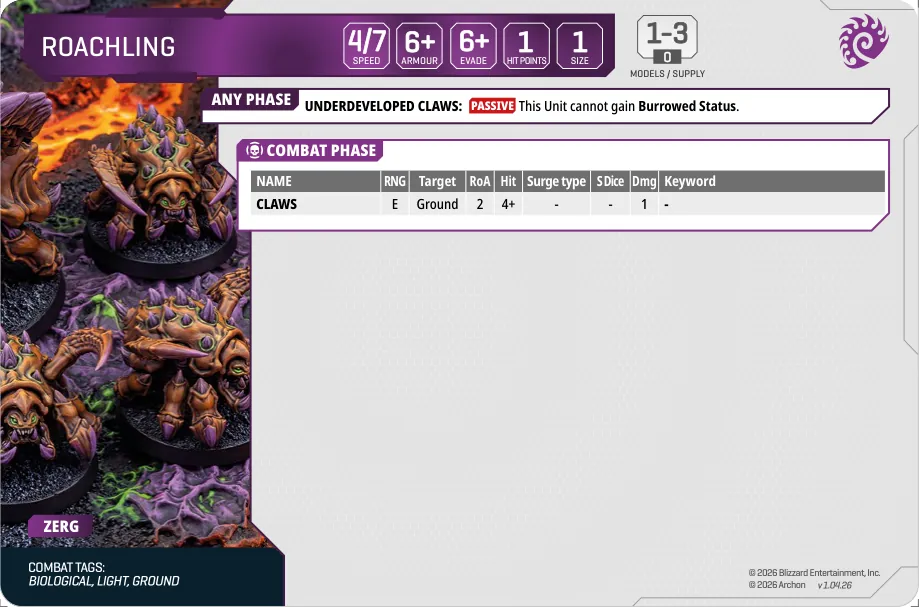
Underdeveloped ClawsPassive This Unit cannot gain Burrowed Status.
| Weapon | RNG | Target | RoA | Hit | Surge | S | Dmg | Keyword |
|---|---|---|---|---|---|---|---|---|
| Claws | E | Ground | 2 | 4+ | - | - | 1 | – |
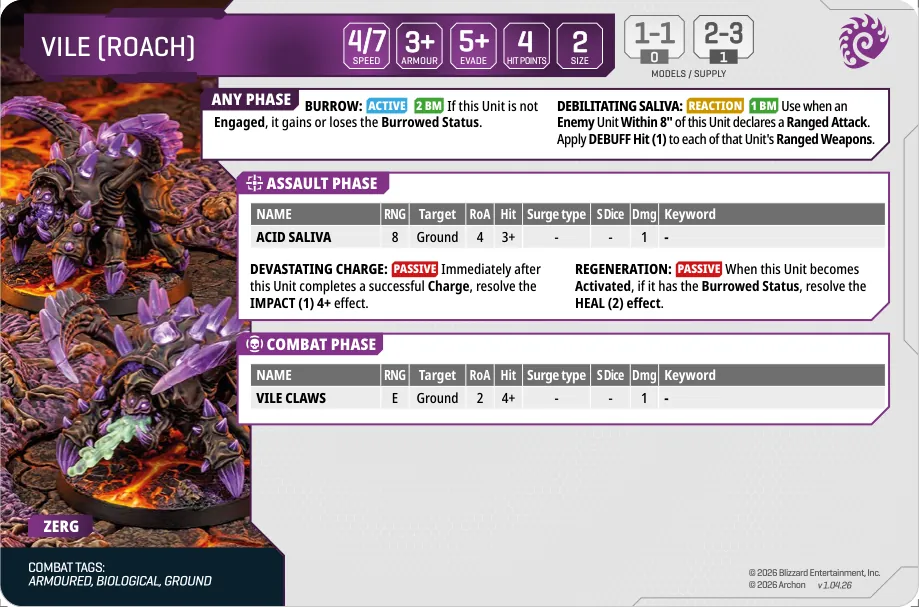
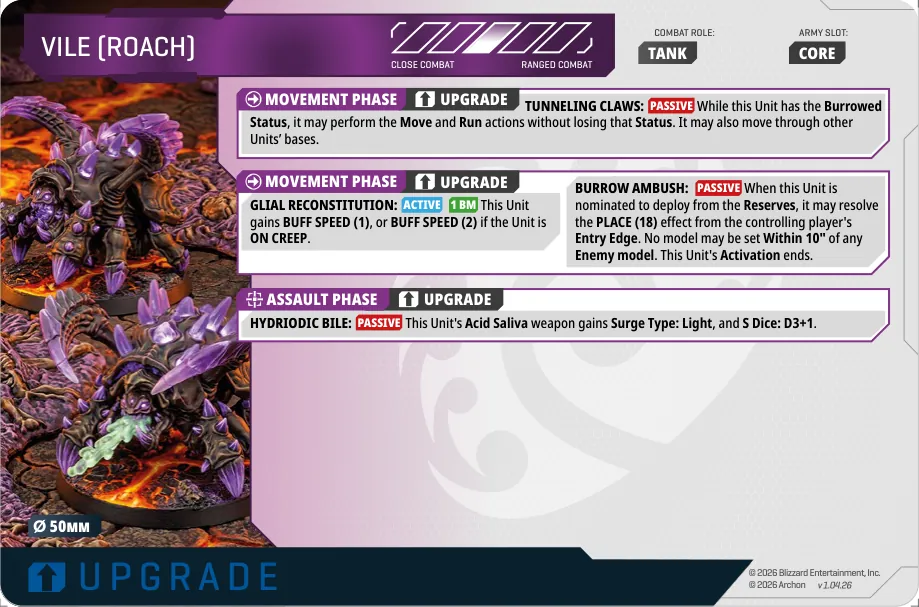
BurrowActive2 BM If this Unit is not Engaged, it gains or loses the Burrowed Status.
Debilitating SalivaReaction1 BM Use when an Enemy Unit Within 8" of this Unit declares a Ranged Attack. Apply DEBUFF Hit (1) to each of that Unit's Ranged Weapons.
Devastating ChargePassive Immediately after this Unit completes a successful Charge, resolve the IMPACT (1) 4+ effect.
RegenerationPassive When this Unit becomes Activated, if it has the Burrowed Status, resolve the HEAL (2) effect.
| Weapon | RNG | Target | RoA | Hit | Surge | S | Dmg | Keyword |
|---|---|---|---|---|---|---|---|---|
| Acid Saliva | 8 | Ground | 4 | 3+ | - | - | 1 | – |
| Weapon | RNG | Target | RoA | Hit | Surge | S | Dmg | Keyword |
|---|---|---|---|---|---|---|---|---|
| Vile Claws | E | Ground | 2 | 4+ | - | - | 1 | – |
Tunneling ClawsPassive+10 3 models While this Unit has the Burrowed Status, it may perform the Move and Run actions without losing that Status. It may also move through other Units' bases.
Glial ReconstitutionActive1 BM+20 3 models This Unit gains BUFF SPEED (1), or BUFF SPEED (2) if the Unit is ON CREEP.
Burrow AmbushPassive+20 3 models When this Unit is nominated to deploy from the Reserves, it may resolve the PLACE (18) effect from the controlling player's Entry Edge. No model may be set Within 10" of any Enemy model. This Unit's Activation ends.
Hydriodic BilePassive+10 3 models This Unit's Acid Saliva weapon gains Surge Type: Light, and S Dice: D3+1.
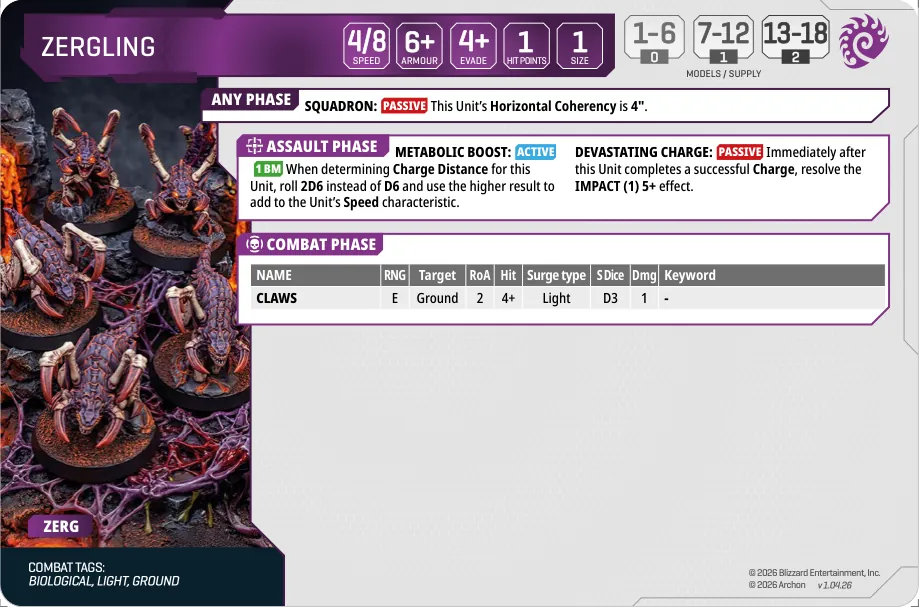
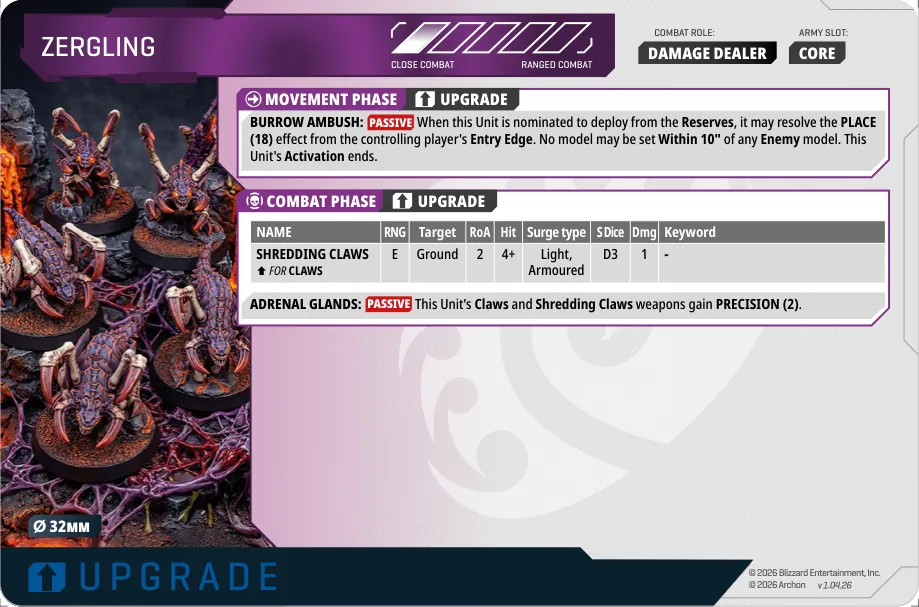
SquadronPassive This Unit's Horizontal Coherency is 4".
Metabolic BoostActive1 BM When determining Charge Distance for this Unit, roll 2D6 instead of D6 and use the higher result to add to the Unit's Speed characteristic.
Devastating ChargePassive Immediately after this Unit completes a successful Charge, resolve the IMPACT (1) 5+ effect.
| Weapon | RNG | Target | RoA | Hit | Surge | S | Dmg | Keyword |
|---|---|---|---|---|---|---|---|---|
| Claws | E | Ground | 2 | 4+ | Light | D3 | 1 | – |
Burrow AmbushPassive+20 / +30 12 / 18 When this Unit is nominated to deploy from the Reserves, it may resolve the PLACE (18) effect from the controlling player's Entry Edge. No model may be set Within 10" of any Enemy model. This Unit's Activation ends.
Adrenal GlandsPassive+20 / +20 12 / 18 This Unit's Claws and Shredding Claws weapons gain PRECISION (2).
| Weapon | RNG | Target | RoA | Hit | Surge | S | Dmg | Keyword |
|---|---|---|---|---|---|---|---|---|
| Shredding Claws↑ for Claws+10 / +10 12 / 18 | E | Ground | 2 | 4+ | Light, Armoured | D3 | 1 | – |
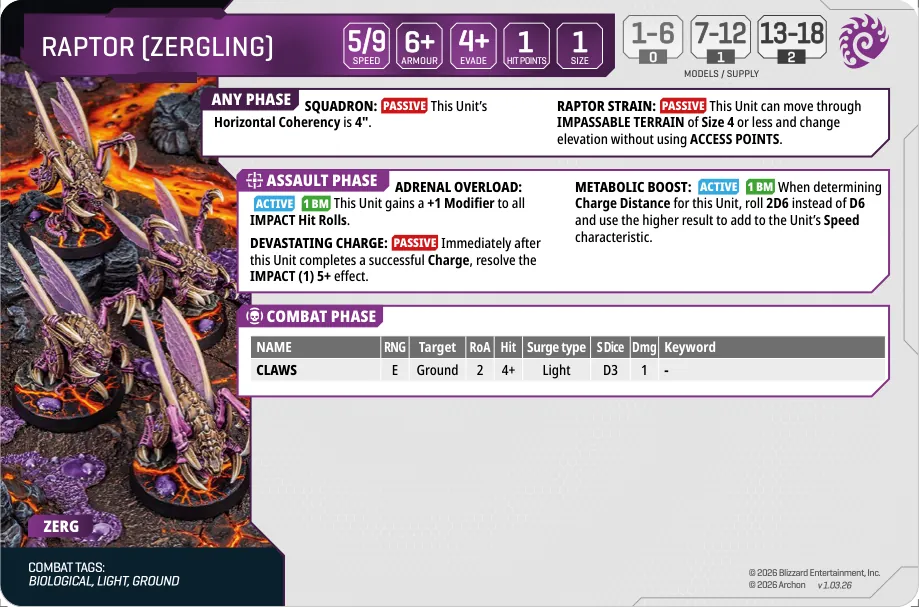
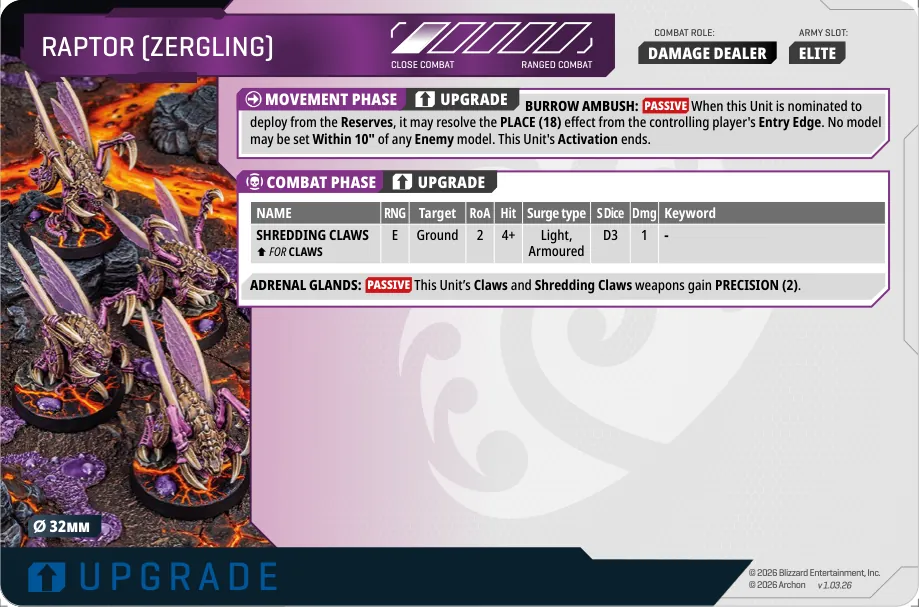
SquadronPassive This Unit's Horizontal Coherency is 4".
Raptor StrainPassive This Unit can move through IMPASSABLE TERRAIN of Size 4 or less and change elevation without using ACCESS POINTS.
Adrenal OverloadActive1 BM This Unit gains a +1 Modifier to all IMPACT Hit Rolls.
Devastating ChargePassive Immediately after this Unit completes a successful Charge, resolve the IMPACT (1) 5+ effect.
Metabolic BoostActive1 BM When determining Charge Distance for this Unit, roll 2D6 instead of D6 and use the higher result to add to the Unit's Speed characteristic.
| Weapon | RNG | Target | RoA | Hit | Surge | S | Dmg | Keyword |
|---|---|---|---|---|---|---|---|---|
| Claws | E | Ground | 2 | 4+ | Light | D3 | 1 | – |
Burrow AmbushPassive+20 / +30 12 / 18 When this Unit is nominated to deploy from the Reserves, it may resolve the PLACE (18) effect from the controlling player's Entry Edge. No model may be set Within 10" of any Enemy model. This Unit's Activation ends.
Adrenal GlandsPassive+20 / +20 12 / 18 This Unit's Claws and Shredding Claws weapons gain PRECISION (2).
| Weapon | RNG | Target | RoA | Hit | Surge | S | Dmg | Keyword |
|---|---|---|---|---|---|---|---|---|
| Shredding Claws↑ for Claws+10 / +10 12 / 18 | E | Ground | 2 | 4+ | Light, Armoured | D3 | 1 | – |
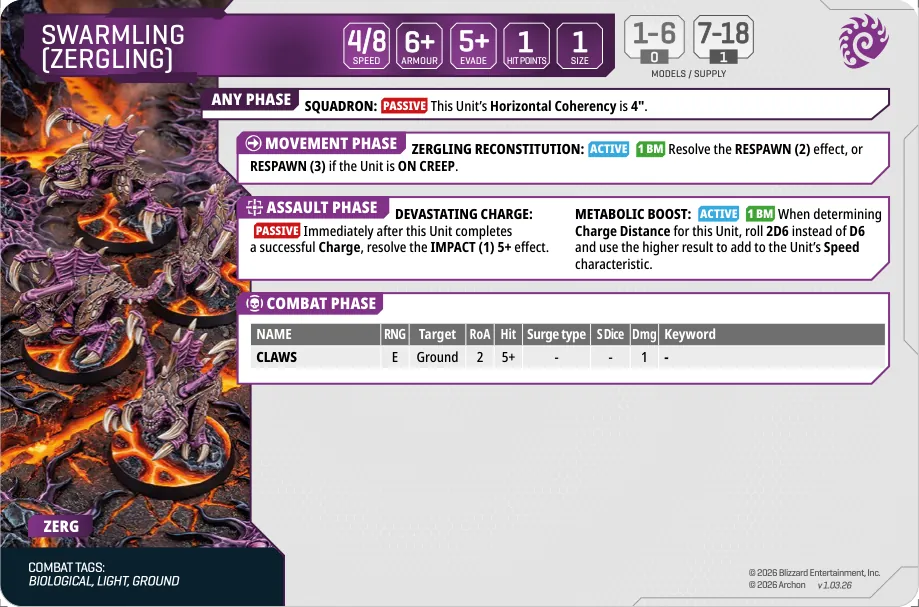
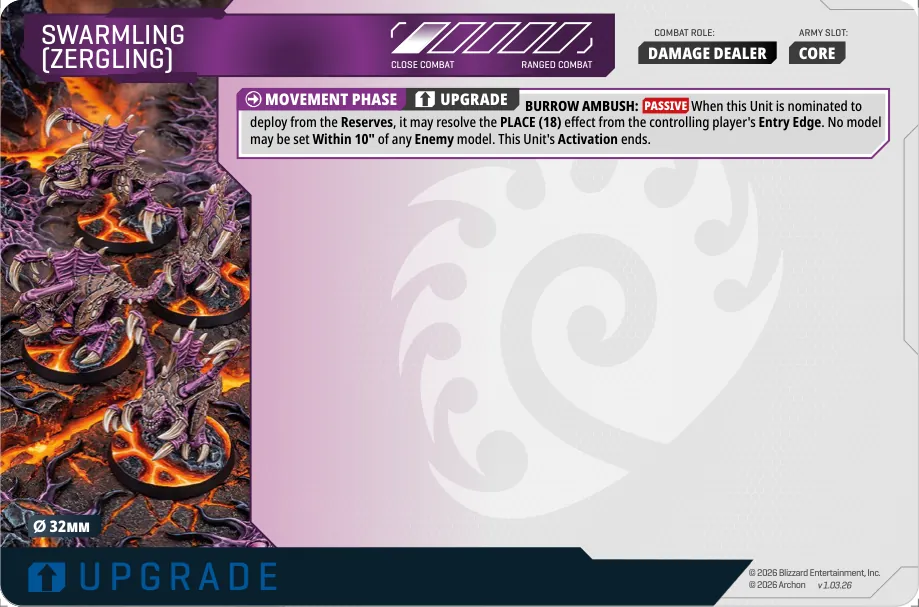
SquadronPassive This Unit's Horizontal Coherency is 4".
Zergling ReconstitutionActive1 BM Resolve the RESPAWN (2) effect, or RESPAWN (3) if the Unit is ON CREEP.
Devastating ChargePassive Immediately after this Unit completes a successful Charge, resolve the IMPACT (1) 5+ effect.
Metabolic BoostActive1 BM When determining Charge Distance for this Unit, roll 2D6 instead of D6 and use the higher result to add to the Unit's Speed characteristic.
| Weapon | RNG | Target | RoA | Hit | Surge | S | Dmg | Keyword |
|---|---|---|---|---|---|---|---|---|
| Claws | E | Ground | 2 | 5+ | - | - | 1 | – |
Burrow AmbushPassive+20 18 models When this Unit is nominated to deploy from the Reserves, it may resolve the PLACE (18) effect from the controlling player's Entry Edge. No model may be set Within 10" of any Enemy model. This Unit's Activation ends.
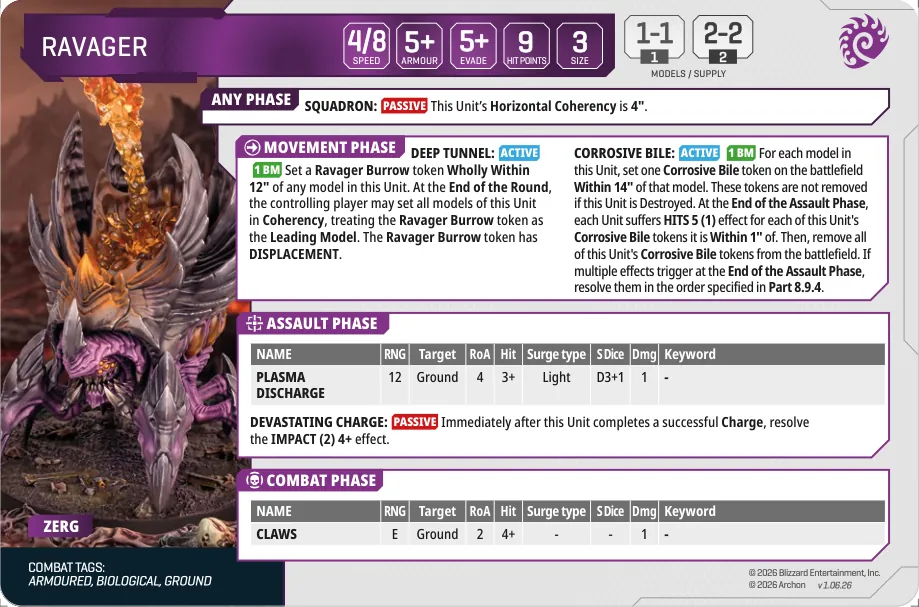
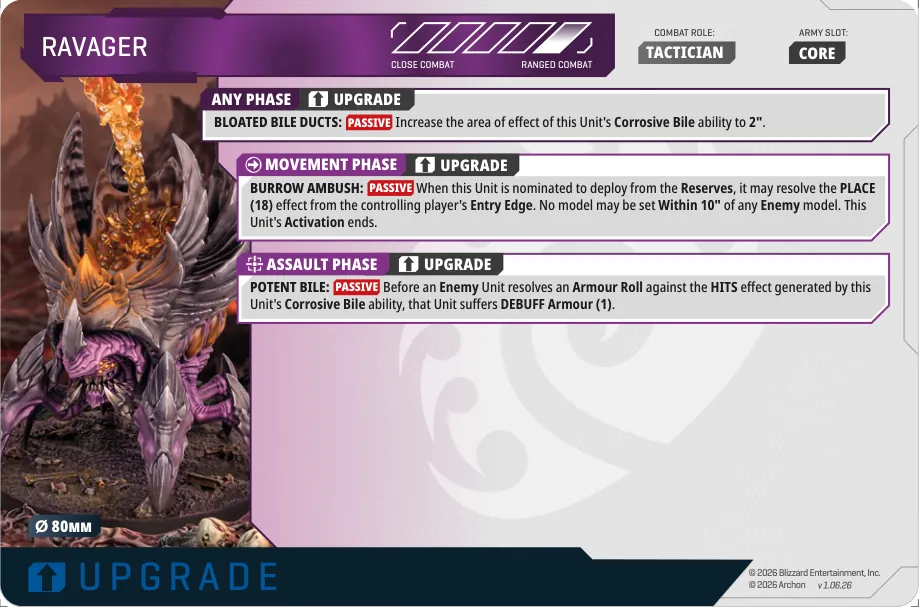
SquadronPassive This Unit's Horizontal Coherency is 4".
Deep TunnelActive1 BM Set a Ravager Burrow token Wholly Within 12" of any model in this Unit. At the End of the Round, the controlling player may set all models of this Unit in Coherency, treating the Ravager Burrow token as the Leading Model. The Ravager Burrow token has DISPLACEMENT.
Corrosive BileActive1 BM For each model in this Unit, set one Corrosive Bile token on the battlefield Within 14" of that model. These tokens are not removed if this Unit is Destroyed. At the End of the Assault Phase, each Unit suffers HITS 5 (1) effect for each of this Unit's Corrosive Bile tokens it is Within 1" of. Then, remove all of this Unit's Corrosive Bile tokens from the battlefield. If multiple effects trigger at the End of the Assault Phase, resolve them in the order specified in Part 8.9.4.
Devastating ChargePassive Immediately after this Unit completes a successful Charge, resolve the IMPACT (2) 4+ effect.
| Weapon | RNG | Target | RoA | Hit | Surge | S | Dmg | Keyword |
|---|---|---|---|---|---|---|---|---|
| Plasma Discharge | 12 | Ground | 4 | 3+ | Light | D3+1 | 1 | – |
| Weapon | RNG | Target | RoA | Hit | Surge | S | Dmg | Keyword |
|---|---|---|---|---|---|---|---|---|
| Claws | E | Ground | 2 | 4+ | - | - | 1 | – |
Bloated Bile DuctsPassive+20 / +40 1 / 2 Increase the area of effect of this Unit's Corrosive Bile ability to 2".
Burrow AmbushPassive+20 / +40 1 / 2 When this Unit is nominated to deploy from the Reserves, it may resolve the PLACE (18) effect from the controlling player's Entry Edge. No model may be set Within 10" of any Enemy model. This Unit's Activation ends.
Potent BilePassive+20 / +40 1 / 2 Before an Enemy Unit resolves an Armour Roll against the HITS effect generated by this Unit's Corrosive Bile ability, that Unit suffers DEBUFF Armour (1).
Brood InstinctReaction Use before a Friendly Unit makes an Evade Roll. Apply a +1 Modifier to that roll.
Zerg CreepPassive During Army Building, select exactly one Creep Card and add it to their Army List, paying its listed cost (if any).
Rapid BurrowingActive Select one Friendly, Unengaged Ground Zerg Unit on the battlefield. That Unit gains the Burrowed Status, even if it has already been Activated this Round.
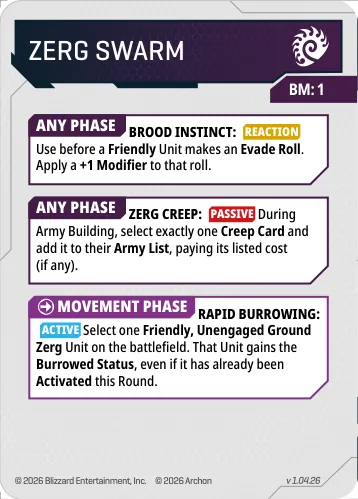
Wild MutationActive If the active unit is ON CREEP, the unit gains BUFF Speed (1) and its first used Weapon gains PRECISION (1).
Zerg CreepPassive During Army Building, you must select exactly one Creep Card and add it to your Army List, paying its listed cost (if any).
Omega NetworkActive If there is no Friendly Omega Worm on the battlefield, set a Friendly Omega Worm Unit anywhere on GROUND LEVEL of the battlefield, more than 10" away from any Enemy model. This Round, the Omega Worm is not eligible to use its Special Abilities (excluding Structure).
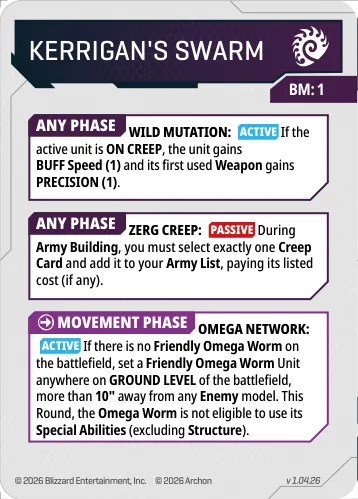
Creep RemovalPassive If an Enemy Unit ends a Move, Deploy, Run, Charge or Disengage action Within 1" of a Friendly Creep Tumor token, remove that token from the battlefield.
Living Glob of TissuePassive Creep Tumor tokens have STAY IN PLAY and DISPLACEMENT.
Malevolent MatriarchPassive If the active Friendly Zerg Unit declares a Charge action while ON CREEP, it gains +1 Modifier to IMPACT Hit Rolls.
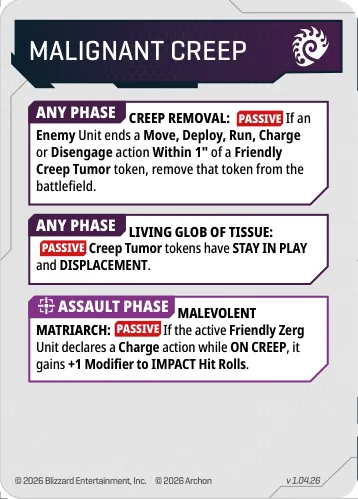
Speed on CreepPassive If the active Friendly Zerg Unit is ON CREEP, increase its Speed characteristic by 1.
Living Glob of TissuePassive Creep Tumor tokens have STAY IN PLAY and DISPLACEMENT.
Creep RemovalPassive If an Enemy Unit ends a Move, Deploy, Run, Charge or Disengage action Within 1" of a Friendly Creep Tumor token, remove that token from the battlefield.
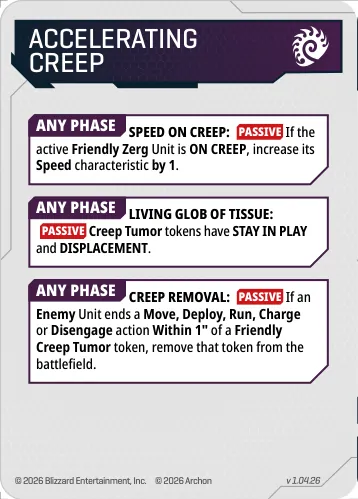
Oversight ModeActive Set a Faction Indicator anywhere on the battlefield. While Enemy Units are Within 6" of this Faction Indicator, they lose HIDDEN Status.
Pneumatized CarapaceReaction Use after a Friendly Unit rolls a D6 for Charge Distance. Roll an additional D6 and use the higher result to calculate the total Charge Distance.
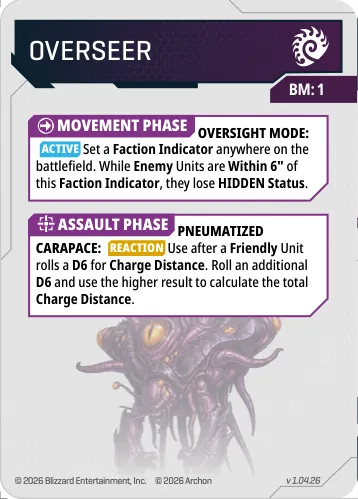
Lie In WaitActive The active, Unengaged Ground Unit gains the Burrowed Status.
Creep SpreadActive Set a Creep Tumor token on the battlefield Within 6" (Line of Sight is not required) of either a Friendly Entry Edge or an existing Friendly Creep Tumor token.
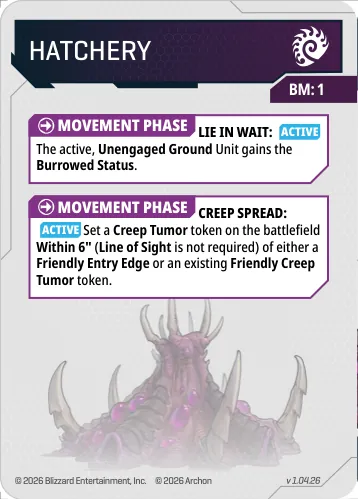
CarapaceReaction Use before a Friendly Unit makes an Armour Roll. That Unit gains TOUGH (1) for this roll.
Extended ClawsActive The active Unit gains a +1 Modifier to all IMPACT Hit Rolls.
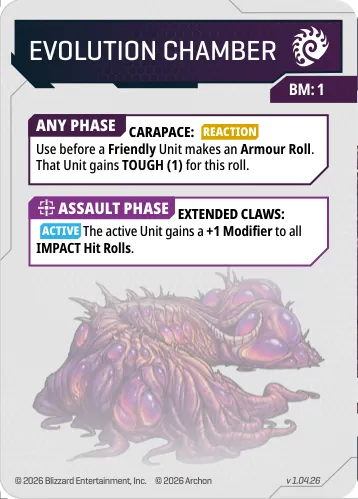
Missile AttacksActive The active Unit's first Ranged Weapon used gains PRECISION (1).
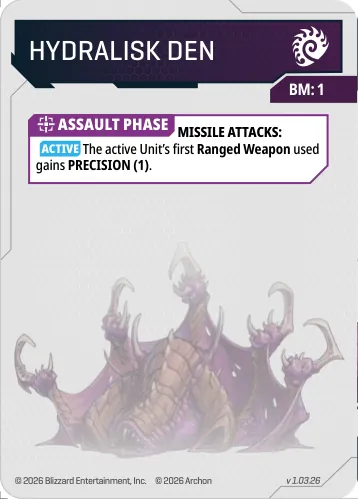
Ventral SacsActive Set a Faction Indicator anywhere on the battlefield more than 10" away from any Enemy model. At the End of the Round, the controlling player may Deploy one Ground Unit from Reserves in base-to-base contact with this Faction Indicator.
Excrete CreepActive Set a Creep Tumor token on the battlefield Within 6" (Line of Sight is not required) of either a Friendly Entry Edge or an existing Friendly Creep Tumor token.
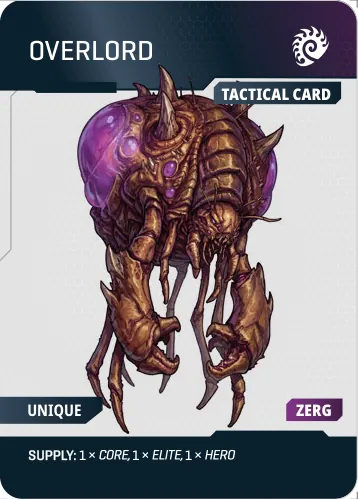
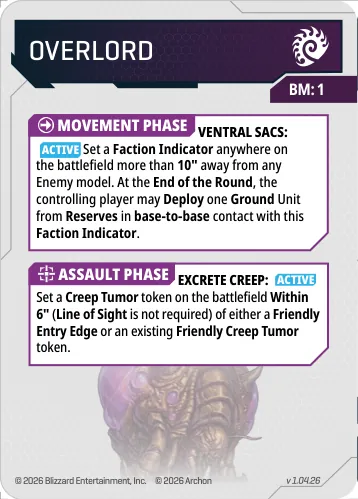
PredationActive The active Unit's Close Combat Weapons gain INSTANT.
Creep SpreadActive Set a Creep Tumor token on the battlefield Within 6" (Line of Sight is not required) of either a Friendly Entry Edge or an existing Friendly Creep Tumor token.
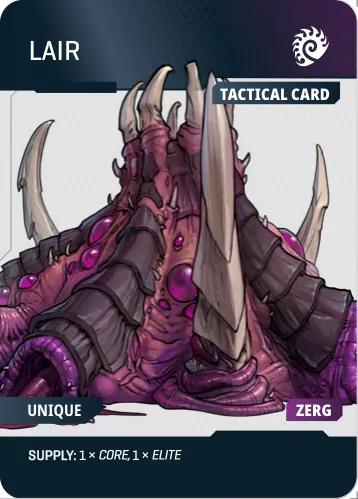
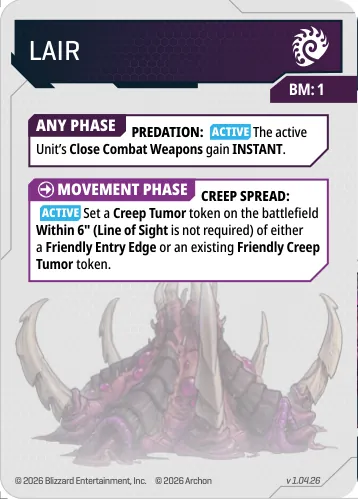
Nasty SurpriseActive The active Ground Unit loses the Burrowed Status.
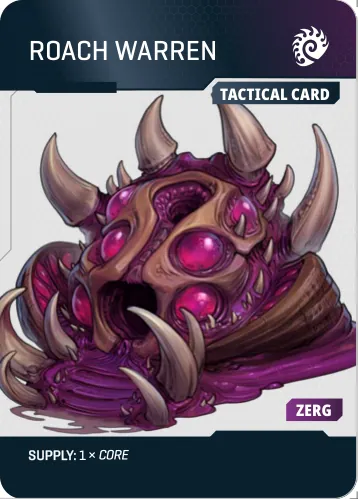
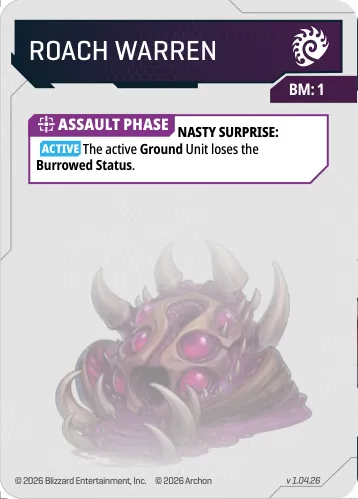
Timing PushActive The active Zergling Unit Deploys from any table edge that is not a Player's Entry Edge. This action must end more than 10" away from any Enemy model.
Feral RageActive The active Unit's first Close Combat Weapon used gains PRECISION (2).
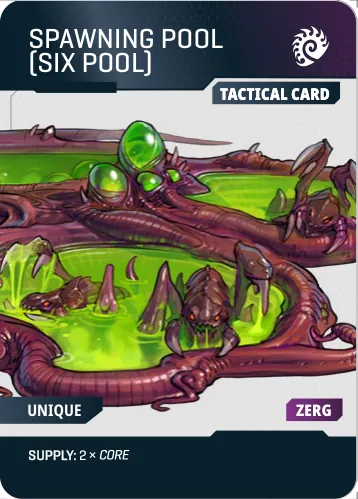
Feral RageActive The active Unit's first Close Combat Weapon used gains PRECISION (2).
Spawn LarvaActive The active Friendly non-Unique Biological Unit with a Size Characteristic of 1 resolves the RESPAWN (2) effect.
Ravager MorphActive Once per Game. The active Friendly Roach Unit performs MORPH (Ravager) 1.
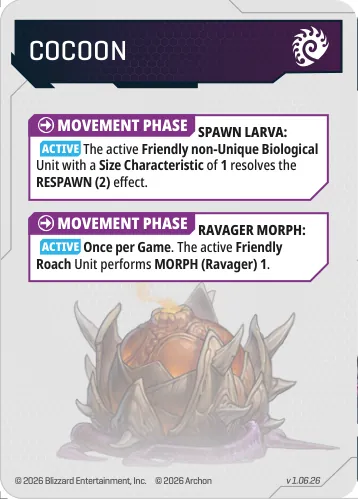
Unit cards and Tactical/Faction cards for the Protoss army.
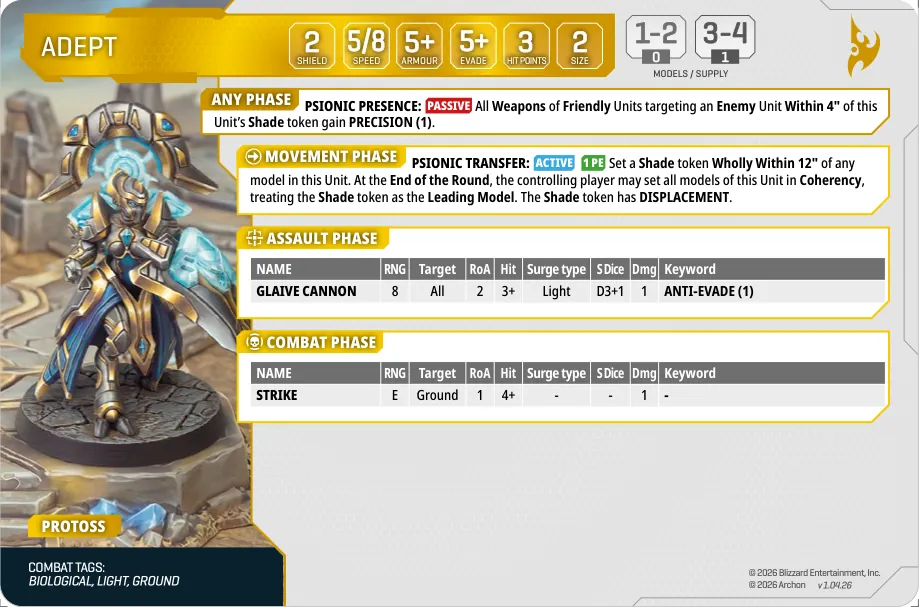
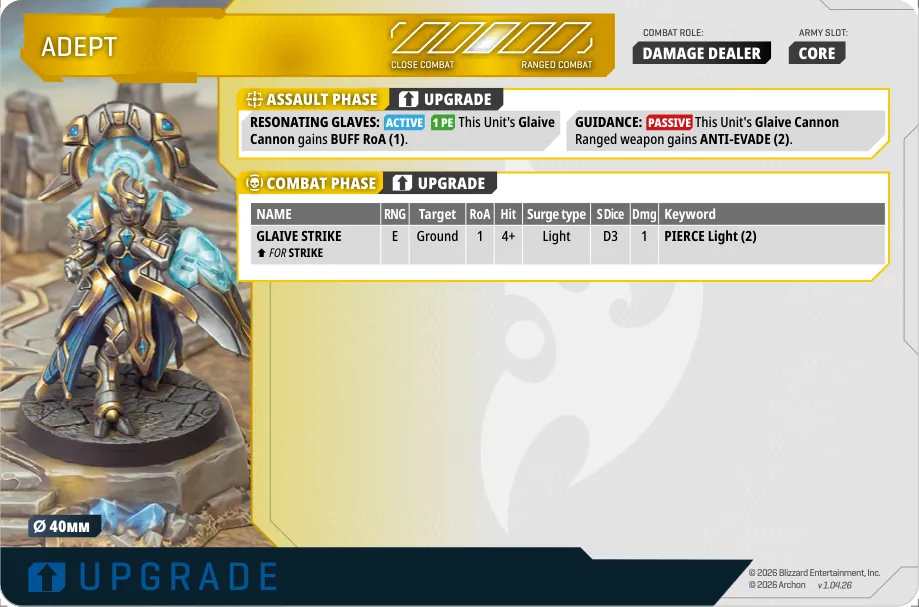
Psionic PresencePassive All Weapons of Friendly Units targeting an Enemy Unit Within 4" of this Unit's Shade token gain PRECISION (1).
Psionic TransferActive1 PE Set a Shade token Wholly Within 12" of any model in this Unit. At the End of the Round, the controlling player may set all models of this Unit in Coherency, treating the Shade token as the Leading Model. The Shade token has DISPLACEMENT.
| Weapon | RNG | Target | RoA | Hit | Surge | S | Dmg | Keyword |
|---|---|---|---|---|---|---|---|---|
| Glaive Cannon | 8 | All | 2 | 3+ | Light | D3+1 | 1 | ANTI-EVADE (1) |
| Weapon | RNG | Target | RoA | Hit | Surge | S | Dmg | Keyword |
|---|---|---|---|---|---|---|---|---|
| Strike | E | Ground | 1 | 4+ | - | - | 1 | – |
Resonating GlavesActive1 PE+20 4 models This Unit's Glaive Cannon gains BUFF RoA (1).
GuidancePassive+10 4 models This Unit's Glaive Cannon Ranged weapon gains ANTI-EVADE (2).
| Weapon | RNG | Target | RoA | Hit | Surge | S | Dmg | Keyword |
|---|---|---|---|---|---|---|---|---|
| Glaive Strike↑ for Strike+20 4 models | E | Ground | 1 | 4+ | Light | D3 | 1 | PIERCE Light (2) |
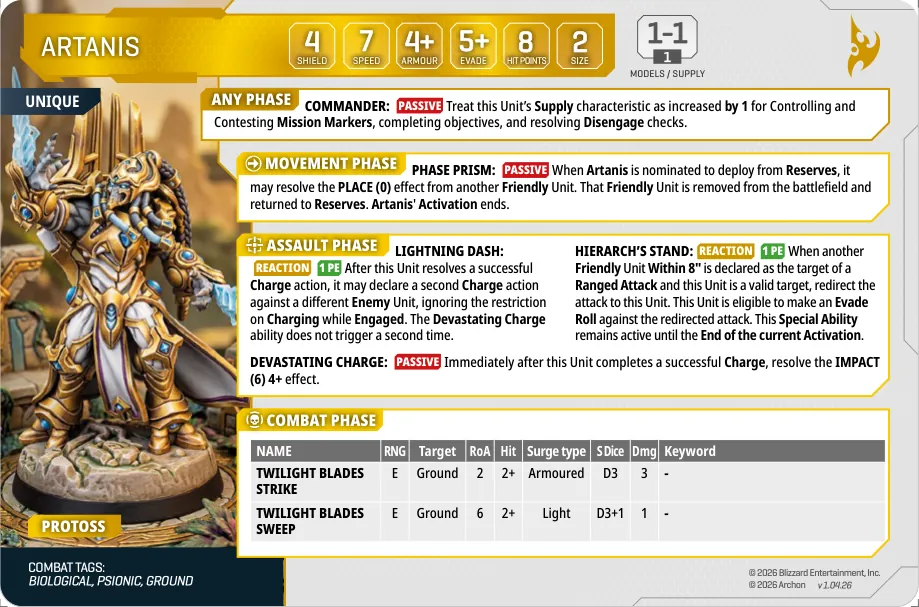
CommanderPassive Treat this Unit's Supply characteristic as increased by 1 for Controlling and Contesting Mission Markers, completing objectives, and resolving Disengage checks.
Phase PrismPassive When Artanis is nominated to deploy from Reserves, it may resolve the PLACE (0) effect from another Friendly Unit. That Friendly Unit is removed from the battlefield and returned to Reserves. Artanis' Activation ends.
Lightning DashReaction1 PE After this Unit resolves a successful Charge action, it may declare a second Charge action against a different Enemy Unit, ignoring the restriction on Charging while Engaged. The Devastating Charge ability does not trigger a second time.
Devastating ChargePassive Immediately after this Unit completes a successful Charge, resolve the IMPACT (6) 4+ effect.
Hierarch's StandReaction1 PE When another Friendly Unit Within 8" is declared as the target of a Ranged Attack and this Unit is a valid target, redirect the attack to this Unit. This Unit is eligible to make an Evade Roll against the redirected attack. This Special Ability remains active until the End of the current Activation.
| Weapon | RNG | Target | RoA | Hit | Surge | S | Dmg | Keyword |
|---|---|---|---|---|---|---|---|---|
| Twilight Blades Strike | E | Ground | 2 | 2+ | Armoured | D3 | 3 | – |
| Twilight Blades Sweep | E | Ground | 6 | 2+ | Light | D3+1 | 1 | – |
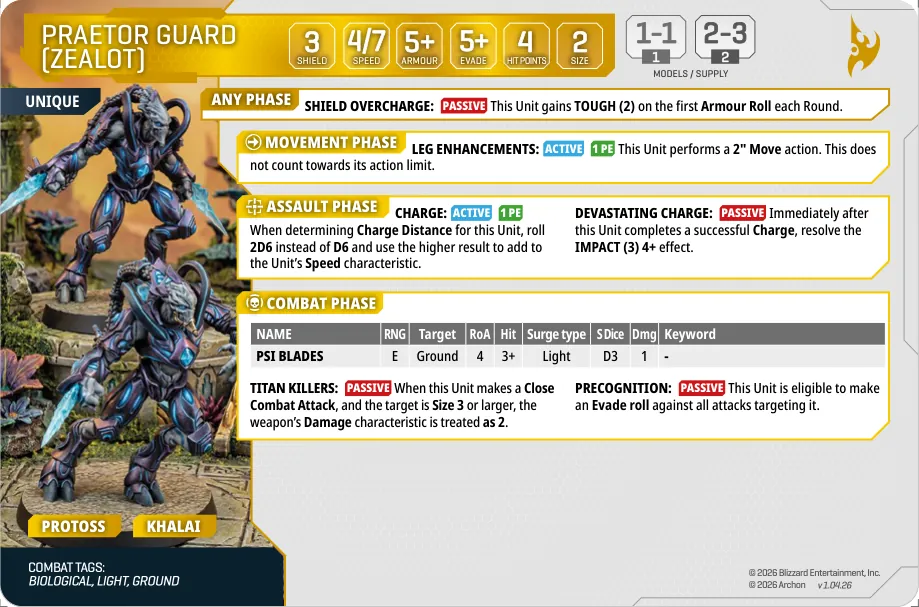
Shield OverchargePassive This Unit gains TOUGH (2) on the first Armour Roll each Round.
Leg EnhancementsActive1 PE This Unit performs a 2" Move action. This does not count towards its action limit.
ChargeActive1 PE When determining Charge Distance for this Unit, roll 2D6 instead of D6 and use the higher result to add to the Unit's Speed characteristic.
Devastating ChargePassive Immediately after this Unit completes a successful Charge, resolve the IMPACT (3) 4+ effect.
Titan KillersPassive When this Unit makes a Close Combat Attack, and the target is Size 3 or larger, the weapon's Damage characteristic is treated as 2.
PrecognitionPassive This Unit is eligible to make an Evade roll against all attacks targeting it.
| Weapon | RNG | Target | RoA | Hit | Surge | S | Dmg | Keyword |
|---|---|---|---|---|---|---|---|---|
| Psi Blades | E | Ground | 4 | 3+ | Light | D3 | 1 | – |
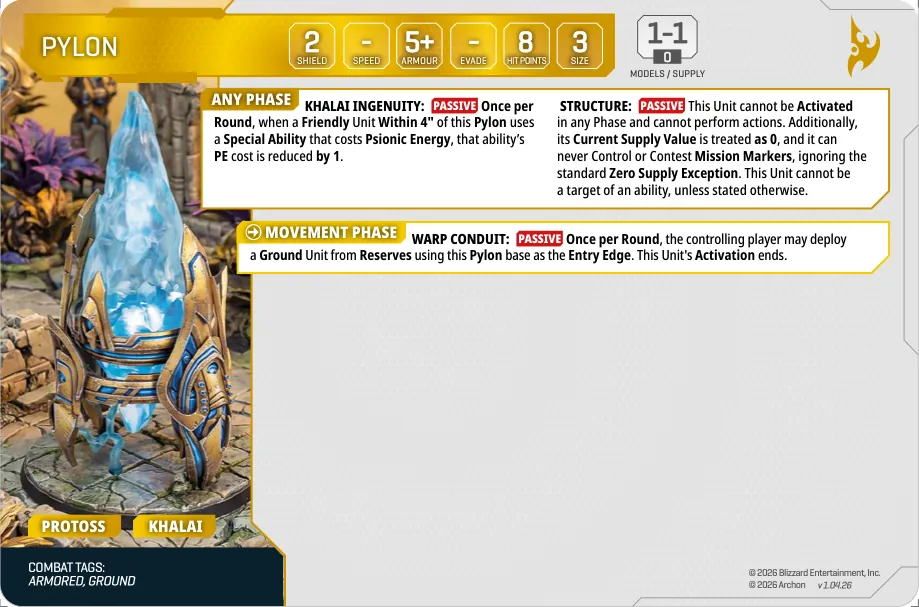
Khalai IngenuityPassive Once per Round, when a Friendly Unit Within 4" of this Pylon uses a Special Ability that costs Psionic Energy, that ability's PE cost is reduced by 1.
StructurePassive This Unit cannot be Activated in any Phase and cannot perform actions. Additionally, its Current Supply Value is treated as 0, and it can never Control or Contest Mission Markers, ignoring the standard Zero Supply Exception. This Unit cannot be a target of an ability, unless stated otherwise.
Warp ConduitPassive Once per Round, the controlling player may deploy a Ground Unit from Reserves using this Pylon base as the Entry Edge. This Unit's Activation ends.
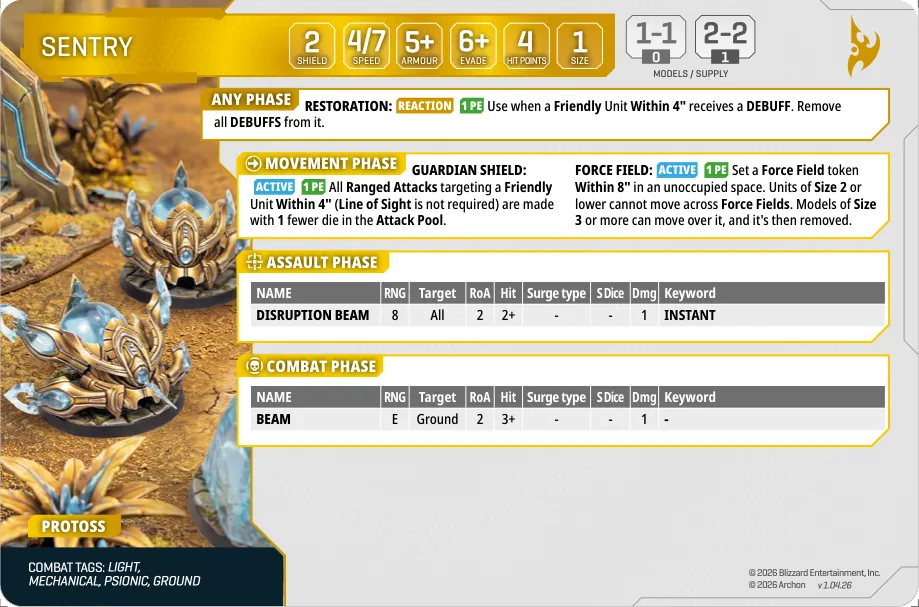
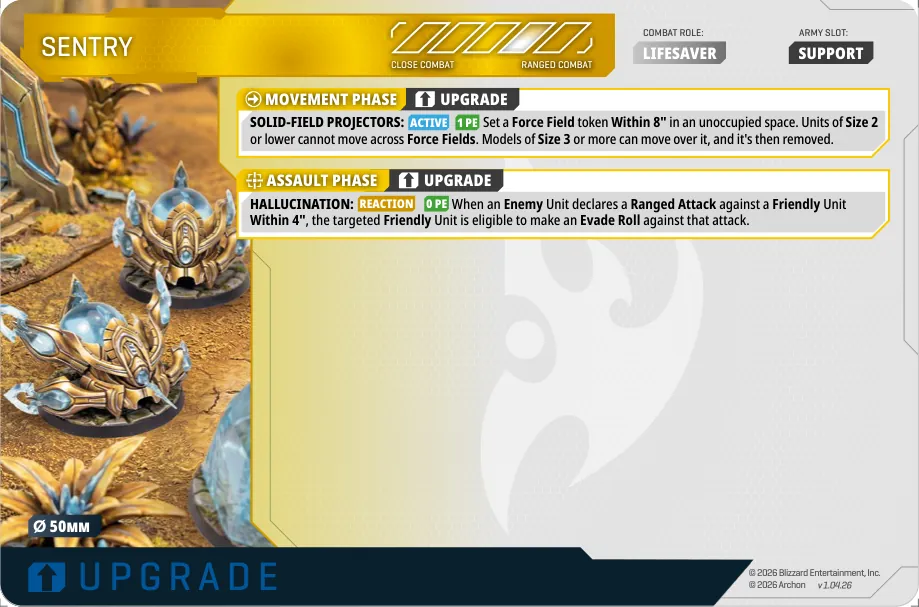
RestorationReaction1 PE Use when a Friendly Unit Within 4" receives a DEBUFF. Remove all DEBUFFS from it.
Guardian ShieldActive1 PE All Ranged Attacks targeting a Friendly Unit Within 4" (Line of Sight is not required) are made with 1 fewer die in the Attack Pool.
Force FieldActive1 PE Set a Force Field token Within 8" in an unoccupied space. Units of Size 2 or lower cannot move across Force Fields. Models of Size 3 or more can move over it, and it's then removed.
| Weapon | RNG | Target | RoA | Hit | Surge | S | Dmg | Keyword |
|---|---|---|---|---|---|---|---|---|
| Disruption Beam | 8 | All | 2 | 2+ | - | - | 1 | INSTANT |
| Weapon | RNG | Target | RoA | Hit | Surge | S | Dmg | Keyword |
|---|---|---|---|---|---|---|---|---|
| Beam | E | Ground | 2 | 3+ | - | - | 1 | – |
Solid-field ProjectorsActive1 PE+20 2 models Set a Force Field token Within 8" in an unoccupied space. Units of Size 2 or lower cannot move across Force Fields. Models of Size 3 or more can move over it, and it's then removed.
HallucinationReaction0 PE+30 2 models When an Enemy Unit declares a Ranged Attack against a Friendly Unit Within 4", the targeted Friendly Unit is eligible to make an Evade Roll against that attack.
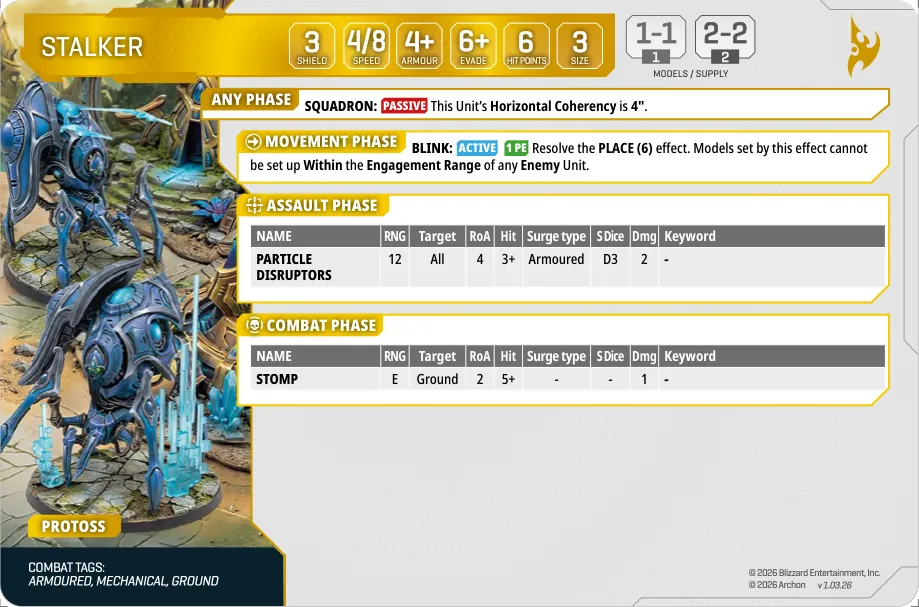
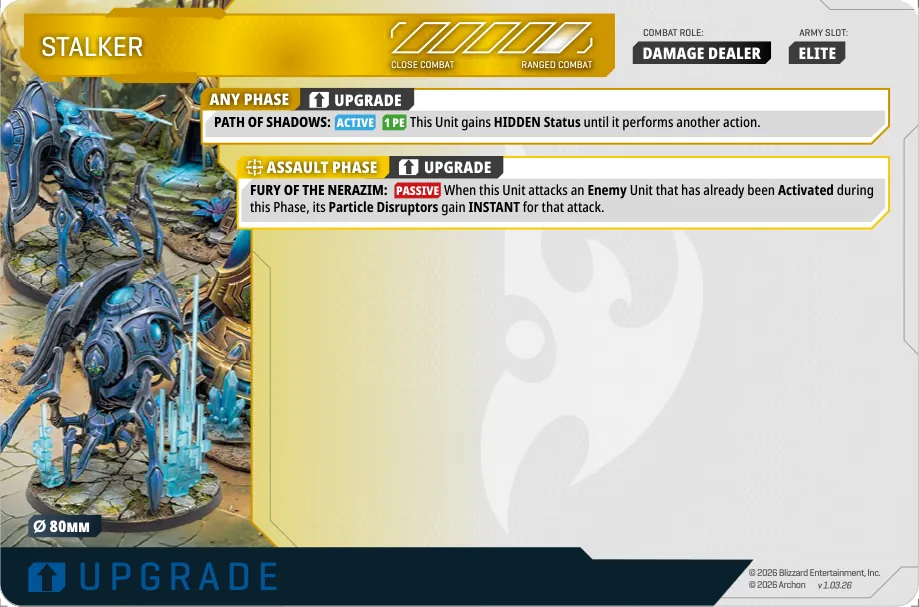
SquadronPassive This Unit's Horizontal Coherency is 4".
BlinkActive1 PE Resolve the PLACE (6) effect. Models set by this effect cannot be set up Within the Engagement Range of any Enemy Unit.
| Weapon | RNG | Target | RoA | Hit | Surge | S | Dmg | Keyword |
|---|---|---|---|---|---|---|---|---|
| Particle Disruptors | 12 | All | 4 | 3+ | Armoured | D3 | 2 | – |
| Weapon | RNG | Target | RoA | Hit | Surge | S | Dmg | Keyword |
|---|---|---|---|---|---|---|---|---|
| Stomp | E | Ground | 2 | 5+ | - | - | 1 | – |
Path of ShadowsActive1 PE+20 / +40 1 / 2 This Unit gains HIDDEN Status until it performs another action.
Fury of the NerazimPassive+20 / +30 1 / 2 When this Unit attacks an Enemy Unit that has already been Activated during this Phase, its Particle Disruptors gain INSTANT for that attack.
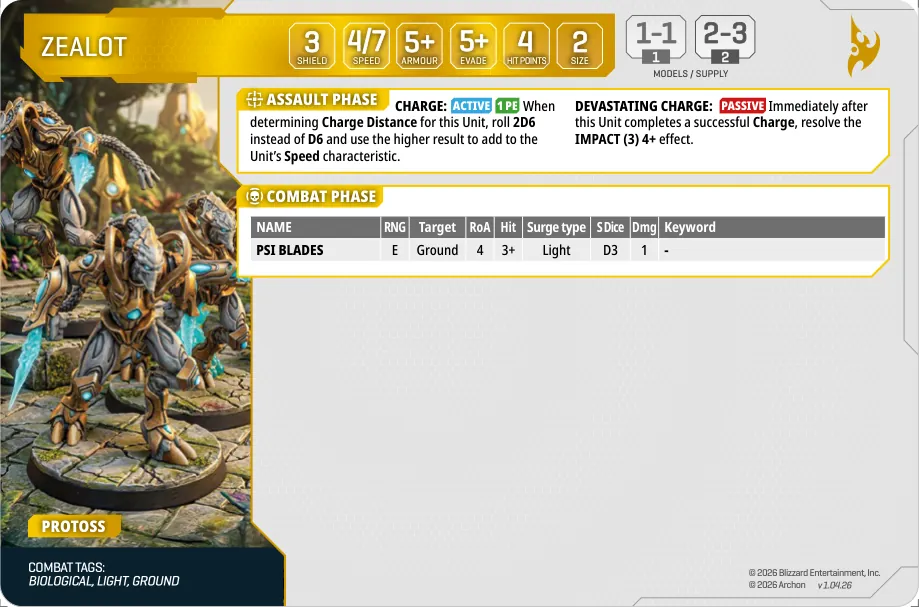
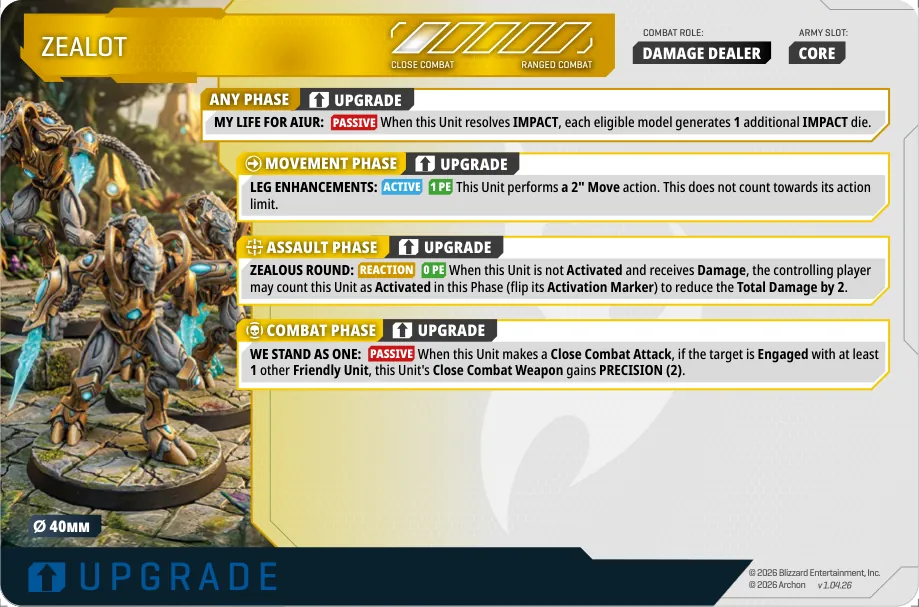
ChargeActive1 PE When determining Charge Distance for this Unit, roll 2D6 instead of D6 and use the higher result to add to the Unit's Speed characteristic.
Devastating ChargePassive Immediately after this Unit completes a successful Charge, resolve the IMPACT (3) 4+ effect.
| Weapon | RNG | Target | RoA | Hit | Surge | S | Dmg | Keyword |
|---|---|---|---|---|---|---|---|---|
| Psi Blades | E | Ground | 4 | 3+ | Light | D3 | 1 | – |
My Life for AiurPassive+10 3 models When this Unit resolves IMPACT, each eligible model generates 1 additional IMPACT die.
Leg EnhancementsActive1 PE+20 3 models This Unit performs a 2" Move action. This does not count towards its action limit.
Zealous RoundReaction0 PE+10 3 models When this Unit is not Activated and receives Damage, the controlling player may count this Unit as Activated in this Phase (flip its Activation Marker) to reduce the Total Damage by 2.
We Stand As OnePassive+20 3 models When this Unit makes a Close Combat Attack, if the target is Engaged with at least 1 other Friendly Unit, this Unit's Close Combat Weapon gains PRECISION (2).
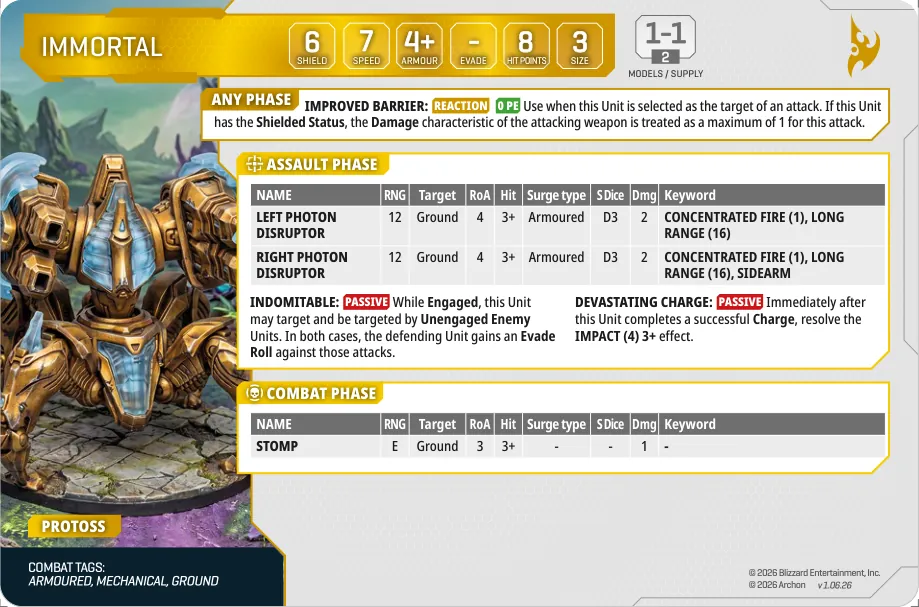
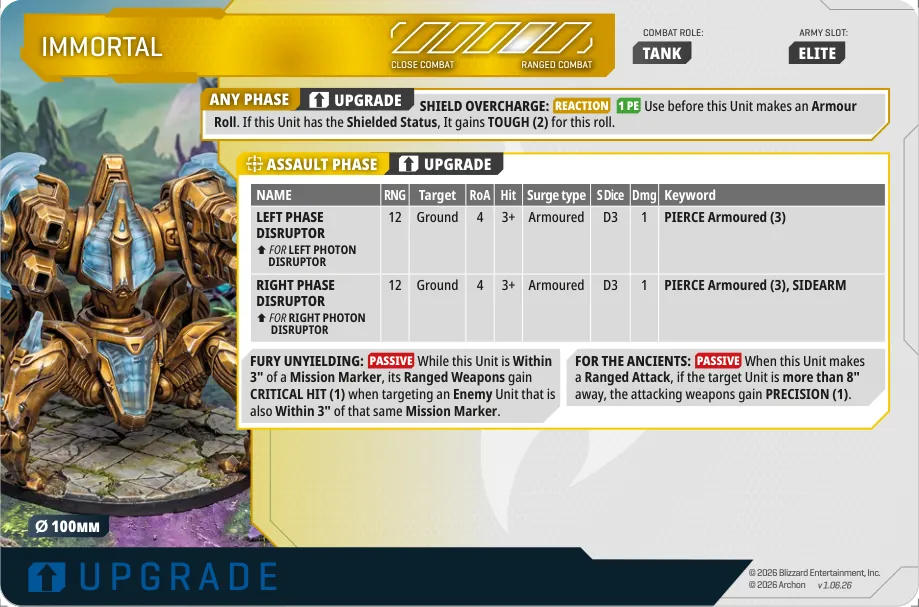
Improved BarrierReaction0 PE Use when this Unit is selected as the target of an attack. If this Unit has the Shielded Status, the Damage characteristic of the attacking weapon is treated as a maximum of 1 for this attack.
IndomitablePassive While Engaged, this Unit may target and be targeted by Unengaged Enemy Units. In both cases, the defending Unit gains an Evade Roll against those attacks.
Devastating ChargePassive Immediately after this Unit completes a successful Charge, resolve the IMPACT (4) 3+ effect.
| Weapon | RNG | Target | RoA | Hit | Surge | S | Dmg | Keyword |
|---|---|---|---|---|---|---|---|---|
| Left Photon Disruptor | 12 | Ground | 4 | 3+ | Armoured | D3 | 2 | CONCENTRATED FIRE (1), LONG RANGE (16) |
| Right Photon Disruptor | 12 | Ground | 4 | 3+ | Armoured | D3 | 2 | CONCENTRATED FIRE (1), LONG RANGE (16), SIDEARM |
| Weapon | RNG | Target | RoA | Hit | Surge | S | Dmg | Keyword |
|---|---|---|---|---|---|---|---|---|
| Stomp | E | Ground | 3 | 3+ | - | - | 1 | – |
Shield OverchargeReaction1 PE+20 1 models Use before this Unit makes an Armour Roll. If this Unit has the Shielded Status, It gains TOUGH (2) for this roll.
Fury UnyieldingPassive+20 1 models While this Unit is Within 3" of a Mission Marker, its Ranged Weapons gain CRITICAL HIT (1) when targeting an Enemy Unit that is also Within 3" of that same Mission Marker.
For the AncientsPassive+20 1 models When this Unit makes a Ranged Attack, if the target Unit is more than 8" away, the attacking weapons gain PRECISION (1).
| Weapon | RNG | Target | RoA | Hit | Surge | S | Dmg | Keyword |
|---|---|---|---|---|---|---|---|---|
| Left Phase Disruptor↑ for Left Photon Disruptor+20 1 models | 12 | Ground | 4 | 3+ | Armoured | D3 | 1 | PIERCE Armoured (3) |
| Right Phase Disruptor↑ for Right Photon Disruptor+20 1 models | 12 | Ground | 4 | 3+ | Armoured | D3 | 1 | PIERCE Armoured (3), SIDEARM |
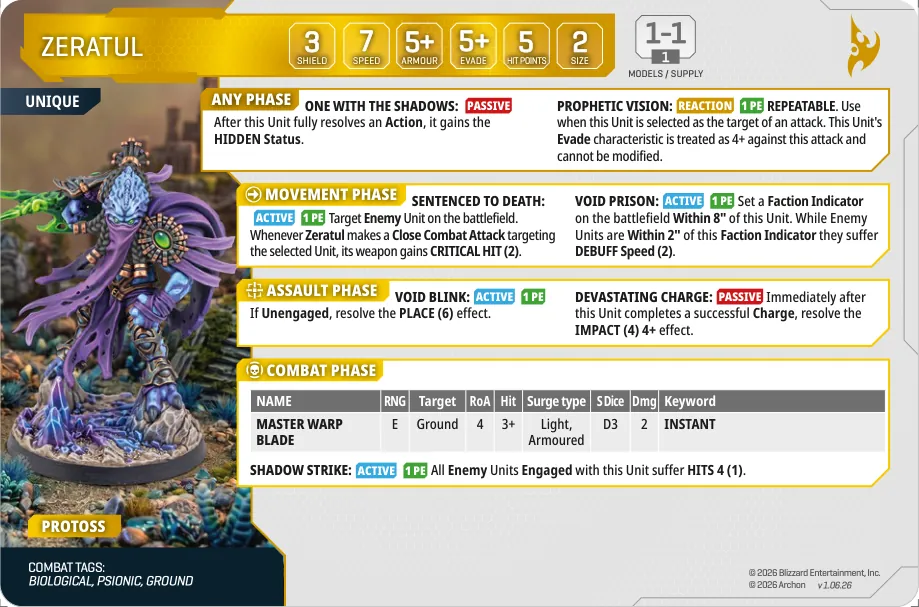
One With the ShadowsPassive After this Unit fully resolves an Action, it gains the HIDDEN Status.
Prophetic VisionReaction1 PE REPEATABLE. Use when this Unit is selected as the target of an attack. This Unit's Evade characteristic is treated as 4+ against this attack and cannot be modified.
Sentenced To DeathActive1 PE Target Enemy Unit on the battlefield. Whenever Zeratul makes a Close Combat Attack targeting the selected Unit, its weapon gains CRITICAL HIT (2).
Void PrisonActive1 PE Set a Faction Indicator on the battlefield Within 8" of this Unit. While Enemy Units are Within 2" of this Faction Indicator they suffer DEBUFF Speed (2).
Void BlinkActive1 PE If Unengaged, resolve the PLACE (6) effect.
Devastating ChargePassive Immediately after this Unit completes a successful Charge, resolve the IMPACT (4) 4+ effect.
Shadow StrikeActive1 PE All Enemy Units Engaged with this Unit suffer HITS 4 (1).
| Weapon | RNG | Target | RoA | Hit | Surge | S | Dmg | Keyword |
|---|---|---|---|---|---|---|---|---|
| Master Warp Blade | E | Ground | 4 | 3+ | Light, Armoured | D3 | 2 | INSTANT |
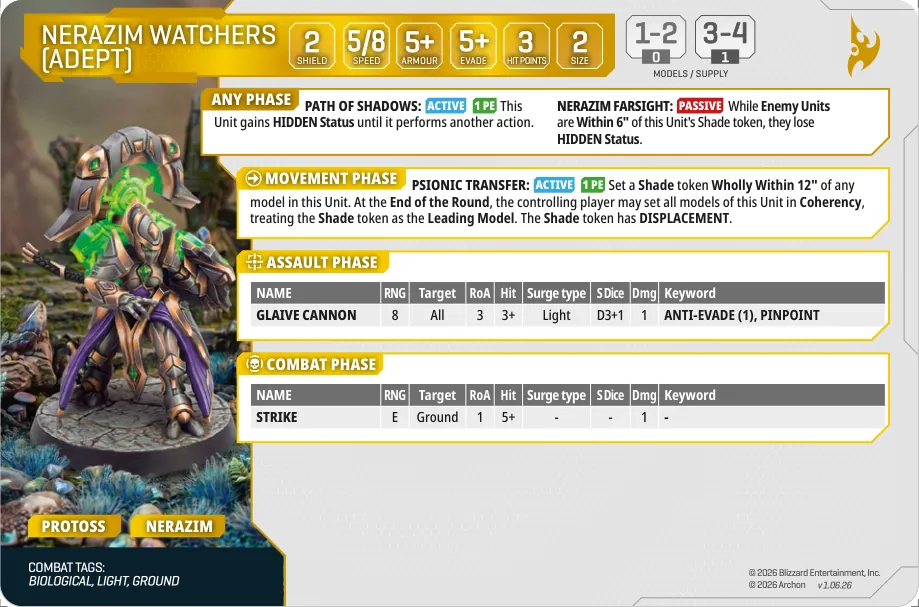
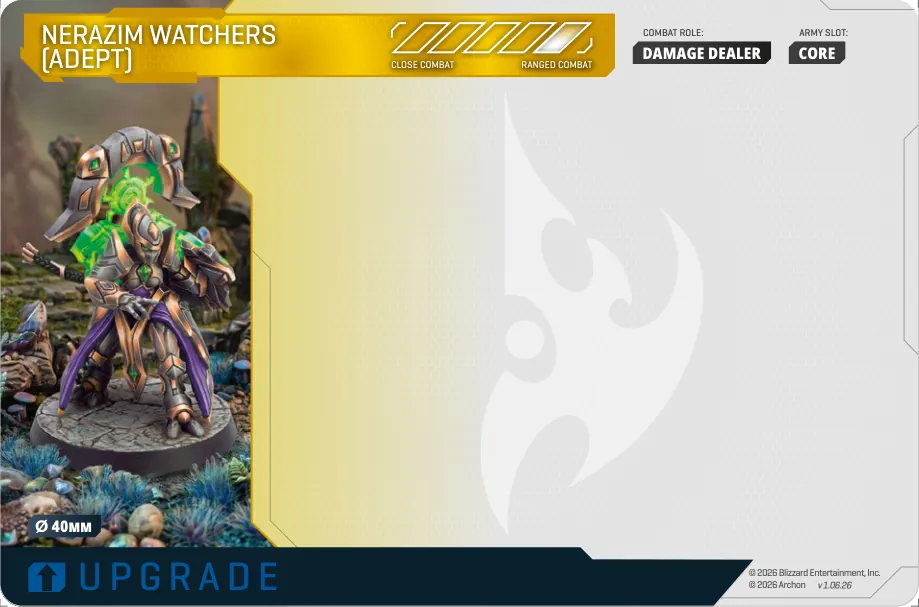
Path of ShadowsActive1 PE This Unit gains HIDDEN Status until it performs another action.
Nerazim FarsightPassive While Enemy Units are Within 6" of this Unit's Shade token, they lose HIDDEN Status.
Psionic TransferActive1 PE Set a Shade token Wholly Within 12" of any model in this Unit. At the End of the Round, the controlling player may set all models of this Unit in Coherency, treating the Shade token as the Leading Model. The Shade token has DISPLACEMENT.
| Weapon | RNG | Target | RoA | Hit | Surge | S | Dmg | Keyword |
|---|---|---|---|---|---|---|---|---|
| Glaive Cannon | 8 | All | 3 | 3+ | Light | D3+1 | 1 | ANTI-EVADE (1), PINPOINT |
| Weapon | RNG | Target | RoA | Hit | Surge | S | Dmg | Keyword |
|---|---|---|---|---|---|---|---|---|
| Strike | E | Ground | 1 | 5+ | - | - | 1 | – |
Pylon Warp-inActive If there is no Friendly Pylon on the battlefield, set a Friendly Pylon Unit anywhere on the GROUND LEVEL of the battlefield more than 10" away from any Enemy model. This Round, the Pylon is not eligible to use its Special Abilities (excluding Structure).
Bound by the KhalaActive At the end of the active Unit's Activation, select one other Friendly Unit eligible to Activate in the current Phase. Immediately Activate that Unit.
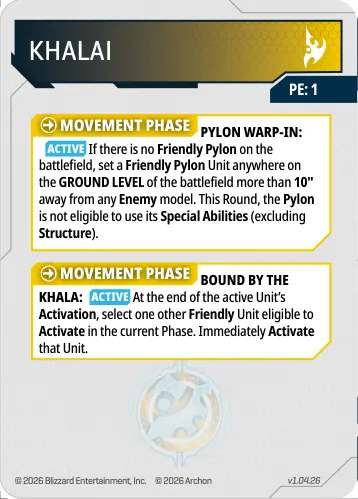
Dae'UhlReaction When a Friendly Unit receives Damage, reduce the Total Damage by 2 (to a minimum of 1).
Mass RecallActive Once per Game. Set a Faction Indicator anywhere on the battlefield. All Friendly Protoss Units Within 6" of this Faction Indicator are removed from the battlefield and returned to Reserves.
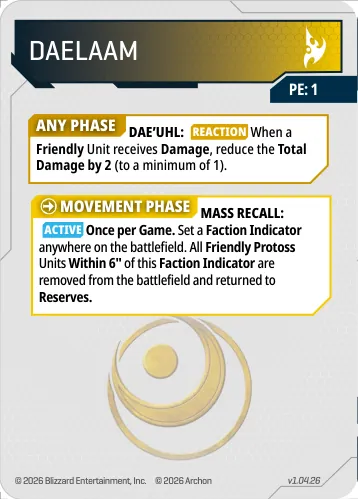
Might of the NerazimReaction If a Friendly Unit loses the HIDDEN Status, it gains Buff Speed (2) and its first Weapon used CRITICAL HIT (2).
Darkness DescendsActive The active Biological Unit gains the HIDDEN Status until the End of the Round.
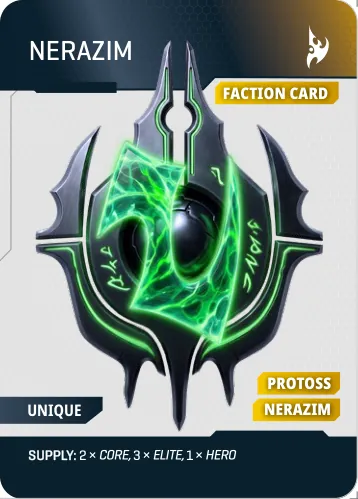
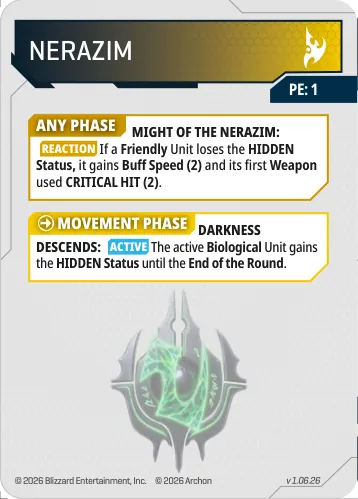
Zealous ChargeActive The active Unit gains BUFF Speed (2).
Quick StrikesActive The active Unit's first Close Combat Weapon used gains PRECISION (2).
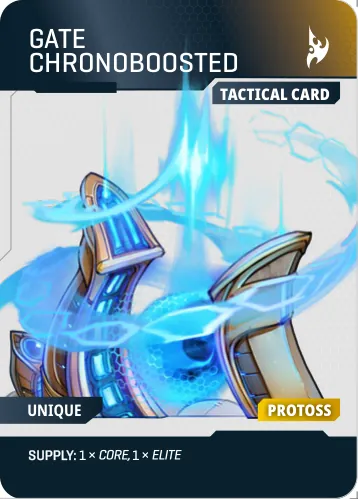
Quick StrikesActive The active Unit's first Close Combat Weapon used gains PRECISION (2).
PhaseActive The active Unit resolves the PLACE (3) effect.
Warp ConduitActive Set a Faction Indicator anywhere on the battlefield more than 10" away from any Enemy model. At the End of the Round, you may Deploy one Ground unit from Reserves in base-to-base Contact with this Faction Indicator.
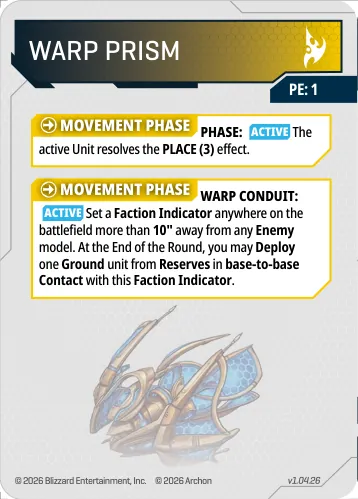
Photon OverchargeReaction Use when an Enemy Unit enters the battlefield from Reserves via a location other than its own Entry Edge. That Unit immediately suffers HITS 3 (1).
Strategic RecallActive The active, Unengaged Ground Unit is returned to Reserves instead of performing an action.
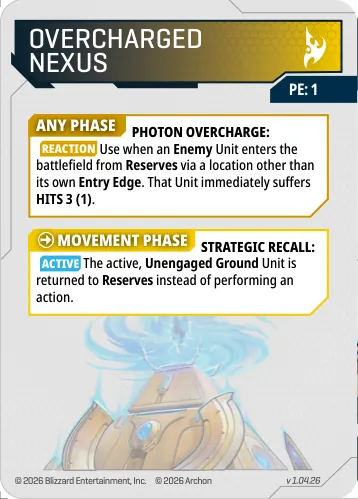
Veil of ShadowsReaction Use after a Friendly Unit resolves a PLACE effect. That Unit immediately resolves the HEAL (2) effect.
Weapons of the FirstbornActive The active Ground Unit's first Ranged Weapon used gains BUFF Range (4).
Warp InActive The active GROUND Unit Deploys from any table edge that is not a player's Entry Edge. This deployment must end more than 10" away from any Enemy model. The controlling player cannot use this ability if another Friendly Ground Unit has already Deployed this Round.
Quick StrikesActive The active Unit's first Close Combat Weapon used gains PRECISION (2).
Ancient PrideActive The active Unit's first Weapon used gains INSTANT.
Strategic RecallActive The active, Unengaged Ground Unit is returned to Reserves instead of performing an action.
SurveillanceActive Set a Faction Indicator anywhere on the battlefield. While Enemy Units are Within 6" of this Faction Indicator, they lose HIDDEN Status.
Gravitic BoostersReaction Use after a Friendly Unit rolls a D6 for Charge Distance. Add 1 to the Charge Distance for this Unit.
Ground ArmorReaction Use before a Friendly Ground Unit makes an Armour Roll. That Unit gains TOUGH (1) for this roll.
Ground WeaponsActive The active Ground Unit's first Ranged Weapon used gains CRITICAL HIT (1).
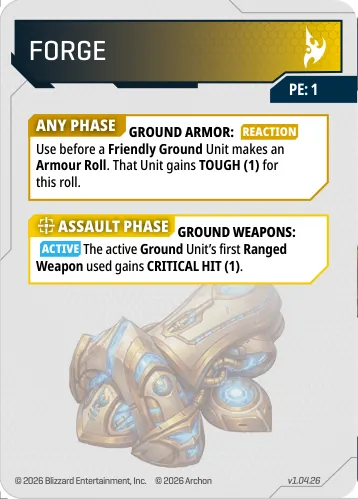
Guardian ShellReaction Use before a Friendly Ground Unit makes an Armour Roll. That Unit gains DODGE (2) for this roll.
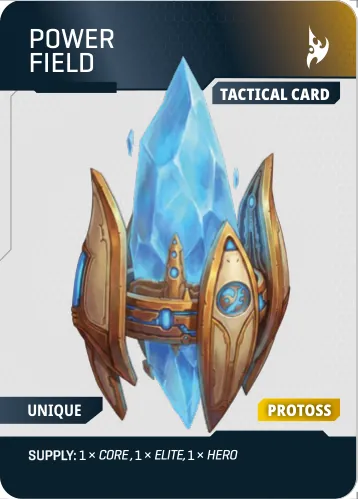
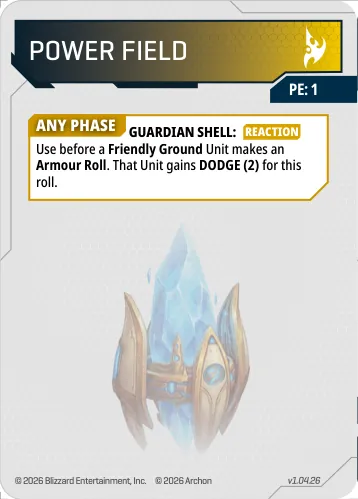
Personal TransportActive Instead of performing an action, the active, Unengaged Ground Unit is returned to Reserves. Then, it performs a Deploy action.
Anakh Su'nActive This Unit gains the HIDDEN Status until it performs another action.
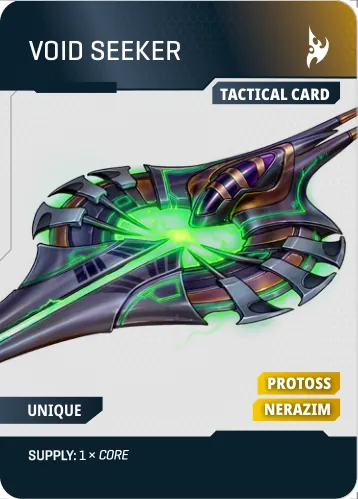
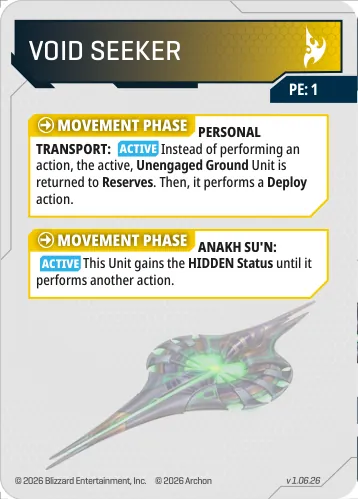
Plasma ShieldsReaction Use before a Friendly Mechanical Ground Unit makes an Armour Roll. If this Unit has the Shielded Status, it gains TOUGH (1) and DODGE (1) for this roll.
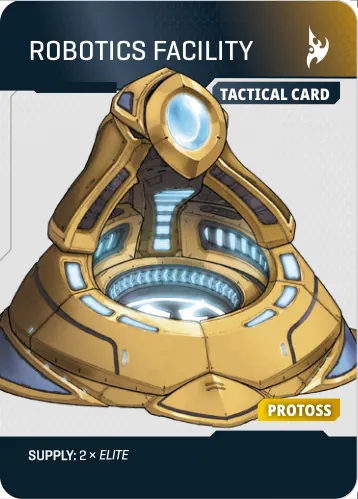
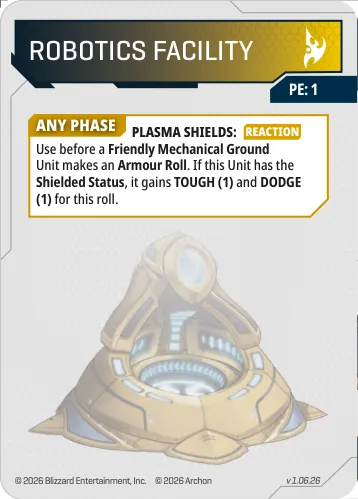
The Mission and Deployment cards chosen in the Draft (Part 9.2). Each Mission comes in Standard and Skirmish versions with different Supply and scoring.
Starting Supply 6 · Escalation +2 · Game Length 5 Rounds
Mission Parameters
Scoring Conditions
Additional Conditions
Starting Supply 4 · Escalation +1 · Game Length 4 Rounds
Mission Parameters
Scoring Conditions
Additional Conditions
Starting Supply 6 · Escalation +2 · Game Length 5 Rounds
Mission Parameters
Scoring Conditions
Additional Conditions
Starting Supply 3 · Escalation +1 · Game Length 5 Rounds
Mission Parameters
Scoring Conditions
Additional Conditions
Starting Supply 6 · Escalation +2 · Game Length 5 Rounds
Mission Parameters
Scoring Conditions
Additional Conditions
Starting Supply 3 · Escalation +1 · Game Length 5 Rounds
Mission Parameters
Scoring Conditions
Additional Conditions
Starting Supply 6 · Escalation +2 · Game Length 5 Rounds
Mission Parameters
Scoring Conditions
Additional Conditions
Starting Supply 3 · Escalation +1 · Game Length 5 Rounds
Mission Parameters
Scoring Conditions
Additional Conditions
Starting Supply 8 · Escalation +2 · Game Length 4 Rounds
Mission Parameters
Scoring Conditions
Additional Conditions
Starting Supply 4 · Escalation +1 · Game Length 4 Rounds
Mission Parameters
Scoring Conditions
Additional Conditions
Starting Supply 6 · Escalation +2 · Game Length 5 Rounds
Mission Parameters
Scoring Conditions
Additional Conditions
Starting Supply 3 · Escalation +1 · Game Length 5 Rounds
Mission Parameters
Scoring Conditions
Additional Conditions
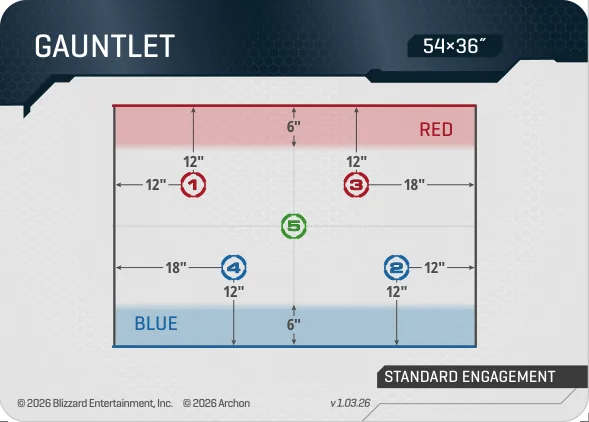
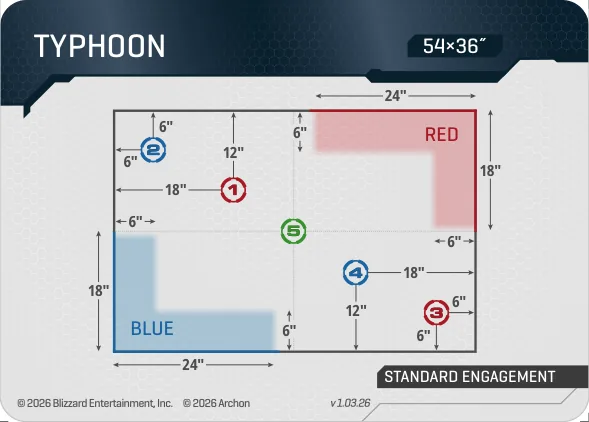
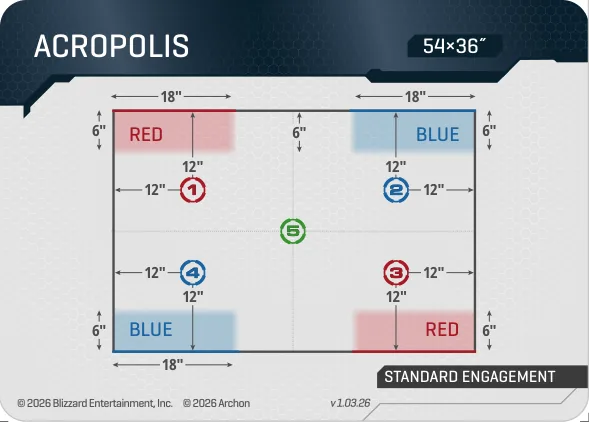
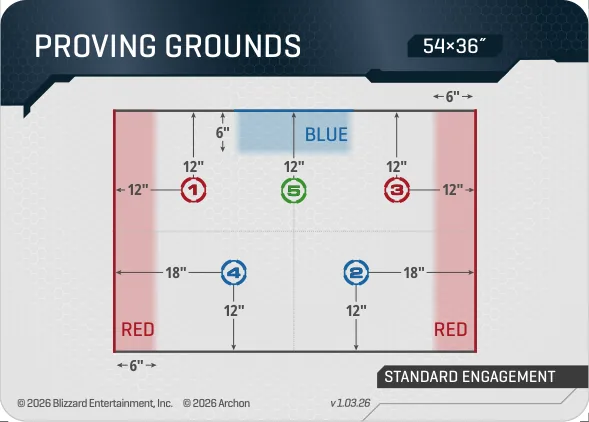
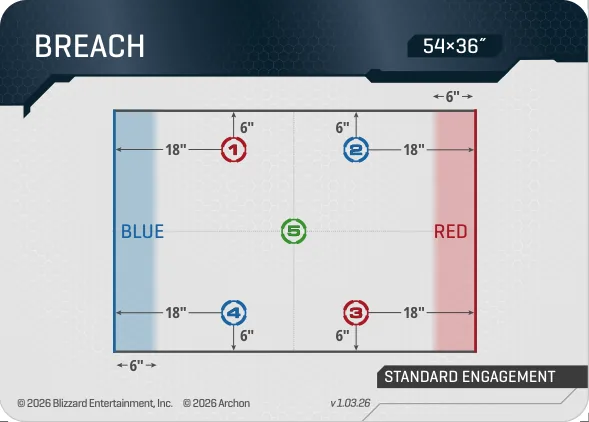
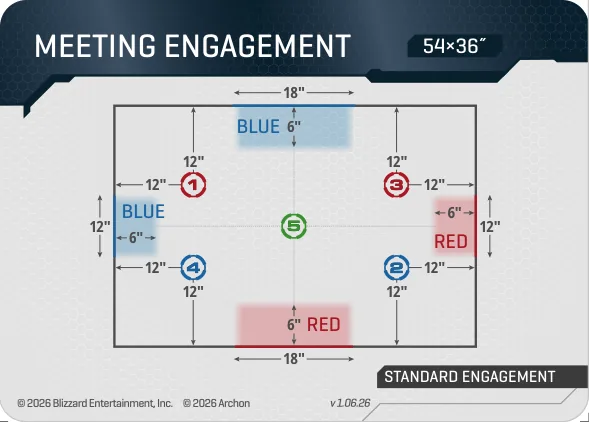
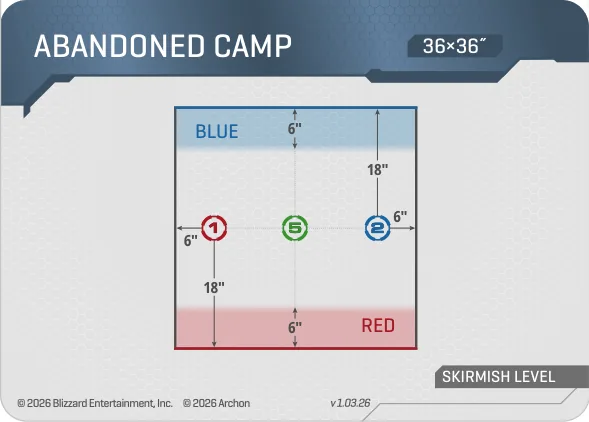
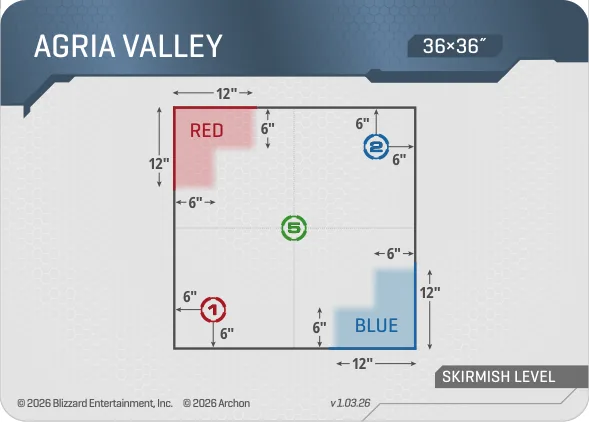
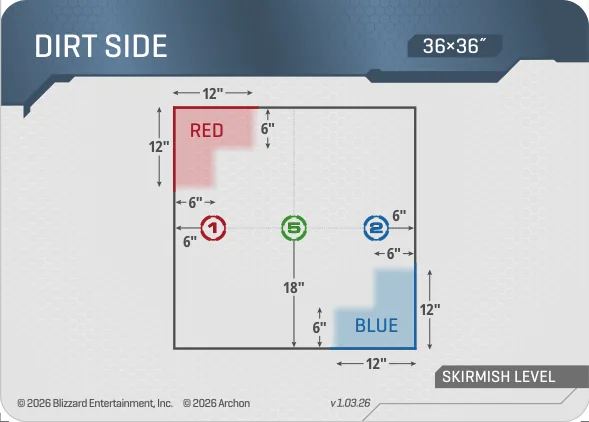
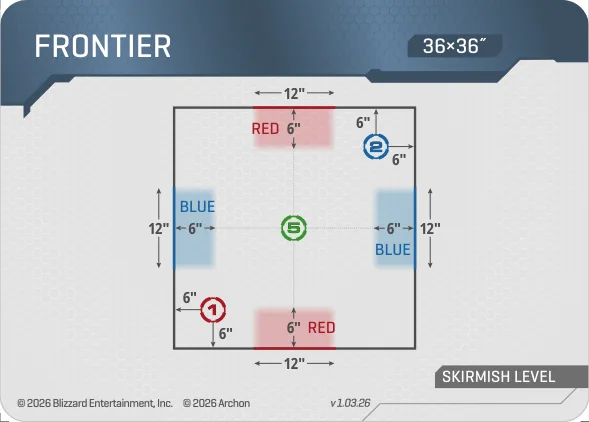
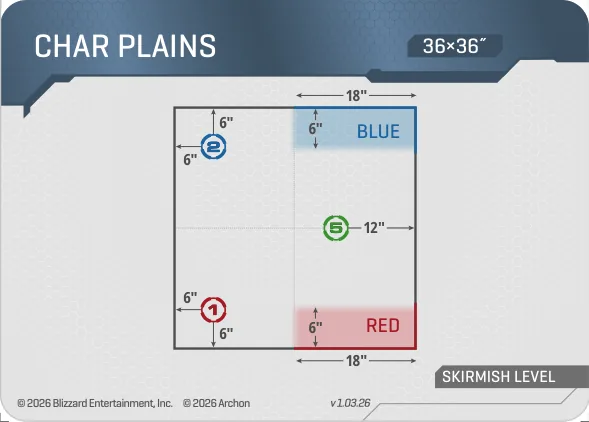
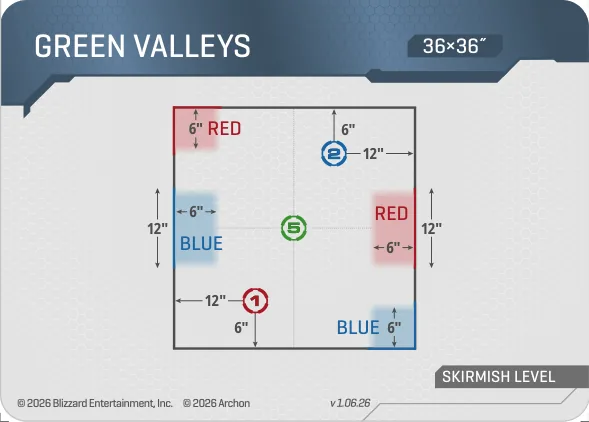
These are the pre-made layouts used in step four of Battlefield Setup (Part 9.3): roll D6 for a Standard Engagement (36" × 54") map or D3 for a Skirmish Engagement (36" × 36") map. Dashed lines mark a 6" grid.
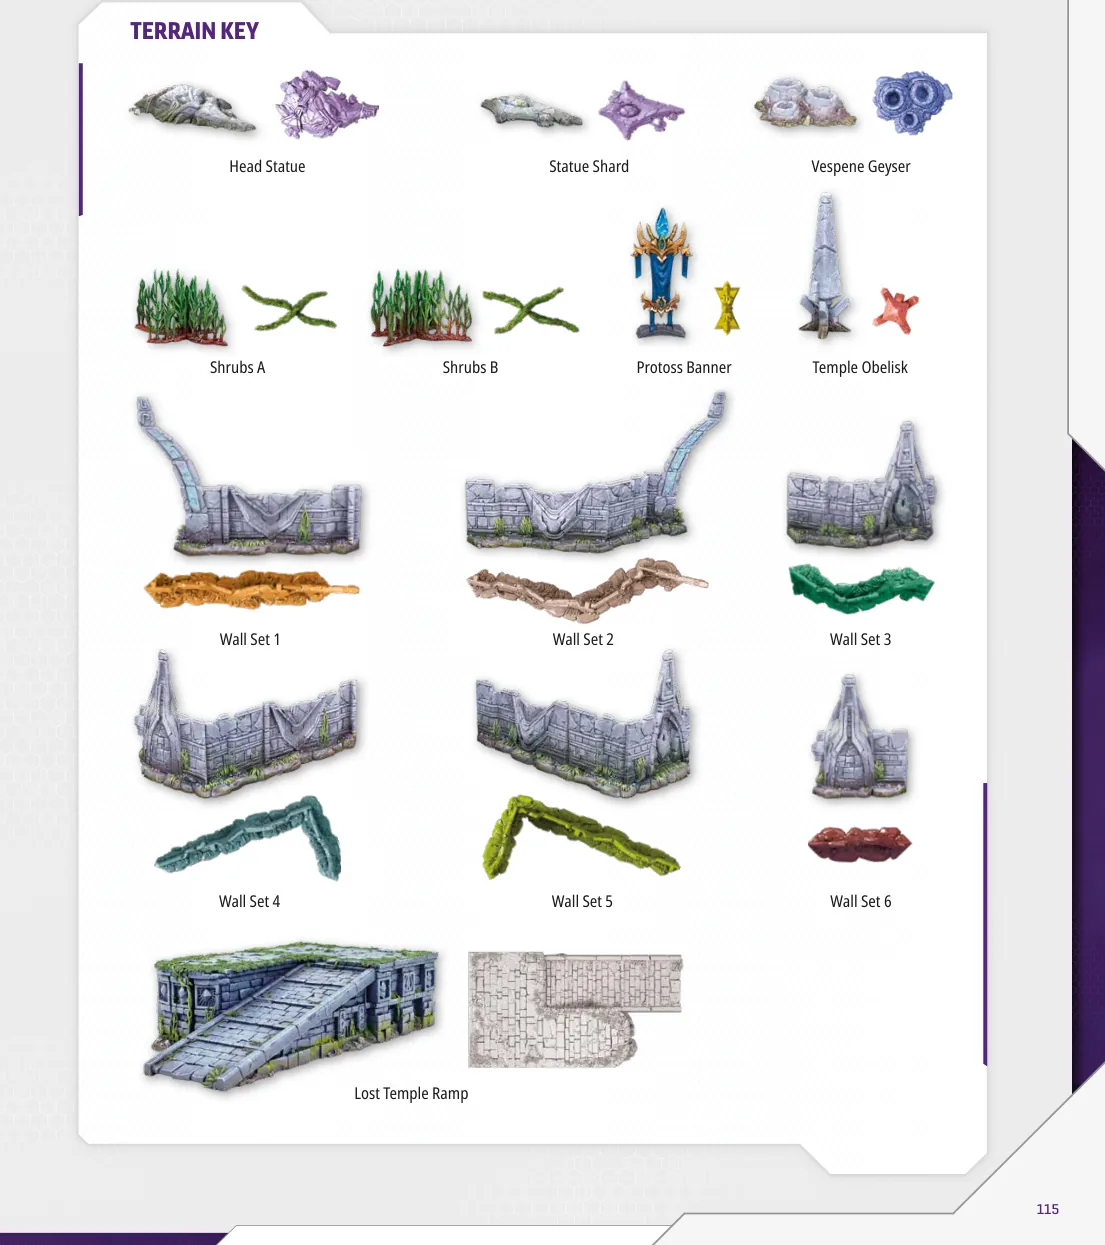
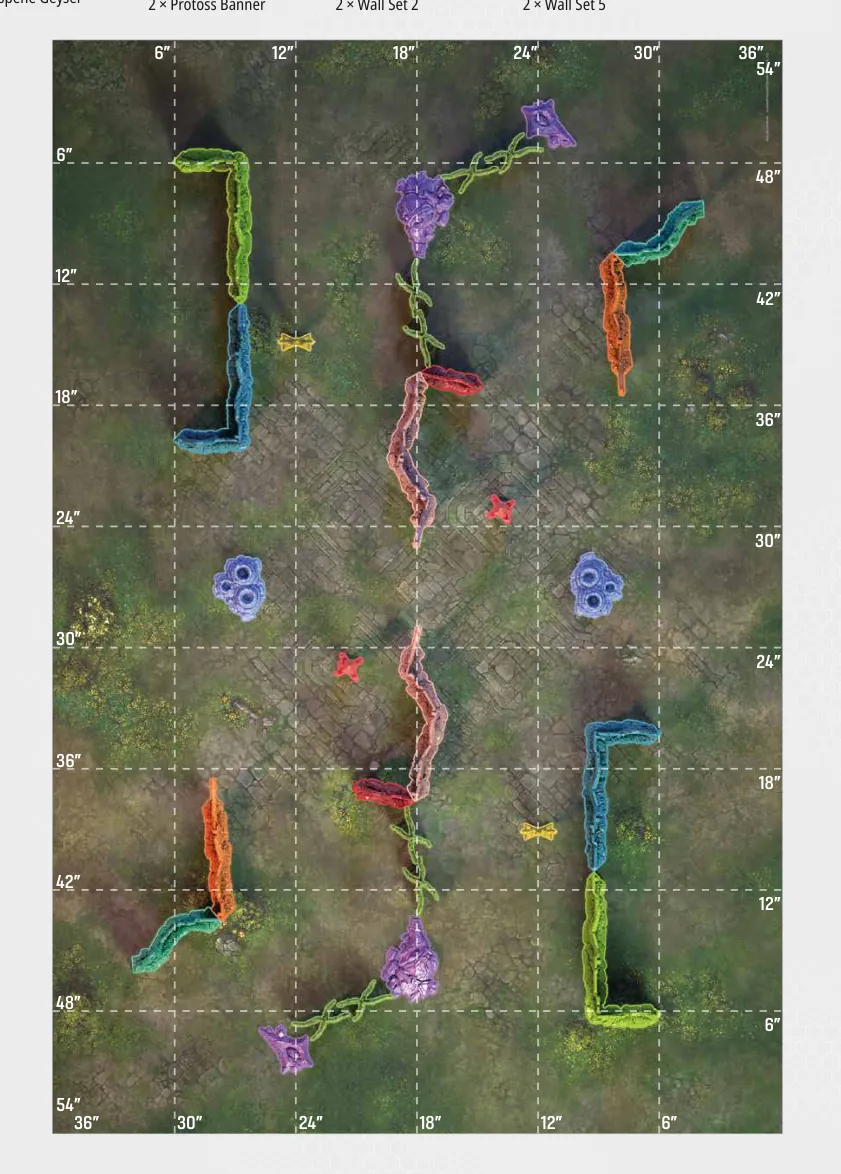
Assembly requires: 2 × Head Statue · 2 × Statue Shard · 2 × Vespene Geyser · 4 × Shrubs A · 4 × Shrubs B · 2 × Protoss Banner · 2 × Temple Obelisk · 2 × Wall Set 1 · 2 × Wall Set 2 · 2 × Wall Set 3 · 2 × Wall Set 4 · 2 × Wall Set 5 · 2 × Wall Set 6
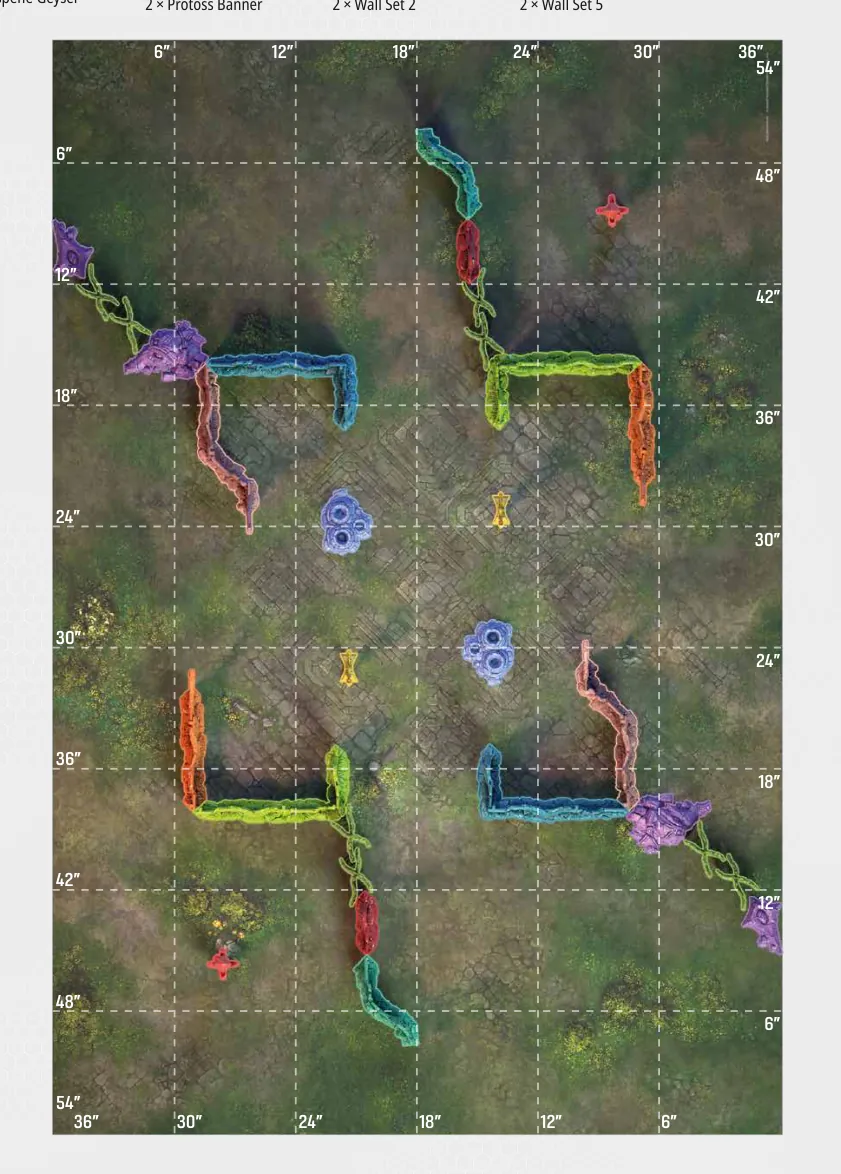
Assembly requires: 2 × Head Statue · 2 × Statue Shard · 2 × Vespene Geyser · 4 × Shrubs A · 4 × Shrubs B · 2 × Protoss Banner · 2 × Temple Obelisk · 2 × Wall Set 1 · 2 × Wall Set 2 · 2 × Wall Set 3 · 2 × Wall Set 4 · 2 × Wall Set 5 · 2 × Wall Set 6
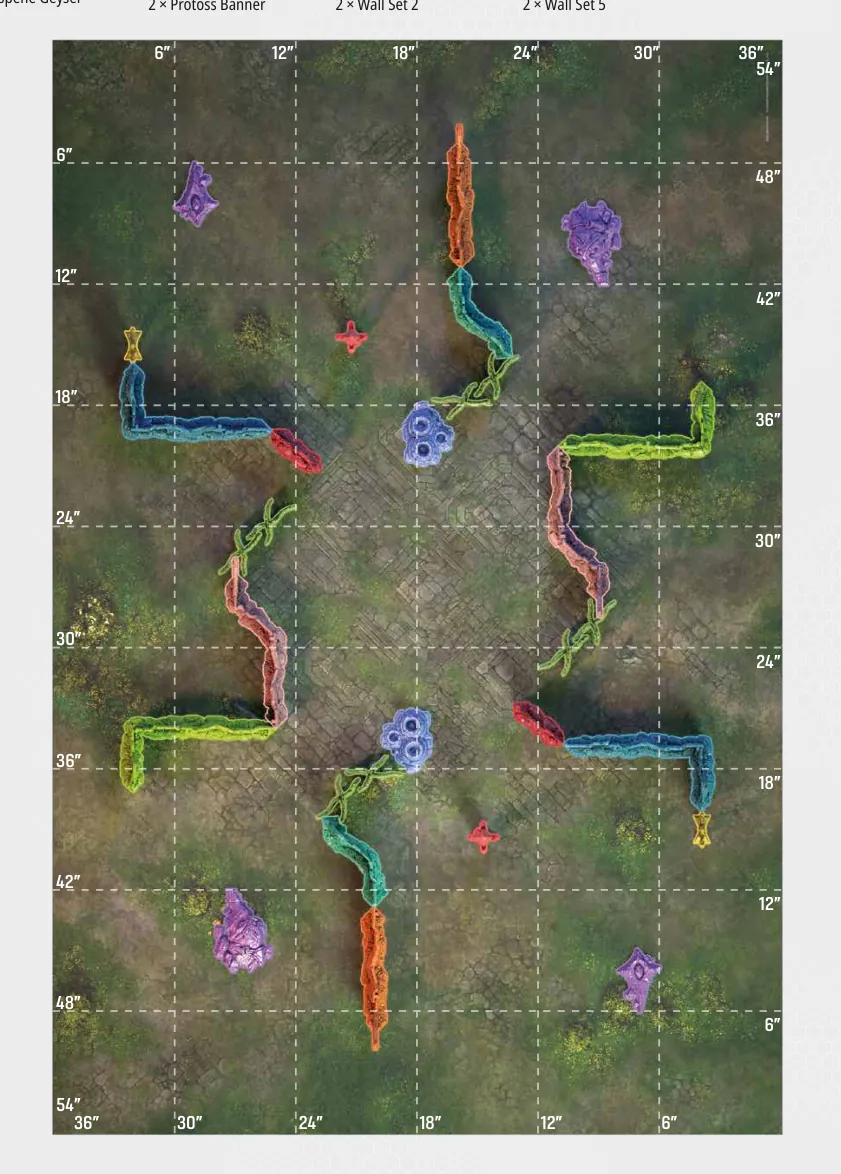
Assembly requires: 2 × Head Statue · 2 × Statue Shard · 2 × Vespene Geyser · 4 × Shrubs A · 4 × Shrubs B · 2 × Protoss Banner · 2 × Temple Obelisk · 2 × Wall Set 1 · 2 × Wall Set 2 · 2 × Wall Set 3 · 2 × Wall Set 4 · 2 × Wall Set 5 · 2 × Wall Set 6
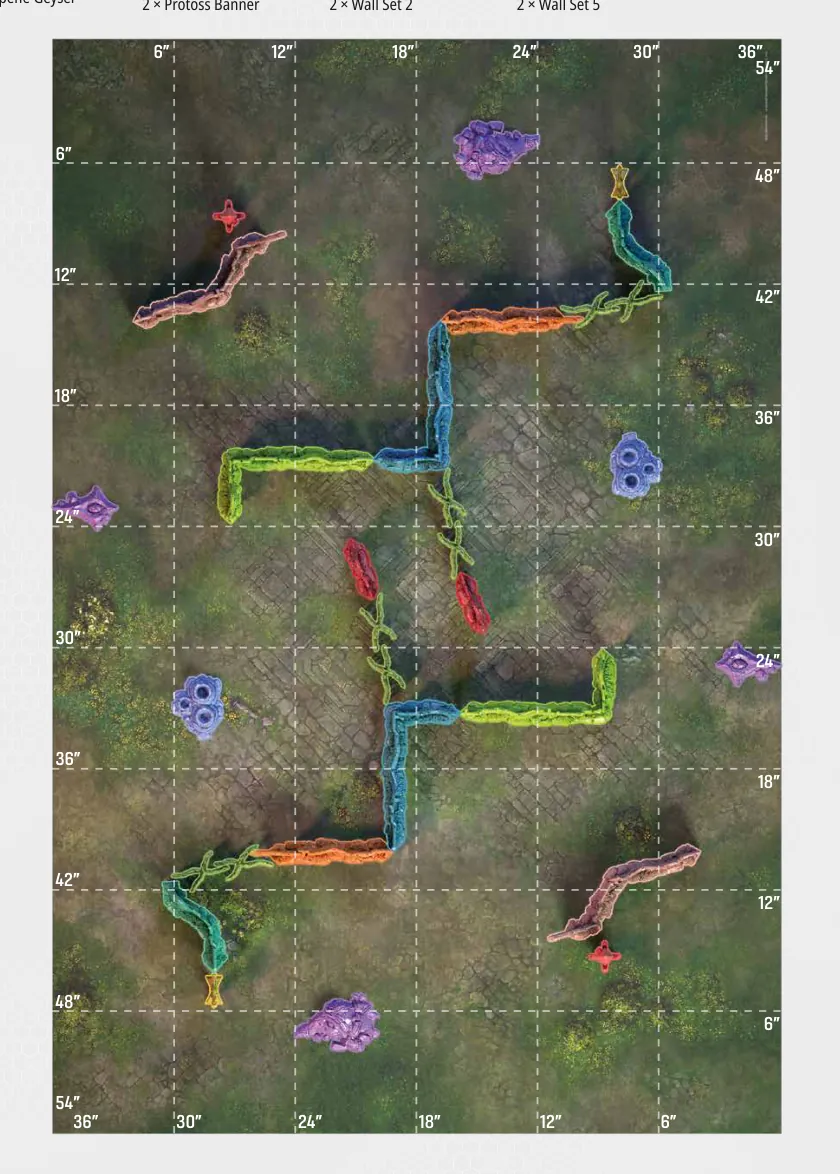
Assembly requires: 2 × Head Statue · 2 × Statue Shard · 2 × Vespene Geyser · 4 × Shrubs A · 4 × Shrubs B · 2 × Protoss Banner · 2 × Temple Obelisk · 2 × Wall Set 1 · 2 × Wall Set 2 · 2 × Wall Set 3 · 2 × Wall Set 4 · 2 × Wall Set 5 · 2 × Wall Set 6
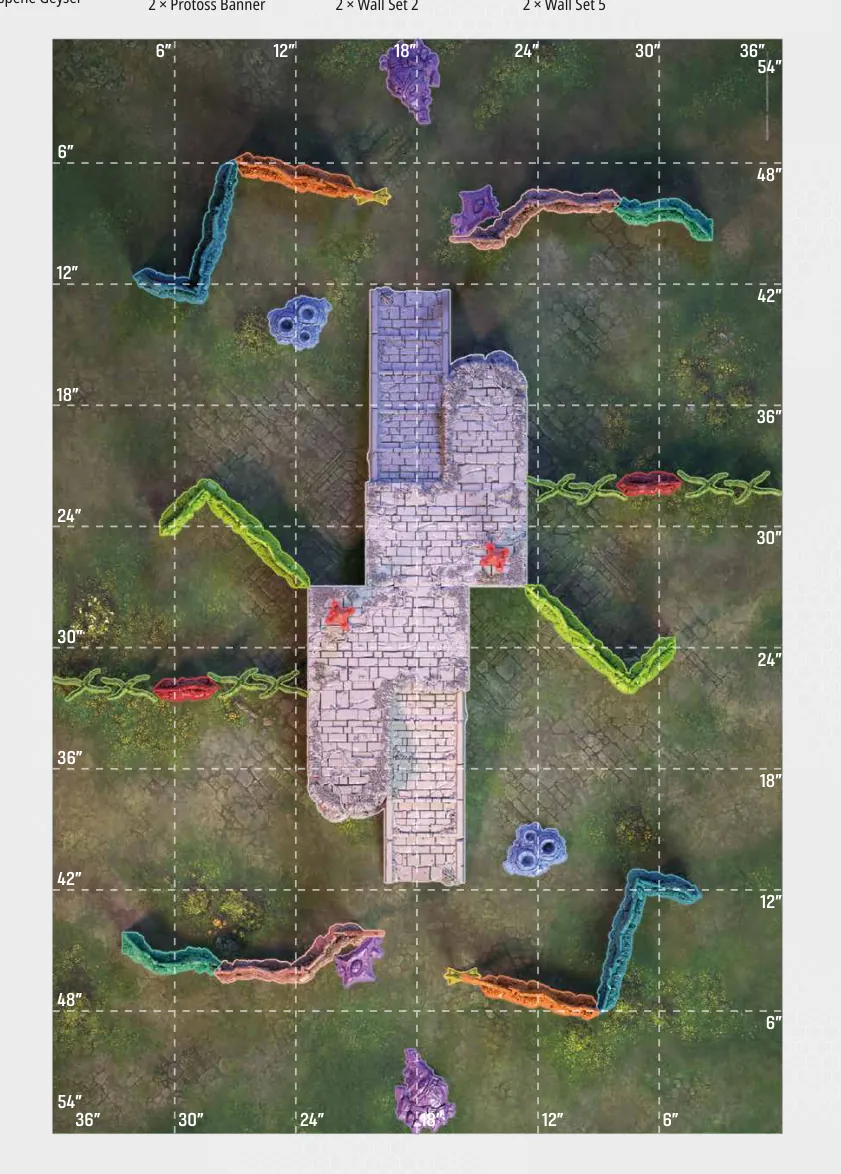
Assembly requires: 2 × Head Statue · 2 × Statue Shard · 2 × Vespene Geyser · 4 × Shrubs A · 4 × Shrubs B · 2 × Protoss Banner · 2 × Temple Obelisk · 2 × Wall Set 1 · 2 × Wall Set 2 · 2 × Wall Set 3 · 2 × Wall Set 4 · 2 × Wall Set 5 · 2 × Wall Set 6 · 2 × Lost Temple Ramp
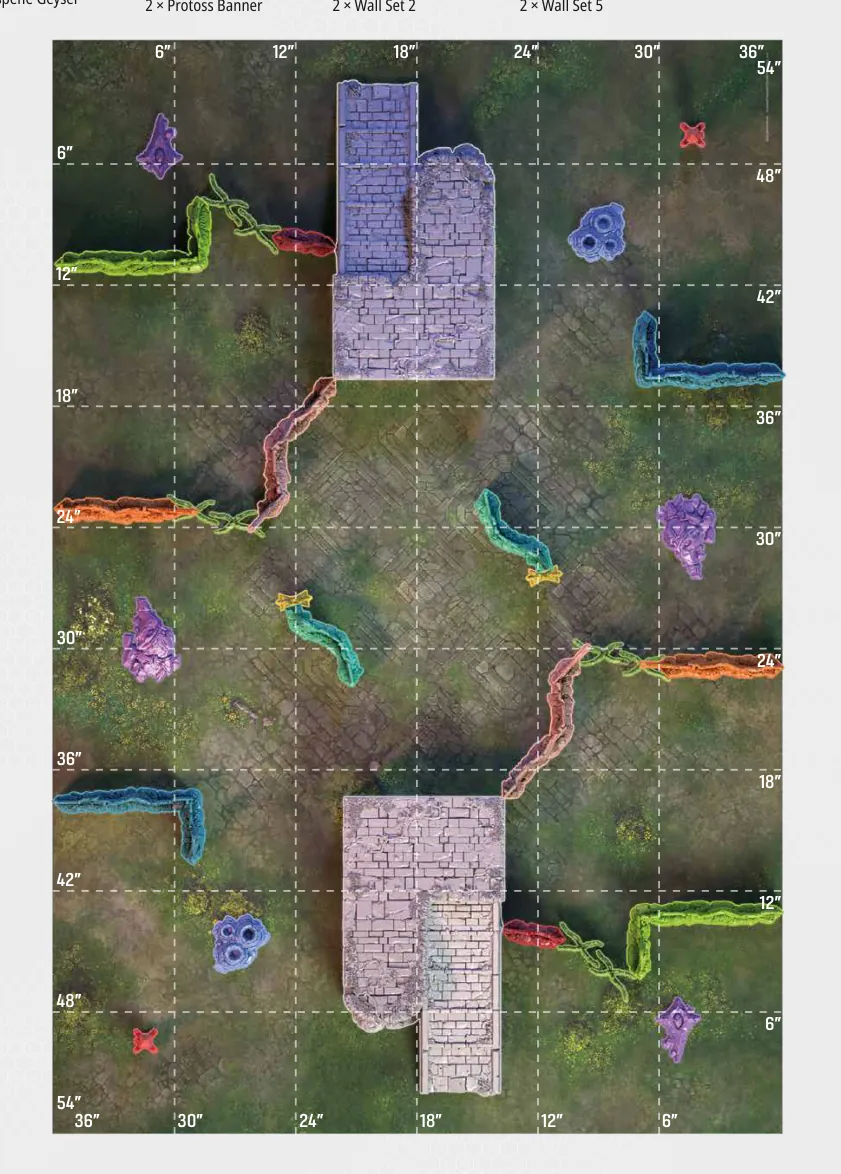
Assembly requires: 2 × Head Statue · 2 × Statue Shard · 2 × Vespene Geyser · 4 × Shrubs A · 4 × Shrubs B · 2 × Protoss Banner · 2 × Temple Obelisk · 2 × Wall Set 1 · 2 × Wall Set 2 · 2 × Wall Set 3 · 2 × Wall Set 4 · 2 × Wall Set 5 · 2 × Wall Set 6 · 2 × Lost Temple Ramp
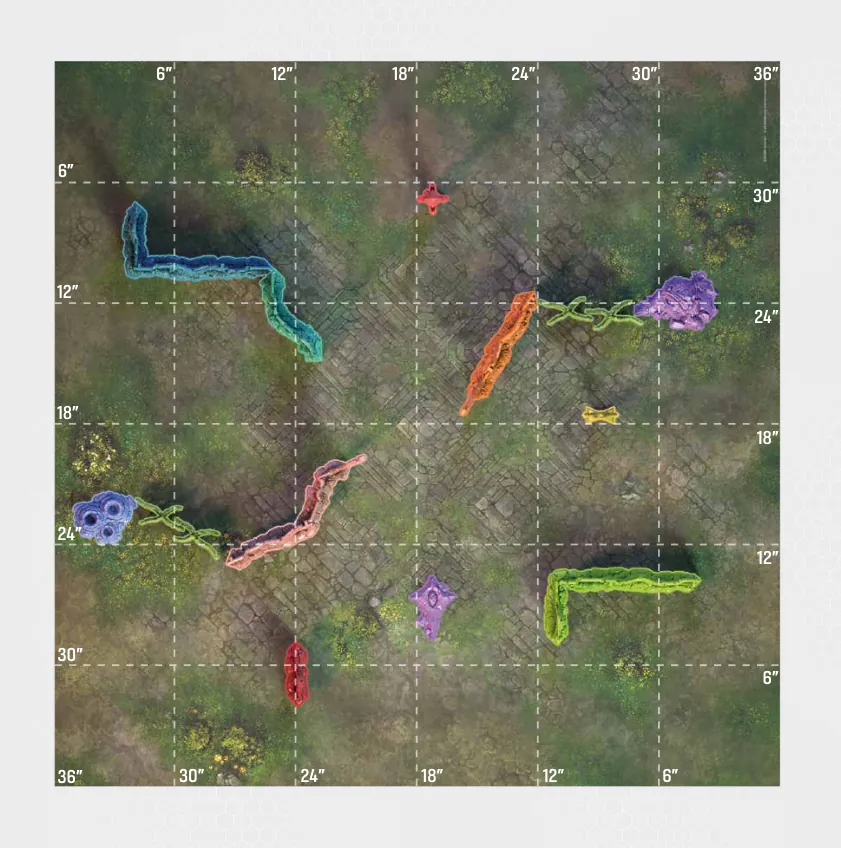
Assembly requires: 1 × Head Statue · 1 × Statue Shard · 1 × Vespene Geyser · 2 × Shrubs A · 2 × Shrubs B · 1 × Protoss Banner · 1 × Temple Obelisk · 1 × Wall Set 1 · 1 × Wall Set 2 · 1 × Wall Set 3 · 1 × Wall Set 4 · 1 × Wall Set 5 · 1 × Wall Set 6
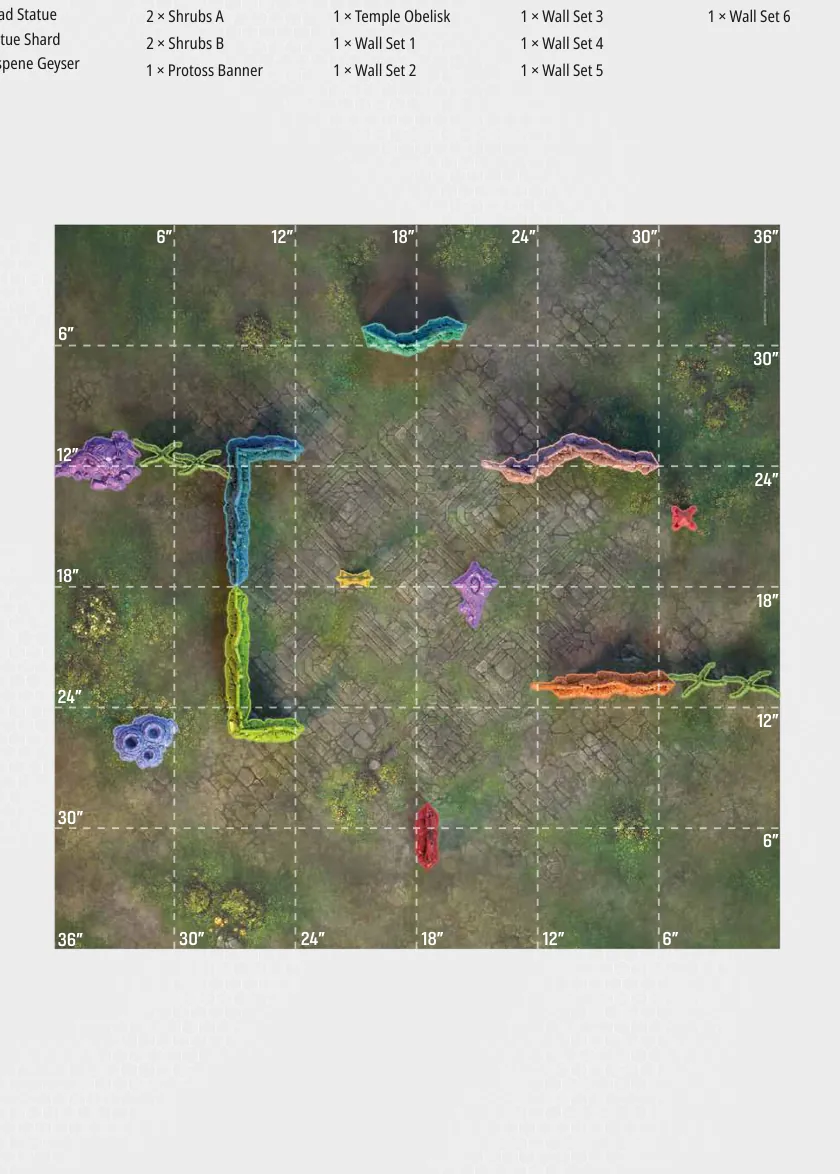
Assembly requires: 1 × Head Statue · 1 × Statue Shard · 1 × Vespene Geyser · 2 × Shrubs A · 2 × Shrubs B · 1 × Protoss Banner · 1 × Temple Obelisk · 1 × Wall Set 1 · 1 × Wall Set 2 · 1 × Wall Set 3 · 1 × Wall Set 4 · 1 × Wall Set 5 · 1 × Wall Set 6
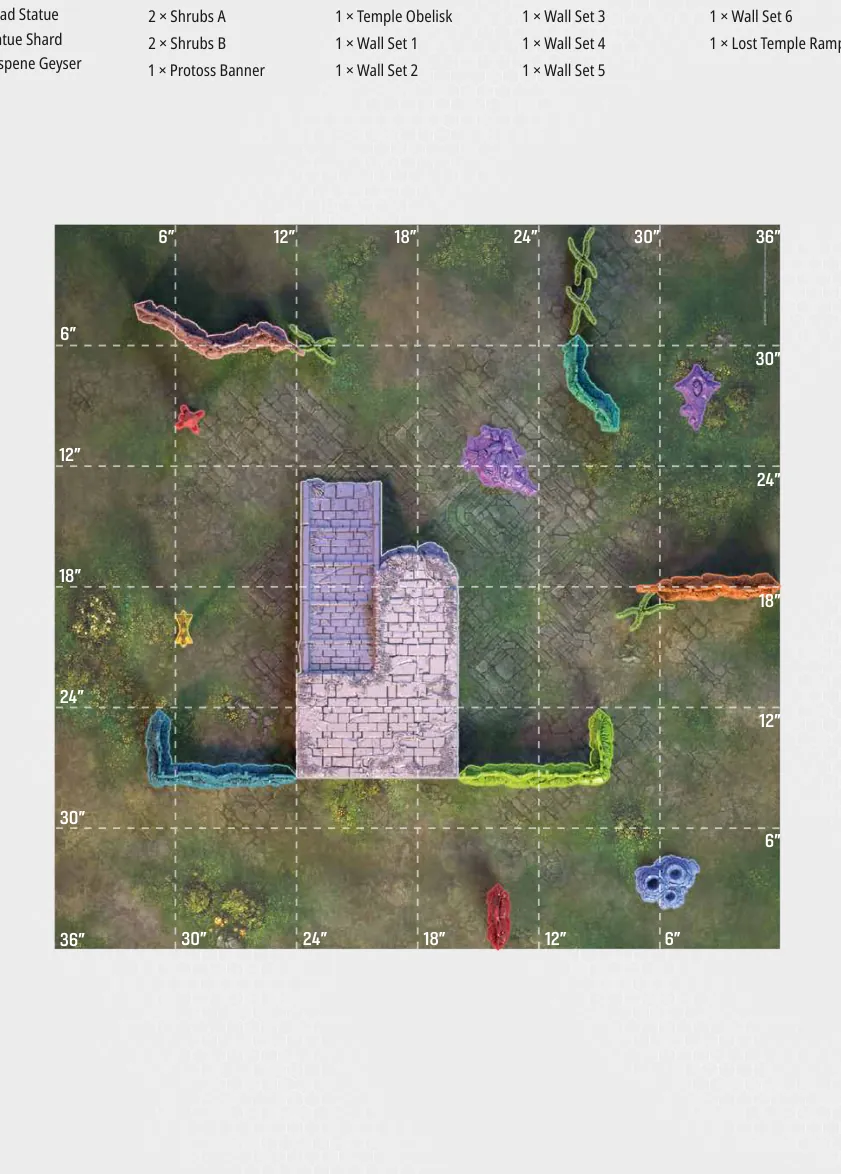
Assembly requires: 1 × Head Statue · 1 × Statue Shard · 1 × Vespene Geyser · 2 × Shrubs A · 2 × Shrubs B · 1 × Protoss Banner · 1 × Temple Obelisk · 1 × Wall Set 1 · 1 × Wall Set 2 · 1 × Wall Set 3 · 1 × Wall Set 4 · 1 × Wall Set 5 · 1 × Wall Set 6 · 1 × Lost Temple Ramp
How to run a StarCraft: TMG event, from eight friends in the back of a game shop to a hundred players over a weekend: what to decide before you announce, how to run the day, and how to score it.
There are two kinds of event, Community and Competitive, and the places where they part ways are marked. A Community event may add to, cut from or change these rules, as long as the changes are published before registration closes. A change announced on the morning of the event is a surprise, not a change.
The person who makes the event happen:
Wherever these rules leave a decision open, it is the TO's. Publish it before registration closes.
| TO plays? | Community event | Competitive event |
|---|---|---|
| TO competes | Yes | No |
| Best practice | Hands final say on penalties to the Head Judge | Non-playing for the whole event |
At a Competitive event the TO doesn't compete: they hold the final word on penalties that run to the end of the event, and nobody should be able to ask whether a call went their way. At a Community event the TO may play; the final decision on penalties then passes to the Head Judge for the whole event, not only the rounds the TO is in.
Answers questions and settles disputes once play begins. The job is to keep games moving, not to police the room.
A Head Judge's decisions are final for the duration of the event. A player who thinks a ruling was wrong can raise it with the TO afterwards, but nothing is reversed mid-game. A penalty that stands for the rest of the event is settled together with the TO.
| HJ plays? | Community event | Competitive event |
|---|---|---|
| HJ competes | Yes | No |
| Best practice | Steps into the pairing when attendance is odd | Non-playing for the whole event |
At a Competitive event, a judge chasing a trophy can't be seen to be impartial, however impartial they are. At a Community event, a playing Head Judge is useful: ideally they play in rounds where attendance is odd, so no player sits out.
A Head Judge who plays does so as a spare player. They are not classified, aren't eligible for placings or prizes, and their results don't go into anyone's SoS or oTP pool.
At larger events, appoint Floor Judges alongside the Head Judge. If only one judge is present, they are both.
Floor Judges are the judges on the ground, the people players flag down without leaving the table:
A Floor Judge has full jurisdiction over rules decisions. They don't check with anyone before ruling, and their call stands. The Head Judge is escalated to only for the genuinely difficult cases: an interaction nobody can find an answer for, a suspected conduct breach, a penalty.
A player who disagrees with a Floor Judge may ask for the ruling to go to the Head Judge, but must do so before play continues. The Floor Judge's ruling applies meanwhile, and the Head Judge's answer ends the matter.
Put this list in your event materials. A player who turns up short will be borrowing from their opponent all weekend, and that costs everyone time.
A printed roster can be handed across, left face-up beside the battlefield and read at a glance; a phone running a clock or score tracker can't. Players relying on a phone or tablet keep it charged themselves, and the TO should say in advance whether power outlets are available.
Official StarCraft: TMG models only. Third-party sculpts, recasts and substitutes aren't permitted at events run under these rules.
Bases may be modelled, and that is encouraged. A base must keep the correct size and shape for its model: movement, ranges and Line of Sight are measured off the base, so a base that grew during modelling changes how the model plays.
Painting isn't required. Assembled models are enough to compete, with no disadvantage in the standings.
| WYSIWYG | Community event | Competitive event |
|---|---|---|
| Specialist models | TO's call | Required |
| Everything else | TO's call | Clearly identified by the players before the game |
At a Community event, set the standard that suits your crowd and state it in the listing. At a Competitive event, any model with the Specialist rule must be WYSIWYG: an opponent should see which model carries it without asking. The rest of the army needs no modelled loadouts, but players must clearly establish what every model is before the game begins.
Some events bring a local scene together; some find a champion. Which one you run decides your engagement scale, your round count and how tightly you hold to this guide.
| Community event | Competitive event | |
|---|---|---|
| Purpose | Bringing players together, welcoming newcomers | Playing at the top of your game against opponents doing the same |
| Engagement scale | Skirmish or Standard | Standard |
| Length | One day | One or two days |
| These rules | Adapt freely | Follow as written |
Community events run over a single day. Pick the scale first; everything else follows from it.
Skirmish gives shorter games. You fit more rounds into the day and can take a bigger field, and newer players get through two or three games instead of grinding out one. It's the easier event to run and to attend.
Standard is the full-size game used at Competitive events. Fewer rounds fit in a day, but it's a taste among friends of what players will meet if they step up.
| Players | On Skirmish | On Standard |
|---|---|---|
| 4–8 | 2–3 rounds | 2–3 rounds |
| 9–16 | 3 rounds | 3 rounds |
| 17–32 | 4 rounds | 3 rounds |
The format the game is built around. At Standard engagement every faction's full toolkit is on the table, the Mission and Deployment draft carries real weight, and the balance work is aimed here.
That's why it's stricter. A Competitive event claims its result means something, so run it at Standard engagement and follow this guide as written. Two events on opposite sides of the world should produce comparable results.
| Players | Days | Swiss rounds |
|---|---|---|
| 12–32 | 1 | 3 |
| 33–128 | 2 | 5 |
A championship format for fields above 128 players will be announced.
You can change the number of rounds, as long as you state it clearly before the first round begins.
If turnout comes in lower than expected, or drops during round one push you into a lower band, you can reduce the round count. Have the Head Judge announce it as early as possible, and no later than the start of round two. Players plan their day around the schedule; a round quietly disappearing is worse than a longer event.
| Engagement scale | Minerals | Vespene Gas |
|---|---|---|
| Standard | 2000 | 200 |
| Skirmish | 1000 | 100 |
Rules version: the most recent official rules, errata and FAQ published as at your rules cut-off date. Set it two weeks before the event and announce it. Anything published after it doesn't apply, even if it goes live during the weekend.
The complete written record of the force a player brings, built to the event's engagement scale. It is the document that gets submitted, checked, published and handed across the table. It must show:
Anything that affects how the army plays belongs on the roster. If an opponent would need to ask, write it down.
The recommended format:
You may run Single List Format instead; announce it in your event rules.
Rosters are submitted one week before the event, leaving time to check them. That is a week after the rules cut-off, so players get seven days to react to anything the cut-off caught.
How far in advance rosters are published to the field is the TO's call. Decide before announcing and state it, so players know whether they prepare blind or against a known field. A penalty for late submission may be announced in advance.
Every submitted roster is revealed to the opponent before the game.
Checking rosters is the TO's and Head Judge's job, but every participant should report any discrepancy they notice. If someone believes a roster is illegal, they raise it with the TO, who settles it with the roster's owner.
If a roster turns out to be illegal after play has begun:
Playing area: 36" × 54" (about 91 × 137 cm).
Each player also gets at least 30 cm (12") of clear surface for cards, dice, tokens and clocks, on the table beyond the playing area or on a side table. In practice, a table of about 60" × 54", or a 36" × 54" table plus a side table per player.
Tables are set up before the event begins by the TO or judges. Players don't build their own.
Use the official Map Layouts or community-made layouts. Community layouts are chosen in advance and shown in the event listing, which ones and how many, so players know what they're playing on before they register.
Every table clearly identifies its layout: a printed copy at the table edge, or its name or number on a card. Players check the terrain against it before the game and put every piece back when they're done.
Set each table's layout once and leave it for the whole event. Don't reset, rotate or reshuffle terrain between rounds: it keeps a hidden variable out of the standings and saves a great deal of work. Where the pairing software allows, place each player on a different table each Swiss round.
Players need to see the terrain before the draft. Have tables fully set up before pairings go up, and players at their tables before the round clock starts. The draft is a decision about the shape of the battlefield. Players also agree, before the draft, on each terrain piece's Size and the rules it provides.
Mission Markers can't be placed on impassable terrain. Where a Marker's coordinates fall on an impassable piece:
The marker is never moved to accommodate terrain. If the players can't agree, a judge places it and that's that.
Official layouts and terrain are recommended, but many communities use custom terrain for availability, cost, or a collection they're proud of.
If you do, give players a chance to get familiar with it before they arrive: put the layouts, how many, and what the terrain looks like on the event page. Nobody should see your table for the first time on the morning of the event.
When building a custom layout, assign every piece a Size category before the event and aim for roughly this composition:
| Size | Pieces per table | Examples | Effect |
|---|---|---|---|
| 0 | 0–2 | Scatter terrain | Incidental |
| 1 | 2–4 | Barricades, low walls, crates | Cover for infantry. Doesn't block LoS for models larger than Size 1 |
| 2 | 6–8 | Ruins, bunkers, wrecked vehicles | Blocks LoS for most standard Units. Creates fire lanes and chokepoints |
| 3+ | 1–2 | Large structures, elevated platforms | Creates High Ground. Blocks LoS for almost everything |
| Grass (Size 2 special) | 4–6 | Woods, tall growth | Doesn't block movement. Gives LoS cover across open ground |
Size 2 pieces are the backbone of a table. A collection heavy on crates and low walls looks full and plays flat. Match the footprint of the official pieces you're standing in for: a Size 2 piece with twice the official footprint changes the table even when its category is right.
Pair rounds using the Swiss system.
With an odd number of players, one player each round receives a bye.
At a Community event, the Head Judge stepping into the pairing is better than a bye.
A player may concede at any point. The game is scored as an Annihilation for their opponent and counts toward both opponent metrics like any other played game.
When a player concedes, a judge should come to the table. Not to interrogate: a concession is a legitimate choice and most are what they look like. But it can also mean a rules problem nobody resolved, or a player who's had enough, and either needs attention rather than a scoreline.
Conceding repeatedly to shape someone else's standings is not legitimate and is a conduct matter.
A round is 2 hours 30 minutes, including the draft.
The clock starts when the round is called and ends 2 hours 30 minutes later, whatever stage the game has reached. Allow about 15 minutes for the draft; time saved drafting becomes playing time.
For an event of mostly new players, consider adding 15 minutes to round one only, announced in advance. Games that run long in round one tend to finish comfortably by round three.
Don't start a new Battle Round inside the last 15 minutes. Finish the one you're in and score what's on the table.
Dice go down. No final roll, no last activation, no finishing a sequence. The game state at the moment time is called is what gets scored. Three things decide games:
If a table hasn't completed two full Battle Rounds when time is called, a judge looks at the game before it's scored. A one-round result usually says more about how the players spent their time than about the game. The judge decides whether it stands and may treat the shortfall as slow play.
Call the milestones out loud. It costs nothing and is the most effective way to get games finished on time. Times are measured on the round clock from the call.
| Elapsed | Remaining | Call |
|---|---|---|
| 0:00 | 2:30 | "Round begins, draft now" |
| 0:15 | 2:15 | "Drafts should be complete" |
| 0:45 | 1:45 | "45 minutes gone" |
| 1:15 | 1:15 | "Halfway" |
| 2:00 | 0:30 | "30 minutes remaining" |
| 2:15 | 0:15 | "15 minutes, do not begin a new Battle Round" |
| 2:25 | 0:05 | "5 minutes" |
At 5 minutes remaining, judges circulate and help players bring games to a close. Where a game can't reach a natural end, players submit scores as they stand. Extensions are not recommended: time given to one table is taken from every other.
Two numbers come out of every game. Match Points (MP) say who won; Tournament Points (TP) say how convincingly. Everything else here separates players who finish level on both.
This applies to both engagement scales. Only the Victory Point bands differ, since smaller games produce smaller margins.
Record a result for every table, every round. A game left blank or entered 0–0 distorts the standings of everyone who faced either player.
The result comes from the Victory Point difference at the end of the game.
| Result | VP difference (Standard) | VP difference (Skirmish) | Winner | Loser |
|---|---|---|---|---|
| Annihilation | 10+ | 8+ | 3 MP · 5 TP | 0 MP · 0 TP |
| Decisive Victory | 7–9 | 6–7 | 3 MP · 4 TP | 0 MP · 1 TP |
| Breakthrough | 3–6 | 3–5 | 3 MP · 3 TP | 0 MP · 2 TP |
| Stalemate | 0–2 | 0–2 | 1 MP · 2 TP | 1 MP · 2 TP |
| Situation | The player | Their opponent | Counts toward SoS / oTP |
|---|---|---|---|
| Concedes a game | 0 MP · 0 TP | 3 MP · 5 TP | Yes |
| Receives a bye | 3 MP · 4 TP | — | No |
| Doesn't appear (no-show or walkover) | 0 MP · 0 TP | 3 MP · 4 TP | No |
| Runs out of time | Scored from the VP difference on the table | Scored from the VP difference on the table | Yes |
| Order | Metric | What it measures |
|---|---|---|
| 1 | Match Points | How much a player won |
| 2 | Tournament Points | How convincingly they won |
| 3 | Strength of Schedule (SoS) | How strong their opponents were, by result |
| 4 | Opponents' Tournament Points (oTP) | How strong their opponents were, by margin |
Where all four are identical, the placement is shared. At the top of the table, sharing first place is recommended; the call is the TO's.
Both are averages over the opponents a player actually faced, using each opponent's final tally after the last round.
SoS asks whether a player's opponents won; oTP asks how convincingly. Opponents on identical Match Points can have performed very differently, and oTP tells them apart.
Every game actually played goes into both pools, with two exceptions:
A conceded game is a played game. It counts at its full Annihilation value; a concession that vanished from the pool would edit someone else's standings after the fact.
Don't enter a zero for a bye or walkover. The round isn't counted in the numerator or the denominator; a zero quietly penalises every player who received one.
If the exclusions leave a player with an empty pool, record SoS and oTP as 0. A player who withdraws mid-event still counts toward earlier opponents' SoS and oTP at their final tally.
Work both out once, after the final round, from final tallies. Anything shown during the event is indicative only.
Report both to four decimal places and compare unrounded values. At large events, ties at two decimals happen more often than you'd think.
Whatever platform you use, check it handles SoS and oTP as defined here:
The last one is the easiest to get silently wrong.
Before each game, players pick their roster, establish sides and draft the Mission and Deployment, in order. The draft can use physical cards or an app; agree which before starting. With an app, both players must be able to see the card pool and each selection.
Under Dual List Format, both players reveal their chosen roster at the same time, however they agree; if they can't, each tells a judge privately and the judge announces both. Each then brings the draft cards of the chosen roster to the table. Under Single List Format, skip this step.
All cards go on the table face-up, in two rows:
Priority isn't rolled for; it's earned by spending less.
The player without priority chooses the perspective: the side of the table the Deployment is oriented from.
The player with priority then chooses, in order:
If the sequence overruns: if it hasn't concluded 15 minutes into the round, a judge completes the remaining steps at random following the procedure above. Playing time isn't extended.
Players sort out straightforward disagreements themselves. The round clock doesn't stop for rules discussions. Where they genuinely can't agree, call a judge straight away rather than playing on under protest.
Penalties must mean the same thing at every table. Every "penalty" in this guide is one of four levels.
| Penalty | Who applies it | When |
|---|---|---|
| Caution | Floor Judge | A first, minor slip with no real effect on the game, such as a mismeasure caught immediately or a forgotten step |
| Warning | Floor Judge | A repeat of something already cautioned, or a slip that did affect the game. Recorded and cumulative |
| Game Loss | Head Judge | A third Warning in the event, an illegal roster that carried an advantage, or slow play already warned twice |
| Disqualification | Head Judge with the TO | Cheating, or a Code of Conduct breach serious enough to end someone's event |
Penalties accumulate across the whole event. They don't reset between rounds.
Keep a written record: a sheet at the judges' table or a note in the pairing software. Without one, "a third Warning" is unenforceable.
A Game Loss is scored as an Annihilation against the penalised player. A Disqualification ends that player's event: completed games stand and keep counting toward opponents' standings, but they take no further part and aren't eligible for placings or prizes.
Every table keeps moving, clock or no clock. Most unfinished games were simply slow. But deliberately burning the round while ahead is unsporting, and the easiest way to steal a game in a system that scores whatever is on the table at time.
Judges don't need to be called: if a table is visibly behind the milestone calls, a judge can step in. Where a judge decides a player is taking unreasonable time:
This applies with or without a chess clock. A clock makes pace self-policing; without one, the judge takes that role.
Everyone at the event, players, judges, spectators and staff, treats everyone else with respect. The following are prohibited and may lead to penalties up to immediate disqualification and removal from the venue:
Name a point of contact for conduct reports in your event materials, and make sure reports can be made discreetly. Disqualifications for conduct are recorded and reported to the publisher.
Tell players in your event materials:
There's no top cut in StarCraft: TMG. Every player plays every round, deliberately: a player out of contention after round three is still someone's round-four opponent, and their result feeds four other people's standings. The risk isn't boredom at the top. It's the player at the bottom quietly deciding to go home.
A player at 0–3 has two games with nothing on the line. Some will leave, and a drop costs more than one afternoon: remaining opponents get a walkover, and everyone who already played them has SoS and oTP reshaped by a record that stopped moving.
Side events make staying worth it. They don't replace the rounds still to play; they give players something else to be at the venue for.
A side event must never be a reason to leave the main tournament early. Don't schedule anything overlapping a round, and don't let a player swap a round-five game for a side event. If a top cut is announced for larger events, side events will follow the same principle.
They cost almost nothing and are what players remember, and they give players out of contention something to play for.
Clocks aren't the default. But if even one player wants to play on a clock, both players must. There's no negotiating it.
A player intending to use a clock brings their own: a physical clock, or a chess clock app installed and tested beforehand.
The point is time parity: both players get the same pool and neither loses to the other's pace. Deliberately playing slowly or stretching decisions to burn the round is unsporting conduct and can be penalised. Take disputes to a judge straight away.
The round is 2 hours 30 minutes (150 minutes), covering everything: pairings, reading rosters, the draft, deployment and the game.
Each player manages their own pool.
When you first start the clock: check how much of the round is left, subtract 5 minutes as a buffer for judge calls, and split the rest evenly.
If your opponent isn't at the table or is dragging out preparation, you may start the clock on their time. Tell a judge before you start counting.
The only reason to stop the clock mid-game is a serious rules dispute needing a judge. Time is held from the call until the ruling. Ordinary questions and minor doubts are resolved on the time of the player asking.
Every tactical decision and declaration happens on the player's own time. Switch the clock smoothly and often, so it shows who is deciding right now.
By default time runs for the player carrying out their activation. If the opposing player has to decide during it (declaring a reaction, resolving their own effect, weighing an ability), switch the clock to them immediately. Short routine actions at a reasonable pace, such as a passive player's Armour Rolls, don't need a switch every time.
When a player's clock reaches zero they lose active decisions: no cards, no unique abilities, and for the rest of the game:
All of this is done promptly. An opponent may let them use the opponent's remaining minutes, as a favour at their own risk, withdrawable at any moment.
These procedures exist for extreme cases. In an ordinary, well-paced game there's no need to enforce them.
Keywords are the shorthand of the battlefield. The word on a Unit Card or weapon profile may change its function in an instant – from giving it armour bypass to allowing it to burrow underground or make itself invisible. This section collates all the keywords used in the game, explains exactly what each does, and sets out the rules on how they combine with each other. Keywords are written in BOLD CAPS. Unless stated otherwise, keywords do not stack – gaining the same keyword twice provides no extra benefit, and numeric keywords use only the highest value.
Part of a Terrain that connects different elevation levels. Models moving through an ACCESS POINT can change their elevation.
The player whose turn it is to act.
When resolving an attack with this weapon against Enemy Units, the target Unit suffers a -X Modifier to its Evade Roll for this attack (Part 8.7.4, Step 4).
Army Slots determine how many and what types of Units may be included in an army. Each Army Slot has a specific type: Core, Elite, Support, Air, or Hero. Every Unit occupies a number of Army Slots of its designated type equal to its starting Supply Value. The Faction Card provides the initial pool of Army Slots. Additional Army Slots are unlocked by purchasing Tactical Cards with Vespene Gas during Army Building (Part 9.1.5). Unused Army Slots are lost – they cannot be converted, exchanged, or carried forward.
Available Supply is the remaining Supply capacity available for new deployments. It equals the current Supply Pool minus the Total Current Supply Value of all Friendly Units on the battlefield (Part 8.3.2). A Unit may only be deployed from Reserves if its Current Supply Value is less than or equal to the Available Supply. At no point may the Total Current Supply of a player's on-table Units exceed the Supply Pool. Units Destroyed or reduced by casualties free up Available Supply for new arrivals. In the final Round of the game, the Supply Pool becomes unlimited, and the Available Supply restrictions are lifted.
Any terrain piece with an Effective Size of 1 or greater. Blocking Terrain obstructs Line of Sight according to the Cover rules (Part 7.1.1). Whether a model may move through that terrain is determined separately by the movement rules, terrain Size, ACCESS POINTS, Gap Clearance, and any relevant terrain keywords.
The Unit gains a bonus of X to the specified characteristic until the End of the Round.
reduce the value by X (easier to roll).
This weapon cannot be used to make a Ranged Attack while the Unit is currently Engaged (Part 8.7.3).
When making a Ranged Attack against a target Within Y" of the attacking model, increase this weapon's RoA by X for that attack.
Combat Tags are keywords printed on a Unit Card that identify a Unit's physical nature and tactical class. Type Tags: Armoured, Biological, Light, Mechanical, Psionic, Flying, and Ground.
Note: The Ground Combat Tag and the GROUND LEVEL elevation (Part 8.5.3) are distinct concepts. A Flying Unit standing on the playmat is at GROUND LEVEL but does not have the Ground Combat Tag. Throughout these rules, Ground in bold always refers to the Combat Tag. GROUND LEVEL always refers to elevation.
Attacks with this weapon may remove no more than X models as casualties. Once X models have been removed, discard any remaining Total Damage. It is not recorded as a Damage Marker and does not carry over.
The player who commands a specific Unit, model, or Token. They make all decisions and roll all dice. Certain abilities (e.g., Neural Parasite) can transfer control; the new controller then acts in every respect as though the Unit were their own.
Move X dice from the Armour Pool directly to the Damage Pool, bypassing Armour. CRITICAL HIT can never move more dice than are in the Armour Pool.
The Current Supply Value of a Unit is its Supply Value at this moment, based on the number of models remaining in the Unit as shown on the Supply Profile (Part 6.1). Update the Current Supply Value immediately whenever a casualty reduces the model count into a lower bracket. The Current Supply Value is referenced when checking whether a Unit may be deployed from Reserves (Part 8.3.2), when determining Mission Marker Control (Part 8.9.1), when evaluating Tactical Mass for Disengage (Part 8.5.4), and when calculating Victory Points for Supply-based scoring conditions.
The Unit suffers a penalty of X to the specified characteristic until the End of the Round.
The Leading Model may end a move overlapping this Token or Unit (overrides Part 7.3.1). If the Leading Model ends any Move, Deploy, Run, Charge, Disengage, Close Ranks or Special Ability move Overlapping this Token or model, the controlling
player of the Leading Model immediately sets it in Base- to-Base contact with the Leading Model. If Base-to- Base is not possible, sets it as close as possible.
When this Unit is targeted by an attack, reduce the number of dice moved from the Armour Pool to the Damage Pool by Surge or CRITICAL HIT by X (minimum 0). Apply during the Resolve Surge step.
A model's Effective Size is equal to its Size characteristic plus the Size of any terrain it is standing on (Part 7.1.2). A model at GROUND LEVEL has an Effective Size equal to its own Size characteristic only. A model on HIGH GROUND (Size 3+) or MID GROUND (Size 1–2) adds the terrain's Size to its own. Terrain pieces set on elevated surfaces stack in the same way – a terrain piece's Effective Size equals its own Size plus the Size of the terrain it stands on. Effective Size determines which terrain blocks Line of Sight through Full Cover and Direct Cover (Part 7.1.1). Flying models are treated as having an Effective Size higher than any terrain piece on the table for Cover purposes (Part 7.1.4).
Models can stand one of three elevations:
All Units, Tokens, and cards belonging to the opponent are Enemies. In team games, all opposing players' Units, Tokens, and cards are Enemies. A Unit may never target a Friendly Unit with an attack unless a rule explicitly states otherwise. Enemy is the opposite of Friendly and is referenced throughout the rules to determine valid targets, Engagement, and Mission Marker contests.
A Ground Unit is Engaged when any of its models is Within 1" (Engagement Range) of any model in an Enemy Ground Unit, provided the following conditions are met (Part 7.2.1):
When any model in a Unit is Engaged, the entire Unit is considered Engaged. An Engaged Unit cannot perform a standard Move – it must Disengage (Part 8.5.4) or Hold. Engaged Units are also subject to restrictions on Ranged Attacks (Part 8.7.3).
The Engagement Range extends 1" horizontally from any model's base. When two Enemy Ground models are Within each other's Engagement Range, they are Engaged (Part 7.2). Engagement Range is measured horizontally from a top-down perspective, ignoring vertical height (Part 4.1). It is referenced when resolving Move restrictions (Part 8.5.3), Disengage (Part 8.5.4), Charge (Part 8.6.2), the Fighting Rank (Part 8.8.1), and PLACE effects. Melee weapons list E as their Range, indicating they may only strike targets Within the Engagement Range.
The table edge assigned to a player by the Deployment Card. Units enter the battlefield from this edge when deploying from Reserves.
Faction Tags are keywords printed on Unit Cards, Tactical Cards, and Faction Cards that identify allegiance.
does not appear on the Faction Card, that card cannot be included. A Unit with fewer tags than the Faction Card is permitted – it only requires its own tags to be present (Part 9.1.2).
A model is in the Fighting Rank if it is Within the Engagement Range (1") of an Enemy model. Models in the Fighting Rank may strike with their Combat Phase weapons. See Part 8.8.1, Step 2.
A physical Token used to track which player has initiative. At the start of the game, the winner of the Roll-Off (Part 3.2) assigns the First Player Marker to either player for Round 1. The holder of the First Player Marker chooses which player activates first at the start of each Phase. The Marker changes hands in two ways: the first player to Pass during Phase 1 or Phase 2 takes the First Player Marker for the following Phase, and at the end of Phase 4 the Marker is awarded to the player with fewer Victory Points (Part 8.9.6). If Victory Points are tied, both players Roll-Off and the winner takes the Marker.
Flying Units trade board control (no Mission Markers, no melee) for mobility and immunity to terrain.
All Units, Tokens, and cards belonging to the Controlling Player are Friendly to one another. In team games, all teammates' Units, Tokens, and cards are also Friendly. A Unit's own models are always Friendly to it. Friendly is the opposite of Enemy and is used throughout the rules to determine targeting restrictions, movement interactions, and ability eligibility.
A terrain piece with a Size of 2 that follows special rules. Unlike other Size 2 terrain, Grass does not block movement but does block Line of Sight, following the standard Cover rules (Part 7.1.1). Grass is destroyed by the passage of war. If a Leading Model's path of travel passes through or any model of a Unit ends on a Grass terrain piece during any movement action (Move, Deploy, Run, Charge, Disengage or Close Ranks), that Grass terrain piece is immediately removed from the game. It does not return during Cleanup & Refresh and cannot be replaced by any means. A Flying Unit moving over Grass does not destroy the Grass terrain piece. Flying models pass above the terrain, not through it. If any model of a Flying Unit ends on a Grass terrain piece, it is removed as normal.
One of the elevation levels. Model is on the GROUND LEVEL when it is standing directly on the playmat. Models on GROUND LEVEL cannot Engage models on HIGH GROUND, and vice versa. Models on GROUND LEVEL can Engage models on MID GROUND only if both models are adjacent to the same ACCESS POINT connecting their respective elevations. A model at GROUND LEVEL has an Effective Size equal to its own Size characteristic only.
Remove X points of accumulated Damage from the Unit (reduce its Damage Marker accordingly). HEAL cannot return Destroyed models – it only reduces existing Damage. See also: RESPAWN.
One of the elevation levels. Model is on the HIGH GROUND when standing on horizontal terrain of Size 3 or larger. Models on HIGH GROUND cannot Engage models on GROUND LEVEL, and vice versa. Models on HIGH GROUND can Engage models on MID GROUND only if both models are adjacent to the same ACCESS POINT connecting their respective elevations. A model on HIGH GROUND has an Effective Size equal to its own Size plus the terrain's Size.
The affected Unit suffers X automatic hits. Set X dice directly into the Armour Pool and proceed immediately to Armour Rolls (Part 8.7.4, Steps 3–4). Treat the Damage characteristic as Y. These hits do not generate Surge.
Immediately after this Unit completes a successful Charge, check every model in the Fighting Rank or Supporting Rank. For each eligible model, generate X Impact Dice:
Roll the allocated dice for each target Unit separately (this is the Impact Hit Roll). For each result of Y or higher, set 1 die into the target's Armour Pool. Proceed immediately to Armour Rolls. These hits do not generate Surge and treat Damage as 1.
A terrain piece is Impassable if it has no Access Point connecting it to an adjacent elevation level. Models cannot move through, onto, or across IMPASSABLE TERRAIN, and no model may end its movement overlapping it. Models can move through Terrain of Sizes 0 and 1.
Ranged Attacks with this weapon may ignore Line of Sight when selecting a target and resolving Damage. The target must still be Within Range. If the target is not within Line of Sight, it may make an Evade Roll against this attack.
Enemy Units cannot declare or resolve Reaction abilities in response to attacks made with this weapon.
The Leading Model is a temporary reference point used to execute a Unit's movement. Whenever a Unit performs a Move, Deploy, Run, Charge, Disengage, Close Ranks, or any action that instructs the Unit to nominate a Leading Model, the Controlling Player selects one model in the Unit. Move the Leading Model first, measuring its exact path. Then set the remaining models in valid Coherency around the Leading Model's new position (Part 4.4). The Leading Model nomination ends once the action resolves. The Leading Model determines the Unit's Gap Clearance category and interacts with terrain restrictions (Part 4.6).
Line of Sight determines what a model can see and, by extension, what it can target with attacks and abilities. All Line of Sight checks are resolved from a 2D top- down perspective, looking directly down at the battlefield from above. To determine if a model can see a target, trace an imaginary straight line from any
part of the acting model's base to any part of the target model's base. Vertical height is never factored into the trace. If the trace does not pass through any Blocking Terrain (any terrain piece with an Effective Size of 1 or greater), the target is Visible. No further checks are required. If the trace passes through Blocking Terrain, the target is not automatically hidden. Apply the Cover rules (Part 7.1.1) to determine whether that terrain actually blocks the Line of Sight:
Each terrain piece is assessed independently. Terrain pieces do not combine their Effective Size or proximity. If no single terrain piece meets the requirements for Full Cover or Direct Cover, Line of Sight is not blocked, regardless of how many terrain pieces the trace passes through. A terrain piece's footprint is defined by its physical base or outermost edges viewed from above. Gaps, windows, doorways, and open interiors within the footprint do block the Line of Sight unless players agree otherwise during Battlefield Setup (Part 7.1). Flying models ignore the Full Cover rule. Direct Cover and the Elevation Dead Zone still apply. Treat a Flying model's Effective Size as higher than the Effective Size of any terrain piece on the table (Part 7.1.4). Line of Sight is mutual: if Model A can see Model B, Model B can see Model A through the same trace.
When making a Ranged Attack with this weapon, add X to its RoA if the target Unit has Stationary Status.
The maximum Range of this weapon increases to X". Measure each attacking model's distance to the target individually:
If a Batch contains models at both Standard and Long Range, generate the total dice but roll the two groups separately to account for different Hit Target Numbers.
One of the elevation levels. Model is on the MID GROUND when standing on horizontal terrain of Size 1 or 2. Models on MID GROUND can Engage models on HIGH GROUND or GROUND LEVEL only if both models are adjacent to the same ACCESS POINT connecting their respective elevations. A model on MID GROUND has an Effective Size equal to its own Size plus the terrain's Size.
Numbered Markers are set on the battlefield during Setup at the coordinates shown on the Deployment Card. Each Marker is 32mm in diameter and has two sides: Activated or Deactivated. Markers 1 & 3 are Red, Markers 2 & 4 are Blue, and Marker 5 is Neutral. Mission Markers are the primary scoring mechanism. At the end of each Round, players determine Control of each Marker by comparing the Total Current Supply Value of their eligible contesting Units (Part 8.9.1). A Unit may Contest a Mission Marker only if it is on the battlefield, In Coherency, and has at least one model Within 3" with Line of Sight to the Marker on the same elevation. Flying Units and BURROWED Units cannot Contest or Control Mission Markers. Control is Sticky – once a player Controls a Marker, it remains under their control until the opponent reclaims
it with a higher contesting Supply total. A tied result never transfers control.
A Modifier adjusts the Target Number of a roll. Apply all Modifiers before rolling (Part 3.4).
Modifiers from different named sources are cumulative unless otherwise stated. A Target Number can never be modified below 2+ or above 6+. Modifiers adjust the Target Number, not the dice result. A natural roll of 6 always succeeds, and a natural roll of 1 always fails, regardless of Modifiers (Part 3.6). A Modifier is distinct from a Fixed Addition (Part 3.5), which generates a value rather than adjusting a Target Number.
To perform this ability, the controlling player must have sufficient Available Supply. Set one (Name) model in Base-to-Base contact with a model from the active Unit, then remove X models from that Unit from the battlefield. The (Name) model forms a new Unit and cannot be set Within 1" of any Enemy Unit. Place an Activation Marker next to the new Unit; it cannot be Activated for the remainder of the Round.
The Unit suffers X points of Damage. Add this amount effectively to the Unit's Damage Marker. Do not remove any models, even if Total Damage exceeds a model's HP. If the Unit subsequently suffers standard Damage, the combined Total Damage triggers casualty removal normally.
A Friendly or Enemy Ground Zerg Unit is considered to be ON CREEP while it is Within 6" of any Creep Tumor Token or any model designated as a Source of Creep. While satisfying this condition, the Unit gains the ON CREEP keyword. This allows the Unit to trigger specific Special Abilities or Upgrades that require this state.
When attacking a Unit with the specified Combat Tag, treat this weapon's Damage characteristic as X.
Ranged Attacks with this weapon may target Engaged Enemy Units, ignoring the standard Engagement Status restriction (overrides Part 8.7.3, Step 1).
Choose a Leading Model. Remove it and set it Wholly Within X" of its starting position. Then remove and replace all other models in the Unit, maintaining Coherency (Part 4.4). PLACE ignores Gap Clearance, and elevation requirements. The Leading Model is removed and set directly, not moved along a path. However, they must end in a legal position and not Within the Engagement Range of any enemy model. Models using the PLACE effect during the Assault Phase may be set Within the Engagement Range of Enemy models (the Unit becomes Engaged).
After rolling to Hit, move up to X failed Attack Dice directly into the Armour Pool. Treat them as successful Hits for all purposes, including Surge.
The default state of a Tactical Card or Faction Card. A Ready card is face-up, its abilities are available, and it may be Exhausted to pay resource costs or activate its Special Abilities. All Tactical Cards and Faction Cards begin each Round in the Ready state. Cards that have been Exhausted are returned to Ready during Cleanup & Refresh (Part 8.9.5).
This ability is exempt from the Once Per Round limit (Part 2.7.1). It may be used multiple times per Round and per Activation, provided all Costs and trigger conditions are met each time.
A holding area off the battlefield where Units remain until they are deployed. All Units begin the game in Reserves.
While in Reserves, a Unit:
Return up to X Destroyed models to this Unit.
If a Shield value is present on a Unit Card, add it to the Hit Points (HP) of the first model. The Unit is Shielded. The Unit loses its Shielded Status when the Total Damage assigned to it exceeds its Shield value or when the first model in the Unit is removed. The Shielded Status is referenced by other abilities. Losing Shielded Status does not remove any remaining Hit Points, it only ends effects that require the Unit to be Shielded. Shielded Status cannot be restored by HEAL.
When this Unit performs a Ranged Attack or Close Combat Attack, models equipped with this weapon may use it, ignoring the normal restriction of one weapon per model (Part 8.7.3). If a model is equipped with multiple SIDEARM weapons, it may use all of them in the same activation. Attacks made with each SIDEARM must be resolved in separate Batches. Because they are separate Batches, SIDEARM attacks may target a different Enemy Unit than the Unit's other weapons, subject to all standard target eligibility requirements.
While a Unit has the SIEGE MODE Status, apply the following rules:
A Special Ability is any named ability printed on a Unit Card, Tactical Card, or Faction Card. Every Special Ability falls into one of three categories: Active Ability, Passive Ability, or Reaction Ability (Part 2.7).
All three types are inactive while the Unit is in Reserves unless the ability explicitly states otherwise. A Unit cannot be affected by multiple instances of the same- named Special Ability simultaneously.
A Unit may include only one model equipped with this weapon. Multiple upgrades configuring more than one instance of this weapon are not permitted (Part 9.1.7).
Additional hits generated by a Template Weapon that strike models outside the Primary target Unit. When
a Blast Template (BT) or Flamer Template (FT) covers models belonging to Units other than the Primary target, those models are resolved as Spillover. Each affected Unit is resolved as a separate Batch. Spillover Batches do not apply Rate of Attack modifiers and do not generate Surge. Spillover may affect both Friendly and Enemy Units. See Part 8.7.6 for the full Template Weapon procedure.
At the Start of the Round, all Units gain this Status. A Unit immediately loses this Status if any model in this Unit moves, is moved, or is PLACED for any reason.
A category of keyword representing a temporary or persistent operational mode, condition, or statistic modifier affecting a Unit (e.g. BURROWED, SIEGE MODE). Unless stated otherwise, Statuses aren't removed during the Scoring and Cleanup Phase. They stay on the Unit until they are removed by other means A Unit's active Status is visually tracked using Status Markers set next to the Unit:
This Token, Marker or Ability Effect persists through Cleanup & Refresh (overrides Part 8.9.5). It remains until a specific condition removes it (e.g. destroyed or duration expires).
Set the Leading Model of the named Unit in Base- to-Base contact with the Parent Unit. Set remaining models In Coherency. Models cannot be set Within the Engagement Range of any Enemy Unit. Set an Activation Marker next to the summoned Unit – it cannot be Activated during the Phase in which it was summoned. In subsequent Phases, this Unit must be Activated immediately after its Parent Unit's activation ends, before the opponent's next activation. The Summoned Unit cannot be set Within the opponent's Zone of Influence. The player must have sufficient Available Supply. If the Unit's Current Supply Value would cause Total Current Supply to exceed the Supply Pool, it cannot be Summoned. If the Parent is not present on the battlefield, this Unit can be Activated normally.
The Supply Value of a Unit is the value shown on the Unit Card's Supply Profile corresponding to the Unit's current model count. A Unit's starting Supply Value is determined during Army Building by the Composition Option selected (Part 9.1.6) and defines how many Army Slots the Unit occupies. Supply Value is a dynamic characteristic – as casualties reduce the model count into a lower bracket on the Supply Profile, the Supply Value decreases. Update immediately when a casualty moves the Unit into a lower bracket. Supply is used for Deployment, Mission Marker Control, Tactical Mass, and scoring.
A model is in the Supporting Rank if it is in Base-to- Base contact with a Friendly model from the same Unit that is in the Fighting Rank, but is not itself Within the Engagement Range of an Enemy model. Models in the Supporting Rank may strike with their Combat Phase weapons as though they were in the fight. See Part 8.8.1, Step 2.
A Unit has Tactical Mass when its Current Supply Value exceeds the Combined Current Supply Value of all Enemy Units it is Engaged with. A Unit with Tactical Mass ignores the Disengage penalty (Part 8.5.4): it may Ranged Attack and Charge normally in the following Assault Phase after Disengaging.
When this Unit resolves an Armour Roll, change up to X failed results into successes. Treat them as meeting
or exceeding the Armour characteristic – discard them without moving to the Damage Pool.
A Ground Unit is Unengaged when none of its models is Within 1" of any Enemy Ground model, or when terrain restrictions (Part 7.2.1) prevent valid Engagement despite proximity. Flying Units are always Unengaged. An Unengaged Unit may perform a standard Move, Run, Ranged Attack, or Charge without restriction. Only Unengaged Units may be selected to perform a Move action (Part 8.5.2).
A model is Visible to another model if a valid Line of Sight trace can be drawn between them (Part 7.1). If the trace does not pass through any Blocking Terrain, the target is Visible without further checks. If the trace passes through Blocking Terrain, apply the Cover rules (Part 7.1.1) – the target remains Visible unless Full Cover or Direct Cover blocks the Line of Sight. A model with the HIDDEN keyword is not Visible to any model more than 4" away, regardless of Line of Sight.
A model is Wholly Within a distance only if its entire base sits inside that range - no part of the base may extend beyond the edge. A Unit is Wholly Within a distance only if every model in the Unit satisfies this condition. Wholly Within is a stricter requirement than Within and is used for Coherency checks (Part 4.4), certain ability areas of effect, and Mission Marker eligibility. When a rule specifies Wholly Within, partial overlap is not sufficient.
A model is Within a distance if any part of its base touches or crosses into that range. A Unit is Within a distance if at least one model in the Unit meets this condition. Within is a less restrictive requirement than Wholly Within. When a rule specifies Within without the word "Wholly," partial overlap is sufficient.
A restricted area of the battlefield extending 6" inward from a player's Entry Edge, as defined by the Deployment Card. Where the Entry Edge does not run the full length of a table edge, the Zone of Influence is marked using Zone of Influence Markers set at the corners of the Entry Edge. Units arriving from Reserves cannot end their deployment Within the opponent's Zone of Influence. This restriction applies to all forms of arrival - whether by standard deployment, transport, or SUMMON (Part 8.3.3). The Zone of Influence does not affect Units already on the battlefield. It does not restrict movement, block Line of Sight, or interact with any other rule once a Unit has completed its arrival.
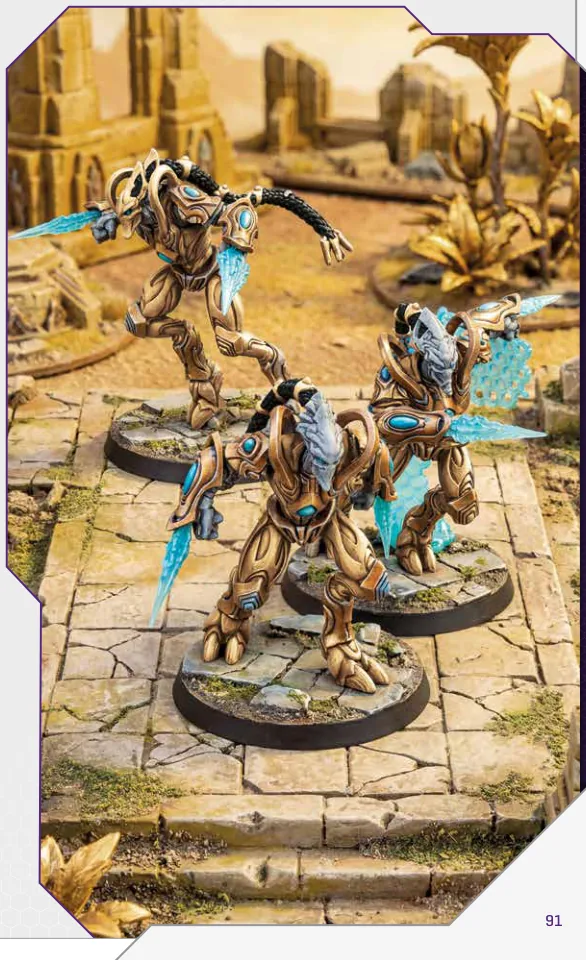
No matching terms.
This Part compiles the most frequently referenced rules, sequences and tables into a single location for quick reference during play. It is not a substitute for the full rules, but it should answer most questions that arise mid-game without the need to search through earlier Parts.
START OF THE ROUND EFFECTS
Actions (choose one per Unit):
First to Pass takes First Player Marker for Phase 2.
Moving a Unit: Leading Model moves up to Speed. Set the rest of the unit In Coherency.
Available Supply = Supply Pool – Total Supply of Friendly Units on the Battlefield.
Actions (choose one per Unit):
First to Pass takes First Player Marker for Phase 3.
Ranged Attack:
Charge:
All Engaged Units must activate. Players alternate.
Actions:
Pass only when no Engaged Units remain.
Close Combat Attack:
Unengaged target:
Engaged target (strict order):
Cannot remove a model if doing so breaks Engagement with an enemy, provided another valid casualty exists.
| BLAST (BT) | FLAMER (FT) | |
|---|---|---|
| Alignment | As much of a template over the target model's base | Narrow end flush with the attacker base |
| LoS check | From the target model's base to each model | From the attacker base through the template to each model |
| Hit Roll | Roll to Hit as normal | Roll to Hit as normal |
| Surge Die | No Surge Die is rolled | No Surge Die is rolled |
| Surge Result | Equals affected models in the Main target Unit only | Equals affected models in the Main target Unit only |
| Spillover | Resolve each affected Unit as a separate Batch. Do not apply Rate of Attack modifiers or Surge to Spillover attacks | Resolve each affected Unit as a separate Batch. Do not apply Rate of Attack modifiers or Surge to Spillover attacks |
If a rules dispute cannot be resolved swiftly:
This rule exists to keep the game moving, not to provide a tactical loophole.
This section lists the Mineral Cost and available Composition Options for each Unit in the game. When mustering a Unit during Army Building (Part 9.1.6), select one Composition Option from the Unit's entry below. The chosen option determines the number of models in the Unit, the Mineral Cost paid, and the Unit's initial Supply Value as shown on its Unit Card's Supply Profile.
Upgrade costs are listed separately beneath each Unit's Composition Options. A purchased upgrade applies to every model in the Unit unless it has the SPECIALIST keyword (Part 9.1.7).
| MODELS | MINERAL COST | SUPPLY VALUE |
|---|---|---|
| 6 | 160 | 1 |
| 9 | 210 | 2 |
| UPGRADE | TYPE | MINERAL COST (6 models) | MINERAL COST (9 models) |
|---|---|---|---|
| AGG-12 | SPECIALIST, ↑ FOR C-14 Rifle | 10 | 10 |
| Bayonet | ↑ FOR Strike | 20 | 30 |
| Combat Shield | - | 20 | 30 |
| Grenades - Frag | - | 10 | 10 |
| Rocket Launcher | SPECIALIST | 40 | 40 |
| Slugthrower | - | 10 | 20 |
| MODELS | MINERAL COST | SUPPLY VALUE |
|---|---|---|
| 6 | 230 | 1 |
| MODELS | MINERAL COST | SUPPLY VALUE |
|---|---|---|
| 2 | 150 | 1 |
| 4 | 280 | 2 |
| UPGRADE | TYPE | MINERAL COST (2 models) | MINERAL COST (4 models) |
|---|---|---|---|
| Kinetic Foam | - | 20 | 40 |
| Laser Targeting Systems | - | 20 | 40 |
| Veteran of Tarsonis | - | 20 | 30 |
| MODELS | MINERAL COST | SUPPLY VALUE |
|---|---|---|
| 3 | 110 | 1 |
| UPGRADE | TYPE | MINERAL COST (3 models) | MINERAL COST |
|---|---|---|---|
| A-13 Flash Grenade Launcher | - | 20 | - |
| Advanced Medic Facilities | - | 60 | - |
| Stabilizer Medpacks | - | 30 | - |
| MODELS | MINERAL COST | SUPPLY VALUE |
|---|---|---|
| 1 | 190 | 2 |
| UPGRADE | TYPE | MINERAL COST (1 model) | MINERAL COST |
|---|---|---|---|
| Ares-Class Targeting System | - | 20 | - |
| Haywire Missiles | ↑ FOR Hellfire Missiles | 40 | - |
| Scatter Missiles | ↑ FOR Hellfire Missiles | 30 | - |
| MODELS | MINERAL COST | SUPPLY VALUE |
|---|---|---|
| 1 | 250 | 1 |
| UPGRADE | TYPE | MINERAL COST (1 model) | MINERAL COST |
|---|---|---|---|
| C-14 Rifle | ↑ FOR Commando Rifle | 0 | - |
| MODELS | MINERAL COST | SUPPLY VALUE |
|---|---|---|
| 1 | 220 | 2 |
| UPGRADE | TYPE | MINERAL COST (1 model) | MINERAL COST |
|---|---|---|---|
| Mode Transformation | - | 20 | - |
| Coordinated Strike | - | 20 | - |
| Shaped Blast | - | 10 | - |
| Smart Shells | - | 10 | - |
| NAME | VESPENE GAS COST |
|---|---|
| Barracks | 25 |
| Barracks (Proxy) | 40 |
| Barracks (Tech Lab) | 45 |
| Supply Depot | 40 |
| Factory | 35 |
| Engineering Bay | 25 |
| NAME | VESPENE GAS COST |
|---|---|
| Armory | 30 |
| Academy | 35 |
| Orbital Command | 25 |
| Dropship | 40 |
| Factory (Tech Lab) | 40 |
| MODELS | MINERAL COST | SUPPLY VALUE |
|---|---|---|
| 12 | 180 | 1 |
| 18 | 220 | 2 |
| UPGRADE | TYPE | MINERAL COST (12 models) | MINERAL COST (18 models) |
|---|---|---|---|
| Adrenal Glands | - | 20 | 20 |
| Burrow Ambush | - | 20 | 30 |
| Shredding Claws | ↑ FOR Claws | 10 | 10 |
| MODELS | MINERAL COST | SUPPLY VALUE |
|---|---|---|
| 12 | 240 | 1 |
| 18 | 300 | 2 |
| UPGRADE | TYPE | MINERAL COST (12 models) | MINERAL COST (18 models) |
|---|---|---|---|
| Adrenal Glands | - | 20 | 20 |
| Burrow Ambush | - | 20 | 30 |
| Shredding Claws | ↑ FOR Claws | 10 | 10 |
| MODELS | MINERAL COST | SUPPLY VALUE |
|---|---|---|
| 6 | 250 | 1 |
| MODELS | MINERAL COST | SUPPLY VALUE |
|---|---|---|
| 18 | 260 | 1 |
| UPGRADE | TYPE | MINERAL COST (18 models) | MINERAL COST |
|---|---|---|---|
| Burrow Ambush | - | 20 | - |
| MODELS | MINERAL COST | SUPPLY VALUE |
|---|---|---|
| 3 | 170 | 1 |
| UPGRADE | TYPE | MINERAL COST (3 models) | MINERAL COST |
|---|---|---|---|
| Burrow Ambush | - | 20 | - |
| Glial Reconstitution | - | 20 | - |
| Hydriodic Bile | - | 10 | - |
| Tunneling Claws | - | 10 | - |
| MODELS | MINERAL COST | SUPPLY VALUE |
|---|---|---|
| 3 | 200 | 1 |
| UPGRADE | TYPE | MINERAL COST (3 models) | MINERAL COST |
|---|---|---|---|
| Burrow Ambush | - | 20 | - |
| Glial Reconstitution | - | 20 | - |
| Hydriodic Bile | - | 10 | - |
| Tunneling Claws | - | 10 | - |
| MODELS | MINERAL COST | SUPPLY VALUE |
|---|---|---|
| 3 | 240 | 1 |
| UPGRADE | TYPE | MINERAL COST (3 models) | MINERAL COST |
|---|---|---|---|
| Burrow Ambush | - | 20 | - |
| Glial Reconstitution | - | 20 | - |
| Hydriodic Bile | - | 10 | - |
| Tunneling Claws | - | 10 | - |
| MODELS | MINERAL COST | SUPPLY VALUE |
|---|---|---|
| 2 | 140 | 2 |
| 4 | 260 | 3 |
| UPGRADE | TYPE | MINERAL COST (2 models) | MINERAL COST (4 models) |
|---|---|---|---|
| Ancillary Carapace | - | 20 | 40 |
| Burrow Ambush | - | 20 | 40 |
| Grooved Spines | - | 20 | 40 |
| Lurking | - | 10 | 20 |
| MODELS | MINERAL COST | SUPPLY VALUE |
|---|---|---|
| 1 | 150 | 1 |
| UPGRADE | TYPE | MINERAL COST (1 model) | MINERAL COST |
|---|---|---|---|
| Creep Speed | - | 10 | - |
| Domineering Presence | - | 10 | - |
| MODELS | MINERAL COST | SUPPLY VALUE |
|---|---|---|
| 1 | 250 | 1 |
| MODELS | MINERAL COST | SUPPLY VALUE |
|---|---|---|
| 1 | 160 | 1 |
| 2 | 270 | 2 |
| UPGRADE | TYPE | MINERAL COST (1 model) | MINERAL COST (2 models) |
|---|---|---|---|
| Bloated Bile Ducts | - | 20 | 40 |
| Burrow Ambush | - | 20 | 40 |
| Potent Bile | - | 20 | 40 |
| NAME | VESPENE GAS COST |
|---|---|
| Spawning Pool | 25 |
| Spawning Pool (Six Pool) | 40 |
| Roach Warren | 25 |
| Hydralisk Den | 35 |
| Evolution Chamber | 30 |
| Hatchery | 30 |
| Lair | 35 |
| NAME | VESPENE GAS COST |
|---|---|
| Overseer | 25 |
| Overlord | 35 |
| Cocoon | 30 |
| CREEP CARDS | VESPENE GAS COST |
|---|---|
| Accelerating Creep | 0 |
| Malignant Creep | 10 |
| MODELS | MINERAL COST | SUPPLY VALUE |
|---|---|---|
| 3 | 160 | 2 |
| UPGRADE | TYPE | MINERAL COST (3 models) | MINERAL COST |
|---|---|---|---|
| Leg Enhancements | - | 20 | - |
| My Life for Aiur | - | 10 | - |
| We Stand as One | - | 20 | - |
| Zealous Round | - | 10 | - |
| MODELS | MINERAL COST | SUPPLY VALUE |
|---|---|---|
| 3 | 280 | 2 |
| MODELS | MINERAL COST | SUPPLY VALUE |
|---|---|---|
| 4 | 150 | 1 |
| UPGRADE | TYPE | MINERAL COST (4 models) | MINERAL COST |
|---|---|---|---|
| Glaive Strike | ↑ FOR Strike | 20 | - |
| Guidance | - | 10 | - |
| Resonating Glaives | - | 20 | - |
| MODELS | MINERAL COST | SUPPLY VALUE |
|---|---|---|
| 2 | 130 | 1 |
| UPGRADE | TYPE | MINERAL COST (2 models) | MINERAL COST |
|---|---|---|---|
| Hallucination | - | 30 | - |
| Solid-Field Projectors | - | 20 | - |
| MODELS | MINERAL COST | SUPPLY VALUE |
|---|---|---|
| 1 | 170 | 1 |
| 2 | 270 | 2 |
| UPGRADE | TYPE | MINERAL COST (1 model) | MINERAL COST (2 models) |
|---|---|---|---|
| Fury of the Nerazim | - | 20 | 30 |
| Path of Shadows | - | 20 | 40 |
| MODELS | MINERAL COST | SUPPLY VALUE |
|---|---|---|
| 1 | 250 | 1 |
| MODELS | MINERAL COST | SUPPLY VALUE |
|---|---|---|
| 1 | 230 | 1 |
| MODELS | MINERAL COST | SUPPLY VALUE |
|---|---|---|
| 4 | 210 | 1 |
| MODELS | MINERAL COST | SUPPLY VALUE |
|---|---|---|
| 1 | 280 | 2 |
| UPGRADE | TYPE | MINERAL COST (1 model) | MINERAL COST |
|---|---|---|---|
| Shield Overcharge | - | 20 | - |
| Left Phase Disruptor | ↑ FOR Left Photon Disruptor | 20 | - |
| Right Phase Disruptor | ↑ FOR Right Photon Disruptor | 20 | - |
| Fury Unyielding | - | 20 | - |
| For the Ancients | - | 20 | - |
| NAME | VESPENE GAS COST |
|---|---|
| Gateway | 25 |
| Warp Gate | 40 |
| Gate Chronoboosted | 35 |
| Observer | 25 |
| Nexus | 35 |
| Overcharged Nexus | 35 |
| NAME | VESPENE GAS COST |
|---|---|
| Power Field | 40 |
| Forge | 30 |
| Warp Prism | 35 |
| Twilight Council | 45 |
| Robotics Facility | 35 |
| Void Seeker | 40 |
UNITS
| NAME | MODELS | UPGRADES | SUPPLY VALUE | COST |
|---|---|---|---|---|
| Marine | 9 | Combat Shield, Grenades - Frag, Bayonet | 2 | 280 |
| Marauder | 2 | Laser Targeting Systems | 1 | 170 |
| Marauder | 2 | Veteran of Tarsonis, Kinetic Foam | 1 | 190 |
| Medic | 3 | Stabilizer Medpacks | 1 | 140 |
| Goliath | 1 | Scatter Missiles | 2 | 220 |
CARDS
| NAME | TYPE | COST |
|---|---|---|
| Terran Armed Forces | Faction Card | - |
| Barracks | Tactical Card | 25 |
| Factory | Tactical Card | 35 |
| Orbital Command | Tactical Card | 25 |
| Supply Drop | Mission Card | - |
| Gather the Resources | Mission Card | - |
| Abandoned Camp | Deployment Card | - |
| Agria Valley | Deployment Card | - |
UNITS
| NAME | MODELS | UPGRADES | SUPPLY VALUE | COST |
|---|---|---|---|---|
| Marine | 6 | AGG-12, Rocket Launcher | 1 | 210 |
| Raynor's Raiders (Marine) | 6 | - | 1 | 230 |
| Marauder | 2 | Kinetic Foam | 1 | 170 |
| Medic | 3 | Stabilizer Medpacks | 1 | 140 |
| Jim Raynor | 1 | - | 1 | 250 |
CARDS
| NAME | TYPE | COST |
|---|---|---|
| Raynor's Raiders | Faction Card | - |
| Barracks | Tactical Card | 25 |
| Academy | Tactical Card | 35 |
| Orbital Command | Tactical Card | 25 |
| Supply Drop | Mission Card | - |
| Divide and Conquer | Mission Card | - |
| Agria Valley | Deployment Card | - |
| Dirt Side | Deployment Card | - |
UNITS
| NAME | MODELS | UPGRADES | SUPPLY VALUE | COST |
|---|---|---|---|---|
| Swarmling (Zergling) | 18 | - | 1 | 260 |
| Corpser (Roach) | 3 | Burrow Ambush, Tunneling Claws, Hydriodic Bile | 1 | 280 |
| Hydralisk | 4 | Ancillary Carapace | 3 | 300 |
| Queen | 1 | Creep Speed | 1 | 160 |
CARDS
| NAME | TYPE | COST |
|---|---|---|
| Zerg Swarm | Faction Card | - |
| Accelerating Creep | Creep Card | 0 |
| Evolution Chamber | Tactical Card | 30 |
| Overseer | Tactical Card | 25 |
| Hydralisk Den | Tactical Card | 35 |
| Supply Drop | Mission Card | - |
| Gather the Resources | Mission Card | - |
| Abandoned Camp | Deployment Card | - |
| Dirt Side | Deployment Card | - |
UNITS
| NAME | MODELS | UPGRADES | SUPPLY VALUE | COST |
|---|---|---|---|---|
| Zergling | 12 | - | 1 | 180 |
| Kerrigan Swarm Raptor (Zergling) | 6 | - | 1 | 250 |
| Roach | 3 | - | 1 | 170 |
| Queen | 1 | - | 1 | 150 |
| Kerrigan | 1 | - | 1 | 250 |
CARDS
| NAME | TYPE | COST |
|---|---|---|
| Kerrigan's Swarm | Faction Card | - |
| Malignant Creep | Creep Card | 10 |
| Evolution Chamber | Tactical Card | 30 |
| Overseer | Tactical Card | 25 |
| Spawning Pool | Tactical Card | 25 |
| Frontlines | Mission Card | - |
| Hold Position | Mission Card | - |
| Frontier | Deployment Card | - |
| Char Plains | Deployment Card | - |
UNITS
| NAME | MODELS | UPGRADES | SUPPLY VALUE | COST |
|---|---|---|---|---|
| Zealot | 3 | My Life for Aiur, Leg Enhancements, We Stand as One | 2 | 210 |
| Adept | 4 | Resonating Glaives, Glaive Strike | 1 | 190 |
| Sentry | 2 | Solid-Field Projectors, Hallucination | 1 | 180 |
| Stalker | 1 | Path of Shadows, Fury of the Nerazim | 1 | 210 |
| Stalker | 1 | Path of Shadows, Fury of the Nerazim | 1 | 210 |
CARDS
| NAME | TYPE | COST |
|---|---|---|
| Daelaam | Faction Card | - |
| Forge | Tactical Card | 30 |
| Twilight Council | Tactical Card | 45 |
| Observer | Tactical Card | 25 |
| Hold Position | Mission Card | - |
| Gather the Resources | Mission Card | - |
| Abandoned Camp | Deployment Card | - |
| Frontier | Deployment Card | - |
UNITS
| NAME | MODELS | UPGRADES | SUPPLY VALUE | COST |
|---|---|---|---|---|
| Zealot | 3 | My Life for Aiur | 2 | 170 |
| Praetor Guard (Zealot) | 3 | - | 2 | 280 |
| Adept | 4 | Glaive Strike | 1 | 170 |
| Sentry | 2 | - | 1 | 130 |
| Artanis | 1 | - | 1 | 250 |
CARDS
| NAME | TYPE | COST |
|---|---|---|
| Khalai | Faction Card | - |
| Gateway | Tactical Card | 25 |
| Warp Prism | Tactical Card | 35 |
| Observer | Tactical Card | 25 |
| Frontlines | Mission Card | - |
| Divide and Conquer | Mission Card | - |
| Frontier | Deployment Card | - |
| Char Plains | Deployment Card | - |
Official answers to frequently asked questions (FAQ v1.1, 25 September 2026).
A Unit’s Shield value is added directly to the Hit Points (HP) of its first model. For example, a Zealot (4 HP) with a Shield of 3 gives its first model a total of 7 HP. Lost HP from this combined pool can be healed normally.
SHIELDED Status is lost in either of the following two situations:
Non-lethal damage is added to the Unit’s Total Damage Pool and removes SHIELDED Status exactly like standard damage.
No. Once its last model is removed and a Unit is Destroyed, it cannot return to play. Unless specified otherwise in mission or other rules.
Unit Coherency is checked only at the end of a movement. If the Unit passed its last check, it remains in Coherency for objective control, regardless of any casualties suffered since then.
They apply to both. A gap is defined as any physical space between terrain pieces or models through which a moving model’s base must pass.
Yes. Coherency Links may pass through Enemy models that your Unit is currently Engaged with. As long as there is open space to place the bases within Coherency, models can be set on the other side of the enemy.
It can pass through anything the Leading Model can legally traverse. For example, since Zerg Raptors have special movement rules allowing them to traverse IMPASSABLE TERRAIN, other models in the Unit can trace their Coherency Links directly through that terrain piece to stay connected.
You can do so via Coherency, no separate Move action is required. When a Unit resolves a movement, only the nominated Leading Model measures and moves along a physical path. All other models in the Unit are set on the battlefield, and Coherency Links are explicitly allowed to trace through Access Points to connect models across different elevation levels.
No. A Unit must actually change its position on the battlefield when performing a Move or Run action. If a Unit does not reposition, it is considered to have performed a Hold action instead.
Yes. The Leading Model must move the maximum possible distance Directly Towards or Directly Away from the target, as applicable.
Apply the Wobbly Model Syndrome rules. The centre of the model’s base must remain on the High Ground terrain feature, and the base may overhang the edge by the minimum amount necessary to stand.
The edge of a High Ground feature is treated as Impassable Terrain for Gap Clearance purposes. Consequently, any physical space must satisfy the moving model’s Size requirement (1” wide for Size 2 or lower, and 3” wide for Size 3 or larger Units). For example, a Size 3 Siege Tank can drive up a ramp if the gap between the ramp’s edges is at least 3” wide, and it can be placed at the top using the Wobbly Model Syndrome rules if its base cannot fit entirely.
No. Ground Units can only move between connected High Grounds.
Yes. Direct Cover is established as long as the Line of Sight trace passes through a terrain piece and the model is Within 1” of any part of that same terrain piece. It does not matter if the specific section of the terrain Within 1” is the part physically obstructing the trace.
Yes. Deactivated Mission Markers can still be controlled normally. The rules for determining control apply to all Mission Markers currently on the battlefield, regardless of whether they are flipped to their Activated or Deactivated side.
You block only the specific physical card, not its name. Since players can bring identical cards, removing one physical copy from the table does not discard the duplicate copy, which remains a valid choice.
They are treated as multiple independent terrain pieces.
Yes. Rules blocking them from Controlling or Contesting Mission Markers do not prevent them from claiming said markers in the “Artefact Hunt”.
Rolling for Mission Marker Activation. The roll for Mission Marker Activation is resolved before players roll for Priority.
Yes. Models may deploy directly onto High Ground if the player’s Entry Edge physically touches that terrain feature. All standard deployment requirements still apply, meaning the Unit must be placed legally in Coherency.
No. Units may not deploy onto a different elevation level than the Unit they are deploying from.
Yes. Both the Omega Worm and aPylon’s base are treated as friendly Entry Edges owned by the player who placed them.
No. Deploying a Unit this way consumes its entire Activation, which ends immediately upon setup. Once the Unit is placed on the battlefield, you must place an Activation Marker next to it, preventing it from performing any further actions or resolving any other active abilities during that Phase.
No. Zones of Influence are only generated by the primary Entry Edges defined by your Deployment Card and are marked exclusively during battlefield setup.
Place the leading model in base-to-base contact with the marker, and the remaining models in Unit Coherency completely outside of enemy Engagement Range. If you cannot place the leading model in base-to-base contact with the marker while keeping it outside of enemy Engagement Range, the Unit cannot be deployed, and the ability is wasted.
No. Abilities do not function while a Unit is in Reserves. Only abilities that explicitly state they work in Reserves (such as “Raiders Roll!”) or those that actually deploy the Unit (like “Armed and Ready” or “Phase Prism”) can be resolved before deployment.
This term refers to a Unit actively performing a Deploy Action. Any card effect, special ability, or core game rule that causes a Unit to perform a Deploy Action counts as that Unit being nominated to deploy.
No. Units in Reserves cannot use abilities or measure range until they are placed on the battlefield. Because a Unit’s passive abilities do not function while in Reserves and the Unit cannot be “On Creep” before actually entering the board, the Deploy must be resolved using the Unit’s standard Speed characteristic.
Yes. Evade rolls are resolved against the final Damage Pool, which includes Surge. Surge only bypasses the Armour Roll, moving successful hits directly to the Damage Pool.
No. Target numbers can never be modified below 2+ or above 6+. Because abilities like ANTI-EVADE apply modifiers, they can only worsen a check to a maximum of 6+.
Yes. Casualty removal is restricted only by visibility, not range. Any model in the target Unit that is visible to at least one model in the attacking Unit is eligible to be removed as a casualty, even if that specific model is physically outside of the weapon’s range.
No. Since the action requires the Leading Model to end their movement closer to the enemy than they started, a Unit where everyone is already in base-to-base contact cannot resolve a Close Ranks action.
You must prioritise maintaining engagement with ALL enemy Units. When removing casualties at Priority 2 or 3, you cannot choose a model if its removal would break engagement with a specific enemy Unit, as long as another valid casualty exists in any priority tier.
No. Targets are declared and resolved one weapon Batch at a time. You select a target for your first weapon type, resolve those attacks completely, and only then declare the target for your next weapon type.
Attacks using a Blast Template may be resolved in any order, keeping in mind that Spillover attacks cannot receive any modifiers.
You must exhaust (flip face-down) one or more Ready cards matching the required resource type to pay the cost. Any excess resources generated are lost and cannot be saved or spent on another ability. For example, exhausting a card that produces 2 CP to pay for a 1 CP ability immediately discards the leftover 1 CP.
Yes. A Unit is always considered within range of itself unless a rule explicitly states otherwise.
Yes. An active Unit on the battlefield is always required to resolve a card’s Active Ability.
Yes. A Unit can resolve any number of differently named Active abilities or Tactical Cards during its Activation, provided you can pay their resource costs. However, Reactions are restricted to one per Activation. Named Active abilities cannot be used more than Once per Round per Unit unless a rule explicitly states otherwise (e.g., a single Marine Unit cannot trigger the “Go! Go! Go!” ability twice in the same Round).
You only need Line of Sight to the Friendly Unit. Because the ability is measured and targeted toward a Friendly Unit Within 8”, that friendly unit is the subject of the range and visibility check.
Yes. Because these abilities apply numeric modifiers rather than keywords, they stack. Modifiers from different named sources are cumulative, allowing these three effects to combine for a potential +3 bonus.
Movement modifiers from different named sources stack normally, unless they share the BUFF keyword. Because Accelerating Creep and the Queen’s Creep Speed upgrade apply flat modifiers without using keywords, they stack with other speed bonuses. However, both Wild Mutation and Glial Reconstitution grant the BUFF Speed keyword, meaning they do not stack with each other.
Yes. Opponents can freely move onto and block a Faction Indicator. If the indicator becomes blocked so that you can no longer place a deploying model in base-to-base contact with it, the indicator remains on the field until the End of the Round and is then removed without deploying the Unit.
Place Artanis directly in base-to-base contact with a model in the selected target Unit.
Yes. Damage reduction applies to a Unit’s Total Damage (the sum of existing and newly assigned damage). For example, if a Marauder Unit with 2 damage takes 1 additional damage, a Medic’s “Life Support” can remove all 3 damage.
No. Tunnelling Claws only allow a Unit to move through enemy Units, not Terrain. Since aForce Field is classified as Terrain, it cannot be bypassed or moved through using this ability.
No. Because a PLACE effect is not a movement, it cannot remove a Force Field.
No. Force Fields explicitly forbid Units of Size 2 or less from moving across them. Because Raptors are Size 1, they cannot ignore this specific terrain restriction.
At the start of the movement. If a Unit is ON CREEP when it begins its movement, it gains the bonus for the entire move, even if it leaves Creep during that movement.
No. Once a Tactical Card is Exhausted, none of its printed abilities can be resolved or used until the card is Refreshed during the Phase 4 Cleanup.
Yes. Reactions can be resolved at any time their specific trigger conditions are met, regardless of whether a Unit is currently activated.
Abilities can affect a Structure if they target an area. or the Unit itself rather than a specific individual model. Structures are only excluded from an ability’s effects if that ability’s targeting requirements, keywords, or restrictions rule them out.
There is no mechanical or rules distinction between these two terms. They are treated as synonyms.
No.
No.
Yes.
It only allows shooting into combat, not shooting out of it. The keyword overrides the targeting restriction on the target Unit, allowing models to shoot at Engaged enemies.
No. Creep Removal only triggers when an enemy Unit ends a Move, Deploy, Run, Charge, or Disengage action within 1” of a Creep Tumor. As PLACE is neither of those, ending a PLACE movement near a Creep Tumor does not remove it.
The target must have the Stationary Status.
The target Unit does not gain an Evade roll, and non-visible models can still be removed as casualties. Because at least one model is visible, the target Unit itself is considered to be within Line of Sight, meaning it does not qualify for the Evade roll granted to out-of-sight targets.
These abilities target a location on the battlefield rather than the Units themselves. They place a Faction Indicator to create a 6” area of effect. Because the ability does not select the Unit as a target, it bypasses the 4” targeting restriction.
These effects are checked at the start and the end of any action or ability during the game round. If a Unit is within the specified range and meets all other requirements, the effect applies immediately.
No. The standard limit of one Reaction per Activation still applies. While REPEATABLE allows the ability to be used across different Activations during the round, it cannot be used multiple times in the same Activation. For triggers that occur outside of an Activation entirely, the ability can only be used once per trigger.
They apply to the weapon Batch (the collective dice pool generated by the Unit’s attack) rather than to individual models. Models in a Unit using the same weapon profile combine their Rate of Attack (RoA) dice into a single pool, and these keywords act on the dice within that pool. Individual models are tracked separately only to determine Range, visibility, and specific per- model roll modifiers (such as the -1 Hit penalty for Long Range).
Splitting attacks is resolved as a single Batch, allowing you to allocate keyword effects as they are resolved. Because the attacks against both Units occur simultaneously, you can choose to apply keywords like PRECISION entirely to one target’s pool or split them across both pools.
Yes. Anytime a Unit’s Current Supply Value is reduced, including during a Morph, the opponent gains Victory Points (VPs) equal to the amount of Supply lost.
Yes. A MORPHED Unit awards Victory Points (VPs) exactly like any other Unit on the battlefield, equal to the amount of Supply lost.
No. You cannot transfer Specialist models to other models or replace a model without the weapon to keep the Specialist.
Yes.
You resolve them using the template rules with the following key adaptations:
Spillover targets only need to share at least one Combat Tag and match the elevation level of the Primary target. Since Zerglings and Roaches both share the Ground Combat Tags, a template can spill over between them if they are on the same elevation. Mutalisks cannot be affected by Ground-level templates even though they share the Biological tag, because Flying Units do not occupy a standard Elevation Level for template purposes.
Because Spillover hits are resolved as separate attack batches, the Guardian Shield modifier applies to each batch individually. Any Ranged Attack (including both the main target and any Spillover batches) targeting a friendly Unit affected by the Guardian Shield is made with 1 fewer die in its Attack Pool.
Weapon keywords apply exclusively to the Attack Pool generated against the Main Target. They do not carry over to Spillover batches, which are resolved as separate, basic attack batches without modifiers.
We would like to extend our heartfelt thanks to all of our Beta Testers, whose invaluable feedback, dedication, and support have played a huge role in helping us create and refine this FAQ. Your questions, suggestions, and countless hours of testing have helped us make the game clearer and easier to understand for everyone. Thank you for being an essential part of this journey with us!
Last updated